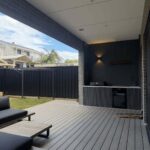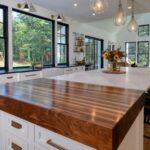
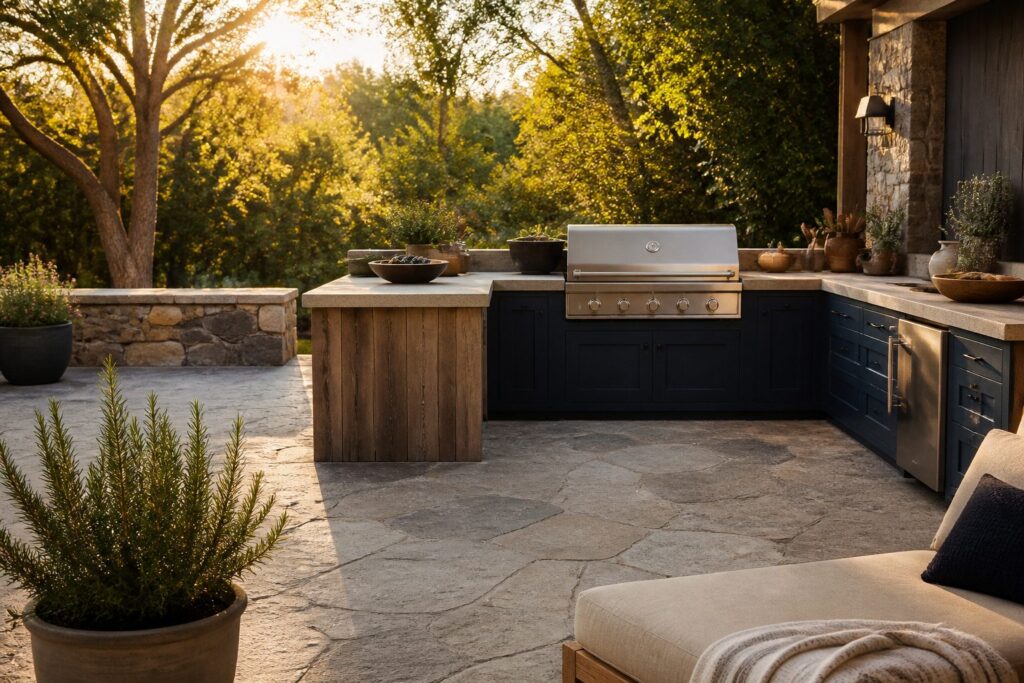
An outdoor kitchen works only when the layout accounts for how people actually move around the heat.
The difference between a space you use and one you abandon is usually a single measurement: 3–4 feet of clear depth at the grill-facing counter edge, where guests collect whether you planned for it or not.
1. Gather Around the Grill
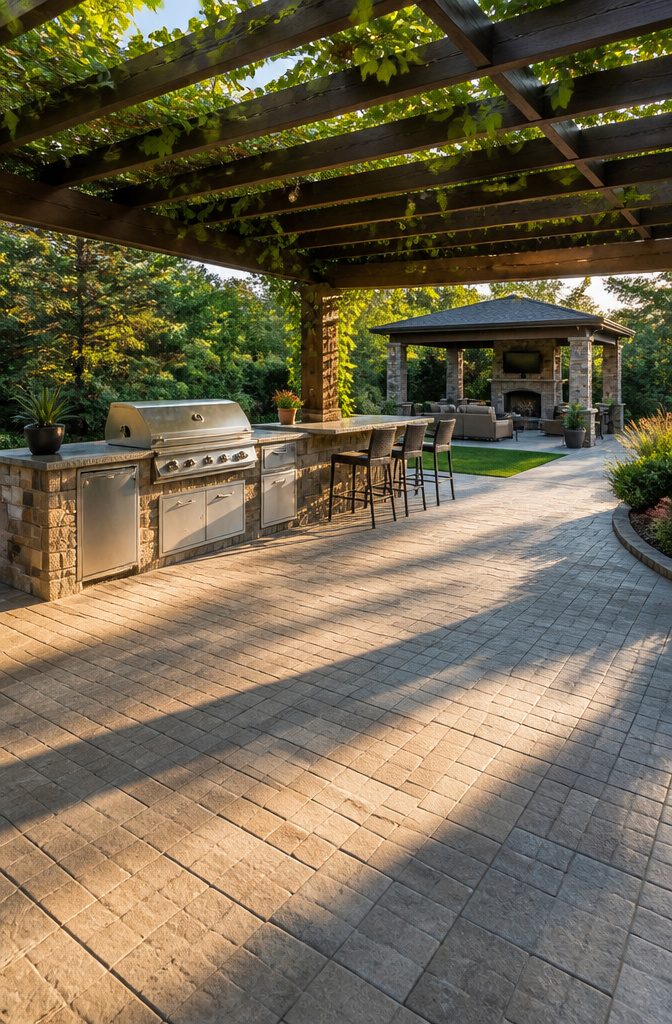
A grill-centered outdoor patio with kitchen lives or dies by how the heat zone shapes movement. The cooking surface pulls people in, so the cover and seating have to account for that attraction rather than fight it.
Built-in grills anchor the space and read as permanent architecture; freestanding units let you shift the layout as gatherings change.
Either way, the cover, whether a pergola, gazebo, or extended roof, needs to be planned around the kitchen’s footprint, not the other way around. Utilities run more cleanly when the grill placement is fixed first.
The standing zone belongs near the grill. Guests collect there whether you planned for it or not, so the heat-facing counter edge needs 3–4 feet of clear depth.
Push seating too close and you force a choice between conversation and comfortable temperatures. A second cover, perhaps a pavilion offset from the kitchen pergola, gives seated guests relief from the cooking heat while keeping the cook shaded.
Fuel type, gas, charcoal, or pellet, matters less for layout than for where smoke travels. Still, the seating arrangement should put the backs of chairs or benches roughly 8–10 feet from the grill face.
Closer than that, and the heat becomes oppressive on still evenings; farther, and the kitchen feels isolated from the gathering it was meant to serve.
The winning move keeps the grill as the visual center while giving the actual sitting and standing room space to breathe.
2. Luxury Outdoor Living
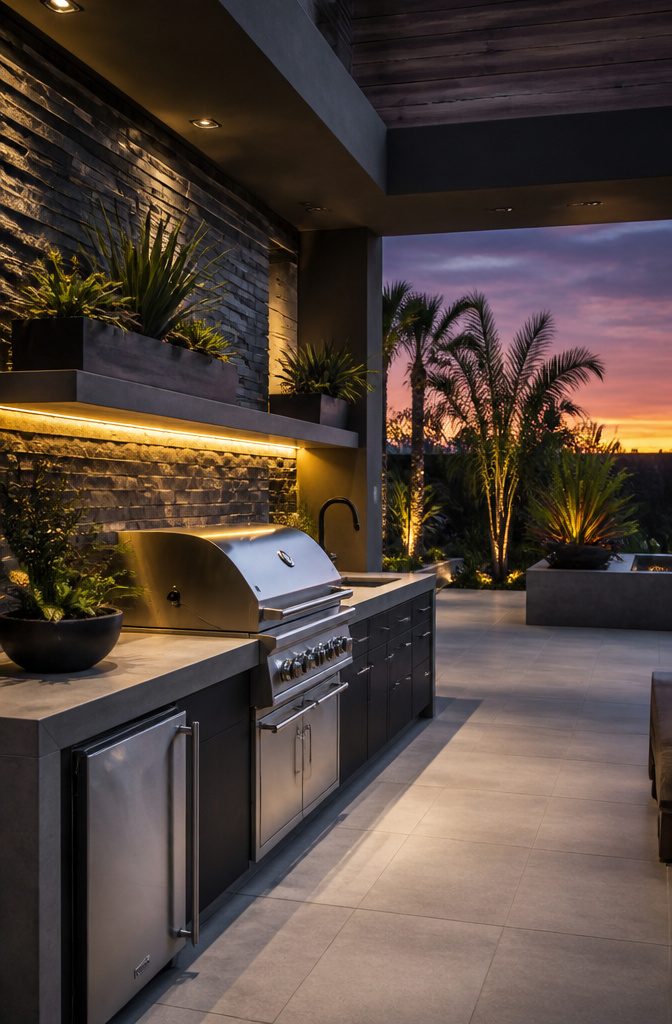
The gap between an upgraded patio and a truly luxury outdoor patio with kitchen comes down to integration, not just price.
I see it in how the materials meet: stainless steel appliances set into poured concrete counters with LED strip lighting tucked beneath, all of it wired into a permanent structure rather than wheeled out seasonally.
Built-in sound systems and smart grills are not add-ons; they are the point of a luxury outdoor kitchen.
The money goes to permanence. A modern aesthetic with clean, straight lines and a monochromatic palette costs because the concrete, glass, and steel must survive weather without looking weathered.
Integrated appliances run higher than their freestanding cousins, and the wiring for those under-cabinet LEDs means hiring a contractor who specializes in outdoor rather than retrofitting an indoor plan.
This is where I would be opinionated: the line between showing off and living well is thin. A smart grill that pings your phone is only worth it if you cook enough to forget the preheat.
The lighting, though, sells the space every evening. If the budget forces a choice, I would take the permanent structure and basic appliances over portable luxury that looks temporary.
3. A Splash of Color
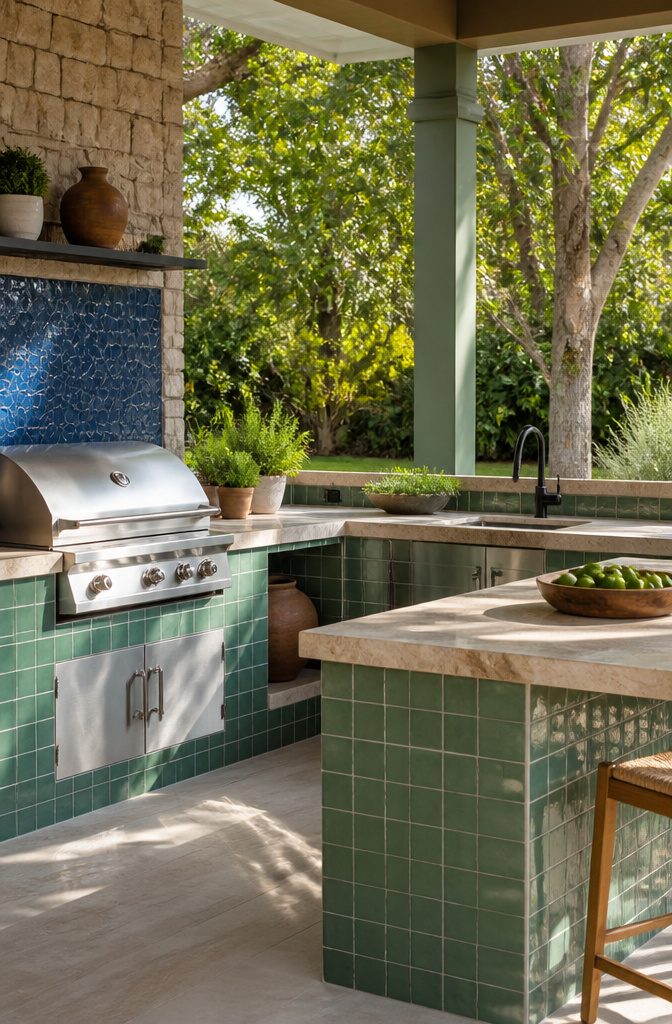
Soft green tile, painted pavilion posts, blue accent backsplashes: color in an outdoor kitchen wants to feel settled from day one, not brave. The question is what holds that pigment once the rain and UV start working.
Outdoor-rated tile and grout are the safe bet. Ceramic glazed to a high finish keeps color longest because the pigment sits under glass, not on top of it.
The soft green tile that reads as timeless in a covered poolside kitchen would chalk and fade within two seasons if left fully exposed; the roof matters as much as the material.
Whitewashed wood and blue tile work for coastal builds for the same reason, the boards and grout lines spend months under diffuse light rather than direct July sun.
Raw steel or iron cabinetry painted in rust tones, like the pavilion example, looks grounded but plan on repaint every three to five years. Powder coat on aluminum lasts better, though the color range narrows to what the shop stocks.
My preference runs to glazed tile on the vertical surfaces that catch the eye, with natural stone or sealed concrete underfoot where traffic grinds pigment away regardless. Spend the color budget where you look, not where you stand.
4. L-Shaped Backyard Kitchen
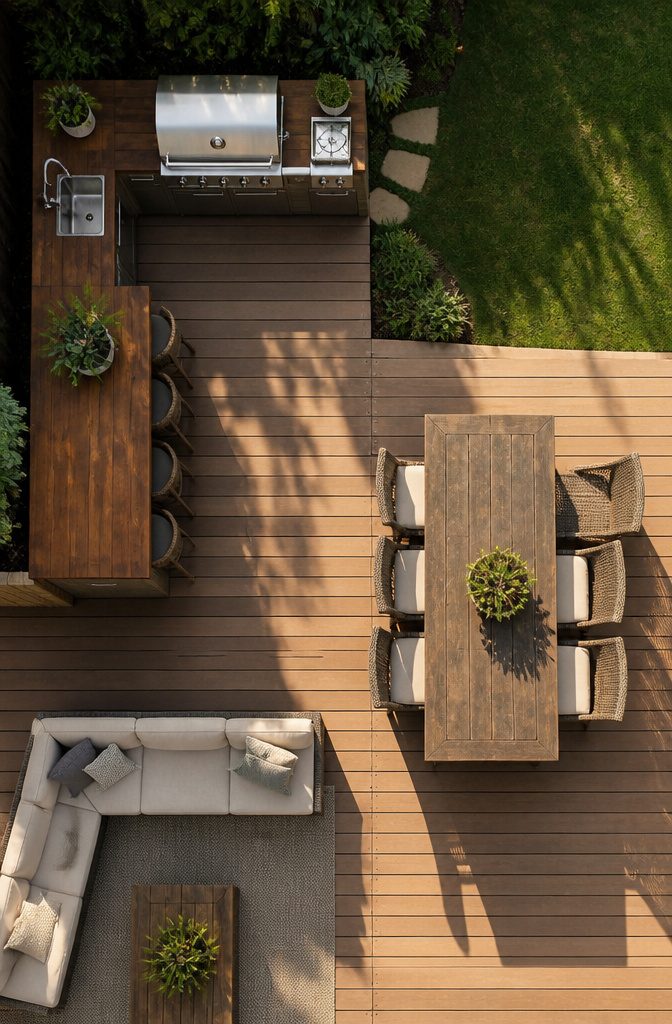
An L-shaped outdoor patio with kitchen pulls the hot work of cooking into one zone and leaves the other arm free for plating and seating, which keeps guests from drifting between you and the flame.
The covered patio site breaks this into work zones for exactly that reason: cooking, prep, and serving each get a dedicated stretch without cross-traffic.
What I watch for in this layout is depth.
Owners on Reddit mention that 8–10 feet of total space is where the design breaks; below that, a straight run often functions better because the corner of an L can turn into a dead zone you cannot reach.
If the patio offers more room, the return arm needs at least 36 inches of clear width for a cook to pivot from grill to counter with a sheet pan in hand, and another 24 inches of landing beside the grill for hot trays.
The decorai notes add that the refrigerator wants separation from the heat source so it is not fighting the grill’s temperature.
Trade-off: the L-shape demands more square footage than it suggests on paper.
The corner itself is structurally useful for a sink or trash pullout, but only if you have the depth to stand in front of it without your back pressed to the dining chairs.
5. Outdoor Kitchen with Pavilion Roof
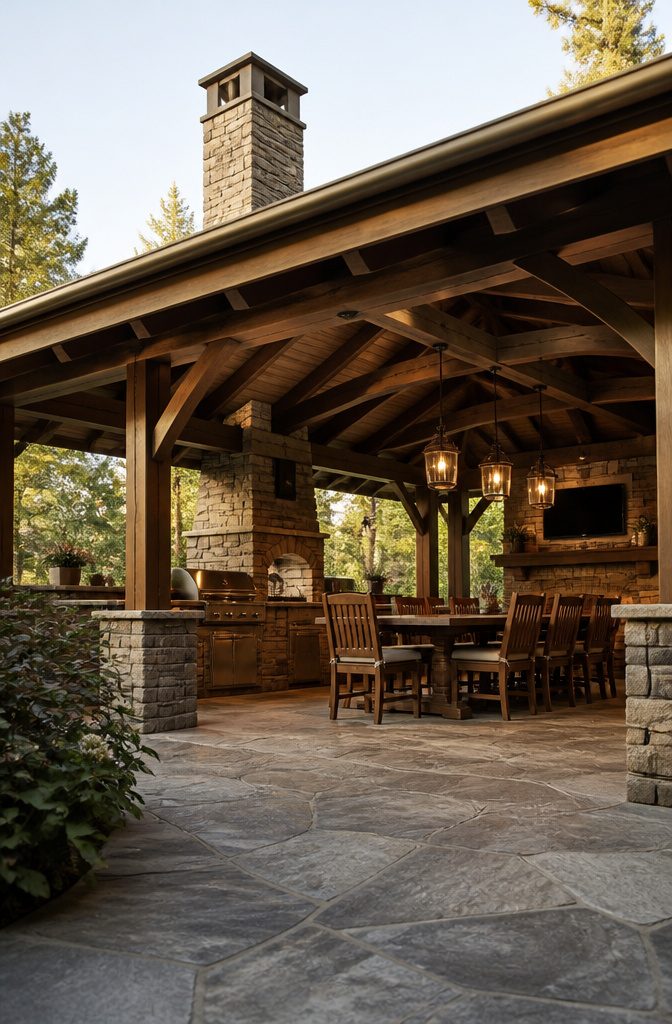
A pavilion roof over an outdoor kitchen is the difference between using the space in October and giving up after Labor Day.
I look at it this way: full coverage keeps the stone finish, built-in fireplace, and prep surfaces dry and usable, while a pergola only buys you shade on sunny afternoons.
The structural step-up is real.
A pavilion needs posts or walls sized for the load of a real roof, not just slats. That means concrete footings below frost line, timber or engineered beams, and proper cover for the chimney vent.
Material costs jump accordingly, and you will need a permit in most municipalities because this is a roofed structure, not an open patio.
I think the trade-off favors the pavilion if you cook outside more than once a weekend.
The solid roof blocks rain that sends you hauling platters indoors, and it holds heat from a built-in fireplace so the space stays comfortable into evenings when an open patio would sit empty. A pergola cannot do either.
Leave generous space between fireplace and grill so both zones stay comfortable to work, and plan the chimney draw before you choose finishes. Poor ventilation ruins a covered kitchen faster than bad stone.
6. Poolside Grill and Prep Zone
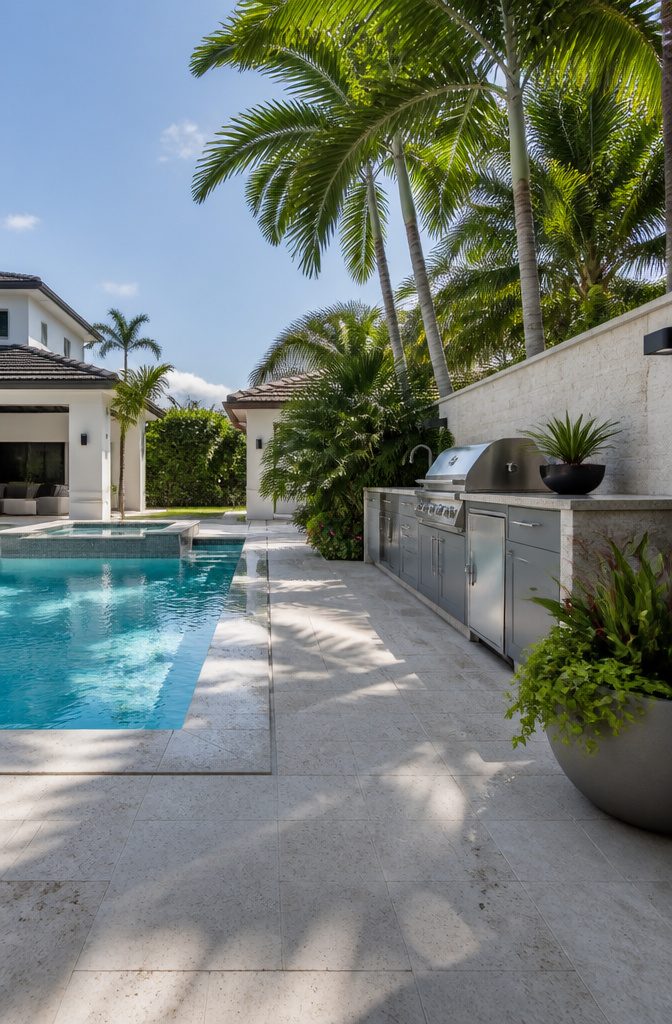
Placing a working kitchen right next to a pool means chlorine and splashing water hit everything daily. The materials either tolerate that or they do not, and most standard outdoor cabinetry fails inside a season or two.
I would keep the grill and any open flame at least several feet back from the pool’s edge.
Keep 8–10 feet between the grill and pool edge: close enough to feel connected, far enough to stop splashing onto hot surfaces and to give people room to move without knocking someone into the water.
Slip-resistant flooring belongs in every walkway between the two zones, not just near the pool ladder, because the traffic pattern is predictable and wet feet are guaranteed.
Concrete pavers with a textured finish handle both chlorine and moisture better than poured concrete, which gets slick and holds puddles.
For the cabinet boxes, marine-grade polymer or sealed teak stands up to the chemical load; standard pressure-treated lumber swells and discolors where the water sits.
A curved island shape keeps guests facing the pool while the cook works with their back to the water, which is the safer arrangement.
Covered seating nearby stretches usability into cooler evenings, though in most of the Midwest you are still looking at four to five months, not year-round.
Storage takes more thought here: anything left out over winter needs to be fully waterproof, or it moves to the garage.
7. Rustic Stone Cooking Area
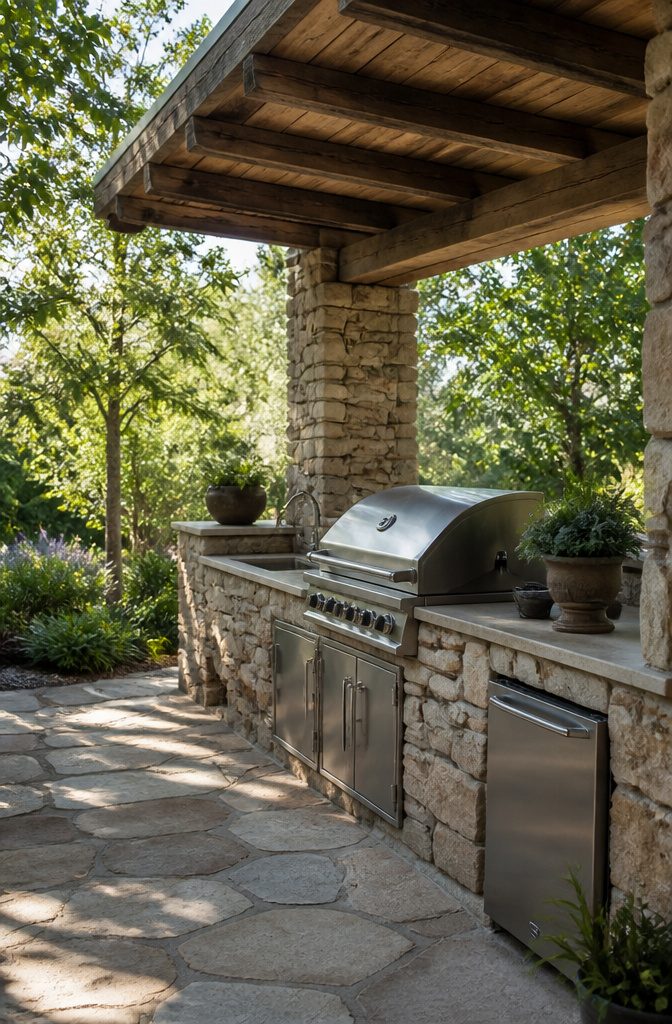
Natural stone in an outdoor patio with kitchen carries weight in more ways than one.
I prefer limestone or fieldstone for cooking areas because the thermal mass keeps the surface cool enough to rest a forearm on in July, even when the sun has been on it all afternoon.
That same density means heat from a grill or pizza oven spreads evenly rather than scorching one spot.
Mortared joints give a cleaner line and keep crumbs out, though I would choose dry-stacked construction anywhere the ground shifts with freeze-thaw cycles.
Gaps between dry stones drain water and let the wall flex without cracking, which matters more in Fort Wayne’s zone 5b winters than most design sites admit.
The rougher look also darkens and weathers faster, which I count as a feature: stone should look like it was always there, not installed last spring.
Aging in place means selecting stone that already carries some variation, some stain, some irregularity. The perfectly uniform pallet will look wrong within two seasons.
8. Mediterranean Outdoor Kitchen and Dining
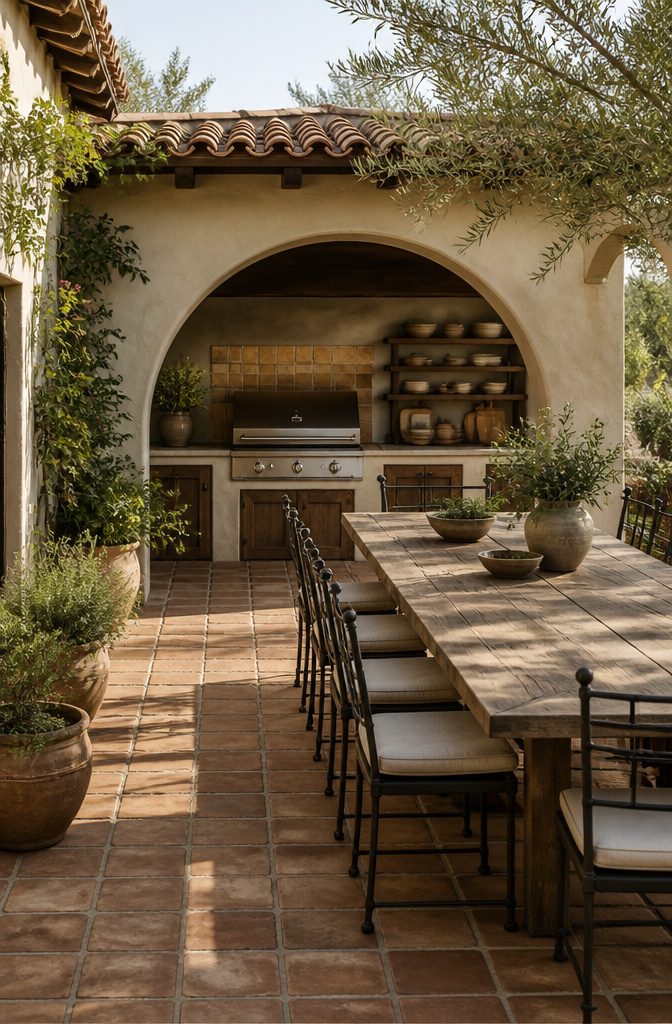
Stucco walls turn an outdoor kitchen into something that feels borrowed from a courtyard in Provence, not hammered together behind a garage.
The plaster finish absorbs afternoon heat and releases it slowly after dusk, which matters more than most people realize when dinner runs past sunset.
Terracotta pavers underfoot carry that same thermal logic, though in Fort Wayne’s Zone 6 winters the freeze-thaw cycle demands a stucco mix rated for exterior use with polymer additives, or the surface spalls within two seasons.
I favor arched openings over squared ones, even for a simple grill niche.
The curve tricks the eye into reading a corner as architecture rather than equipment bay. Terracotta roof tiles on a shallow slope protect the cooking station without the claustrophobia of a full pavilion.
The dining table sits just outside the arch’s drip line, close enough to feel connected, far enough that flare-ups don’t send guests scrambling.
The cost runs steeper than pressure-treated framing faced with siding. Stucco needs skilled labor and a cured scratch coat before the finish trowel goes on.
But for a permanent installation where the kitchen reads as a room you happened to build outdoors, I have not found a substitute that carries the same stillness.
9. Coastal Outdoor Kitchen
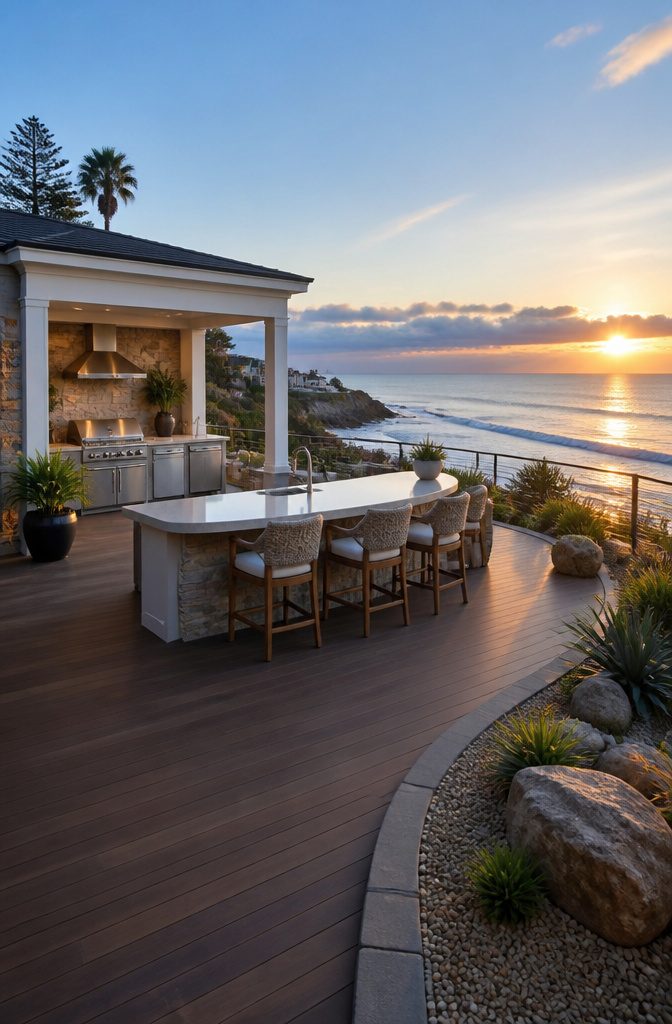
Salt air turns ordinary steel into rust in a single season, which is why marine-grade stainless steel is the only grade I would bother ordering for cabinet fronts, appliance housings, and hardware on a coastal outdoor patio with kitchen.
The alloy costs more than standard 304, but the added molybdenum buys you resistance to chloride attack that regular stainless simply does not have.
For flooring and built-in seating, composite decking is the sensible companion choice; it will not absorb moisture, swell, or host the mildew that colonizes natural wood within weeks in shore humidity.
The maintenance schedule matters as much as the initial specification. I wash down marine steel with fresh water every two weeks during the season, more often after storms, and apply a light mineral-oil wipe to prevent surface haze.
Composite decking needs only a soft-bristle scrub with soapy water monthly; pressure washers void warranties by tearing the cap layer. Skip this routine and even the right materials start looking tired by midsummer.
10. Farmhouse Grill Station
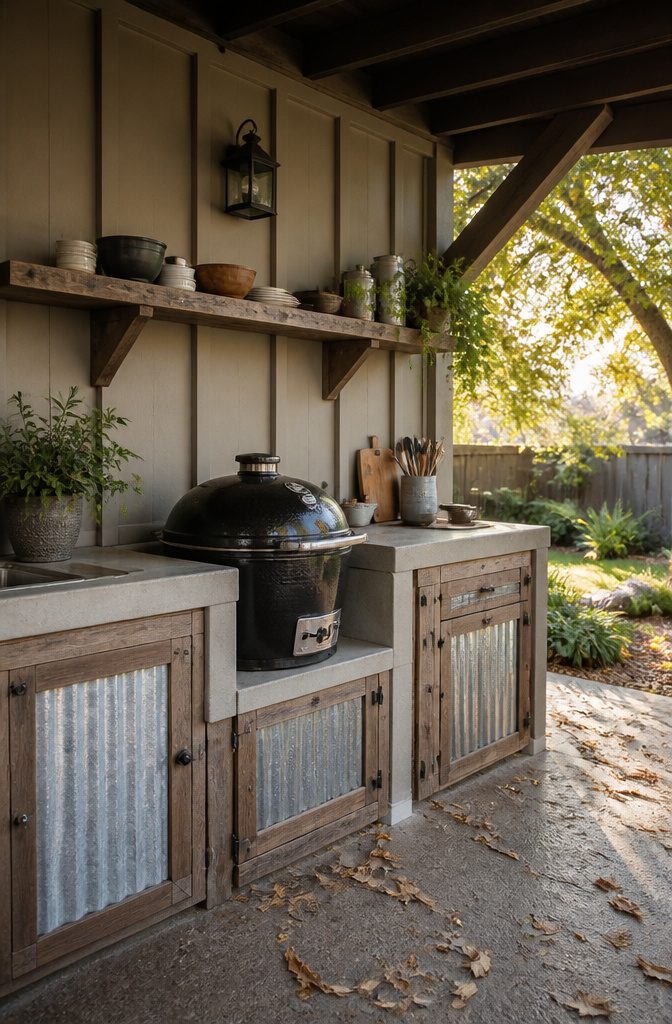
Board-and-batten paneling, galvanized metal sheeting, and open shelving read as a working kitchen rather than a showpiece. Keep the line between rustic and rough—too weathered and it looks abandoned, too finished and it loses the point.
Galvanized metal for the backsplash or cabinet fronts gives you the utilitarian note without chasing vintage charm. It dents, it scratches, and that is the appeal; a factory-clear coat slows the rust if your climate runs wet.
Open shelving above the grill puts plates and tools where you grab them, though you will dust the stack before every cookout if you are near trees.
The board-and-batten backs the shelves in painted cedar or pine; a satin finish catches evening light without glossing over the hand-worked joints.
A charcoal grill on a poured counter or a built-in base anchors the station. Start with that and the counter space beside it.
Designers split on what follows: one path says add shelter and storage later as needs grow, the other pushes straight for a stone fireplace or wood-fired oven to deepen the rustic mood. For a farmhouse read, the oven is gilding.
The board-and-batten and metal already state the style. A prep counter gives you more daily use than a pizza oven that fires twice a season.
11. Industrial Rooftop Kitchen
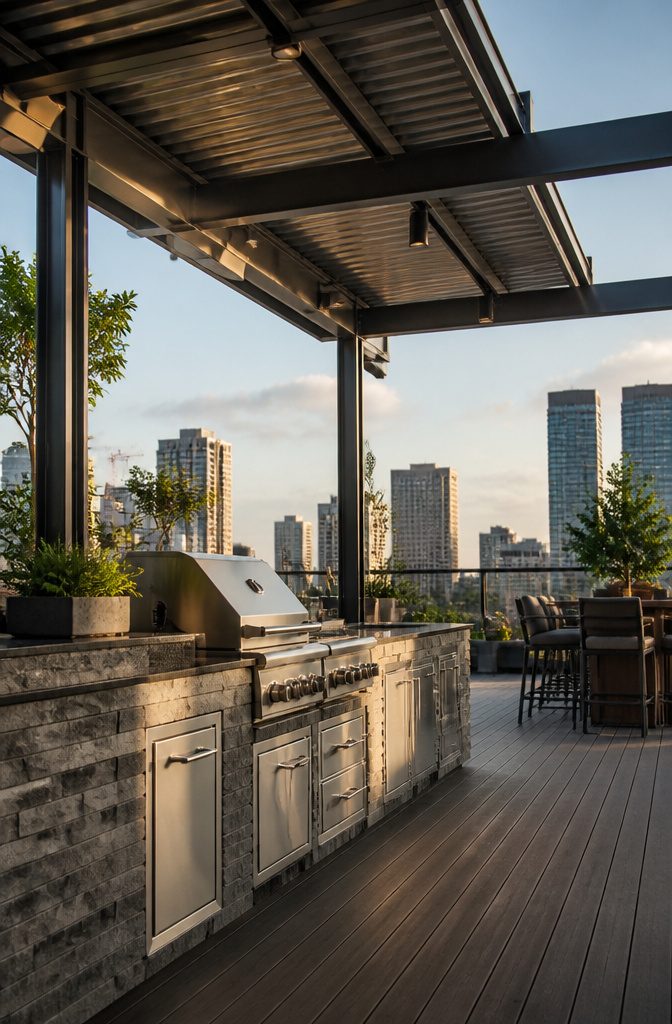
A rooftop kitchen changes every calculation the ground-level plans skip.
The weight of stone countertops, a steel grill body, and a full refrigerator adds up faster than most balconies are built to carry, and I would verify the load rating with a structural engineer before a single cabinet goes in.
Wind exposure matters just as much. Standard grills vent from the back; on a rooftop, gusts whip across every side and can snuff a burner or flare it dangerously.
I would pick models sealed and rated for marine or high-altitude use, with heavier castings that do not walk across the deck in a storm.
Drainage cannot wait until the first downpour. Water runs to the low spot, and on a roof that low spot is often inside the kitchen footprint.
I would slope the entire surface away from the house and the cooking zone, then channel it to a drain before adding flooring.
Appliances need tethering. A freestanding refrigerator or grill on casters becomes a projectile; I would bolt frames through the deck into the structure below, or choose built-in units that become part of the architecture.
The extra hardware and weatherproofing push costs well above ground-level builds, but a flying appliance costs far more than the anchor kit that stops it.
12. Backyard BBQ Station
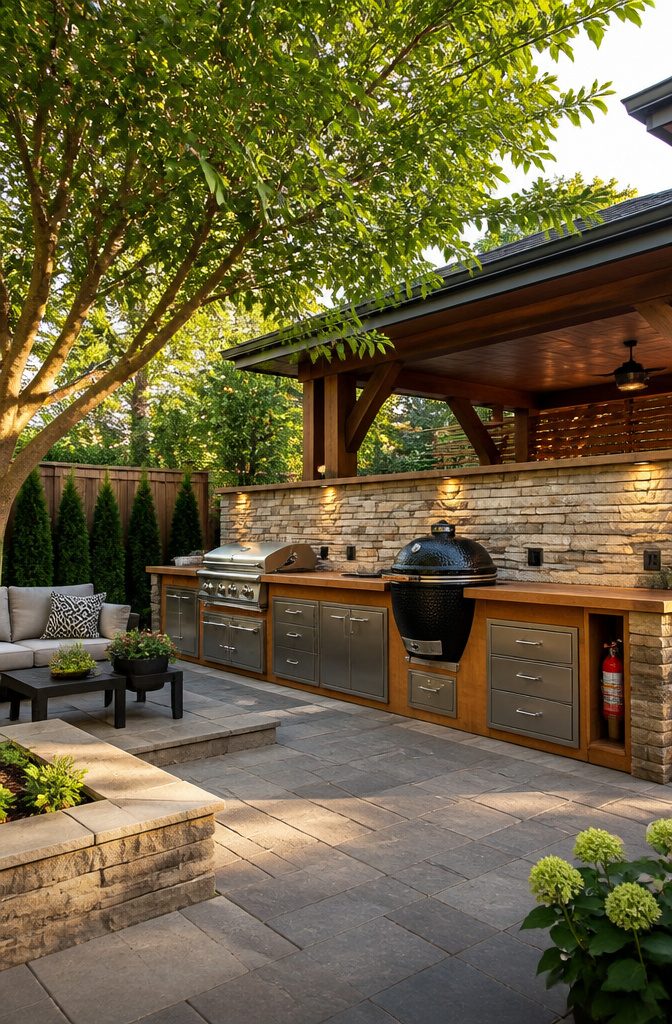
A backyard BBQ station lives or dies by its workflow from the moment charcoal hits the chimney starter to the second you pull finished meat off the grates.
Fire safety clears the ground first: 36 inches of clearance on all sides of any live fire is the accepted minimum, more if your smoker vents sideways rather than up.
A vent hood over kamado-style cookers and gas grills handles the smoke that does not rise straight, and a stacked stone backsplash behind the line stops stray sparks from finding anything worth burning.
I would put the fire extinguisher in the first cabinet you open with your non-knife hand.
Wood storage wants to stay dry and close, but not so close that embers find it.
A separate bin or cabinet at the end of the counter, lid sealed, keeps hickory and oak ready without turning the prep zone into a tinderbox.
Give the resting area its own surface, not the same board where raw rub sat; cross-contamination on a patio meal is as real as in any kitchen.
Slip-resistant flooring under the whole station matters more here than elsewhere on the patio, because grease and water mix fast and visibility falls after dark.
Weatherproof drawers for tools and cutlery keep the last trip indoors from happening right when the internal temperature is climbing toward done.
13. Outdoor Pizza Oven Setup
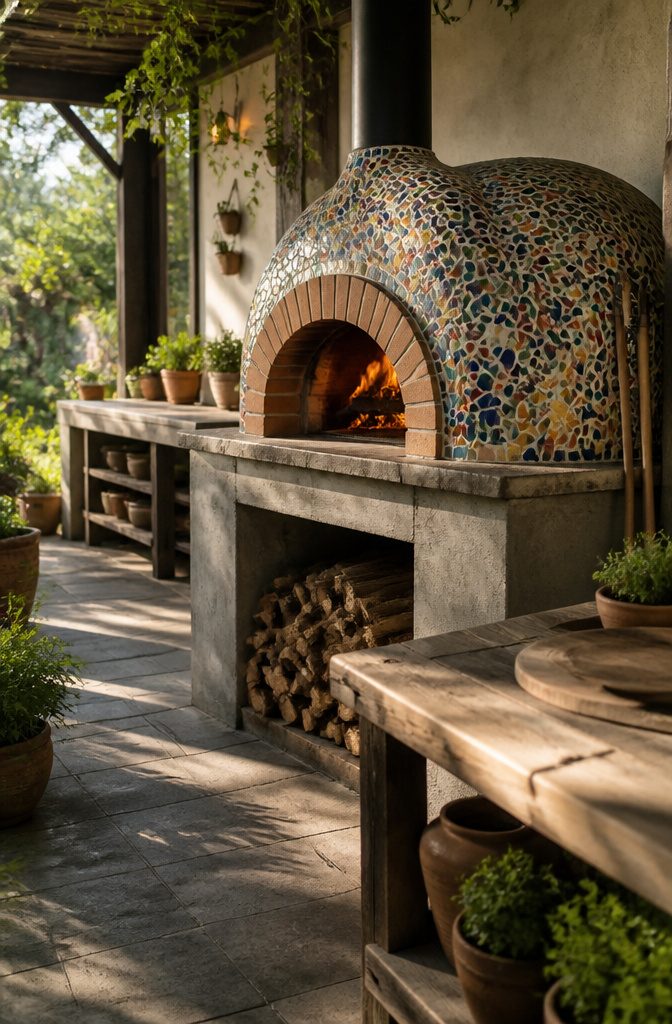
A pizza oven turns an outdoor patio with kitchen from a grilling station into a place people gather before dinner is even ready.
The oven itself becomes the center of the layout, so the base needs to be built for real weight and real heat: a slab of poured concrete or concrete block, vented properly, with refractory mortar on the dome side and whatever finish you want on the guest side.
I have watched people try to retrofit a cheap metal stand and it always ends with crumbling brick and a tilted dome.
The dome material is the decision that locks you in.
Corten steel or brick-lined steel heats fast, holds steady, and tolerates weather; cast refractory cement with a mosaic finish looks hand-built but cracks if you do not cure it over a dozen small fires first.
Steel domes vent easier, cement domes retain heat longer. For most home cooks the steel dome wins because the learning curve is already steep enough.
Gas gets you to 700°F in twenty minutes and holds there; wood demands active management but pushes past 900°F for the 90-second Neapolitan bake.
I would go wood only if you already split and stack for a fireplace or a smoker.
Otherwise, a gas-assisted wood oven gives you the flame look with a backup plan for wet evenings, and that flexibility is worth the extra cost.
14. Compact Balcony Kitchen
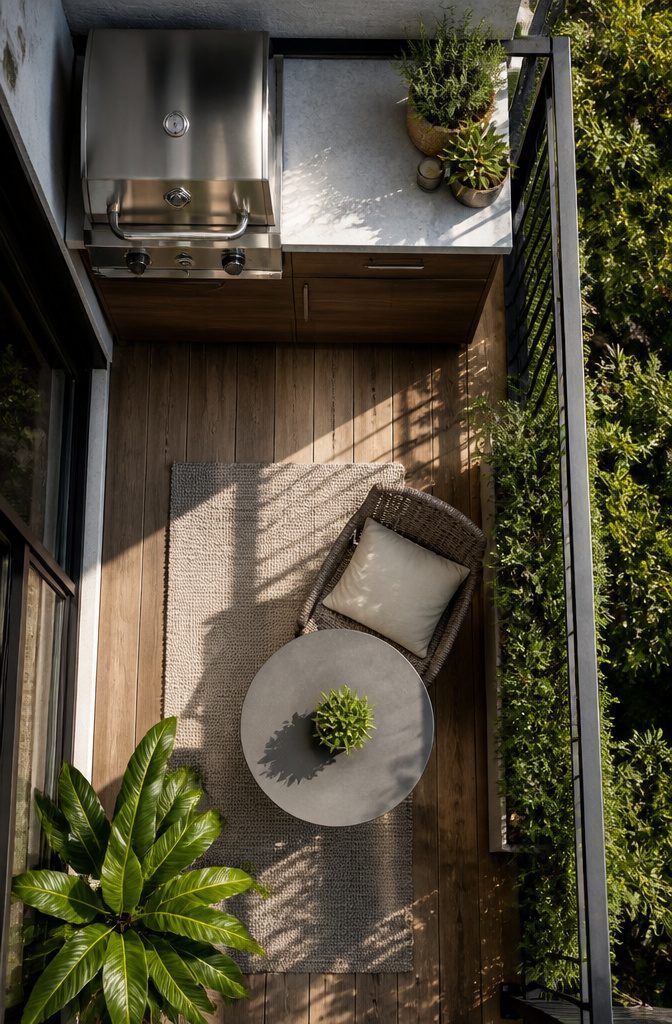
The question in an apartment balcony kitchen isn’t what to add; it’s what to leave out. Items that blunt the flow of prep and cooking are worse than none at all.
A side burner and a full sink are the first cuts I’d make in about 8–10 feet of space. That footage becomes prep space instead, and prep space is what turns the corner between "grill outside" and "cook outside."
Straight-run counters win over L-shapes here more often than not, because one wall of fold-down surface keeps the floor clear and the path to the railing open.
A fold-down bracket mounted on a weatherproof rail lets the counter disappear after the meal; owners on Reddit point out that nothing permanent monopolizing the center of a small footprint feels like twice the room.
What stays is the grill, ventilation that respects the lease, and a drawer or two for the handful of tools that earn their keep.
Cities like San Diego, Barcelona, and Singapore are built this way; a balcony kitchen there is ordinary, not squeezed.
The storage is the hard part: weatherproof a single cabinet, keep only what fits inside it, and the balcony stays a balcony rather than a closet with a view.
15. Skyline Views, Fresh Off the Grill
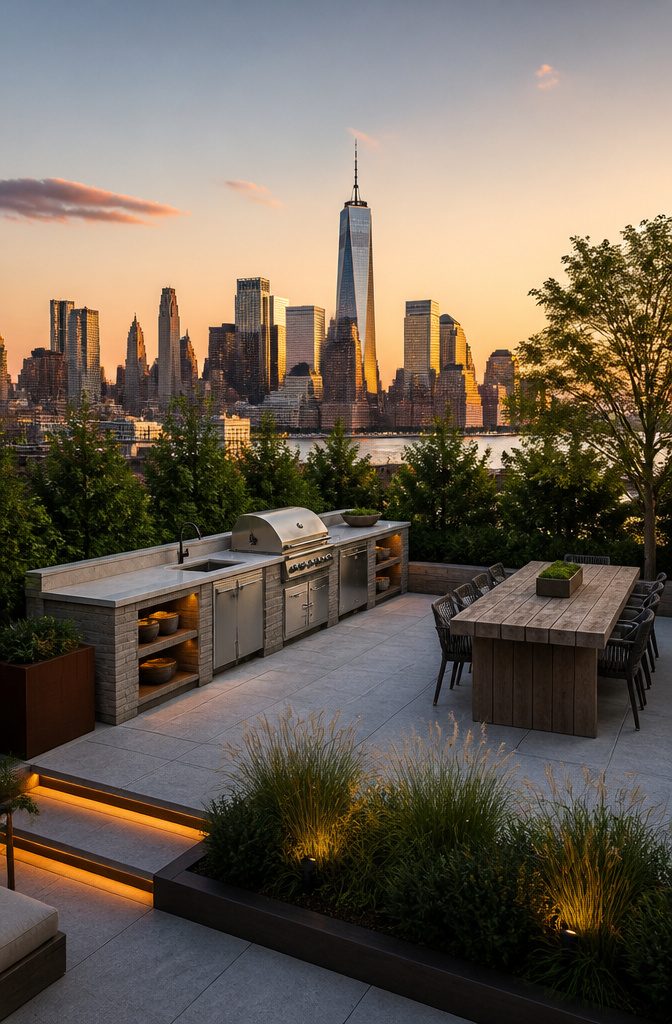
A kitchen placed at the uphill edge of a sloping patio keeps the sightline open across the yard, but the heat column rises with nowhere to go.
Position the grille downwind of your prevailing breeze, and the smoke pushes away from both the house and your seating.
That trade is the one that matters: lose five feet of vista to gain air that does not make your guests squint.
Elevation works the same way reversed. A raised platform for the cook puts exhaust above nose level, yet it also makes the kitchen the visual focus, which you may not want.
A sunken cook station hides the equipment but traps grease and heat at ankle level where no breeze reaches.
Most backyards, in my read of the layouts that work, split the difference: the grille sits on grade, the counter runs perpendicular to the view, and a low backsplash doubles as a windbreak.
I always check the afternoon wind first, before any dimensions get drawn. Stand at the proposed corner through a few barbecues, watch where the flag on the deck goes, and note whether summer evenings bring a shift.
The kitchen you build around a morning breeze will betray you at dinner. Shade structures complicate this further; a roof or umbrella creates a dead zone underneath, so the ventilation path needs clearance above and to the side.
16. Courtyard Kitchen
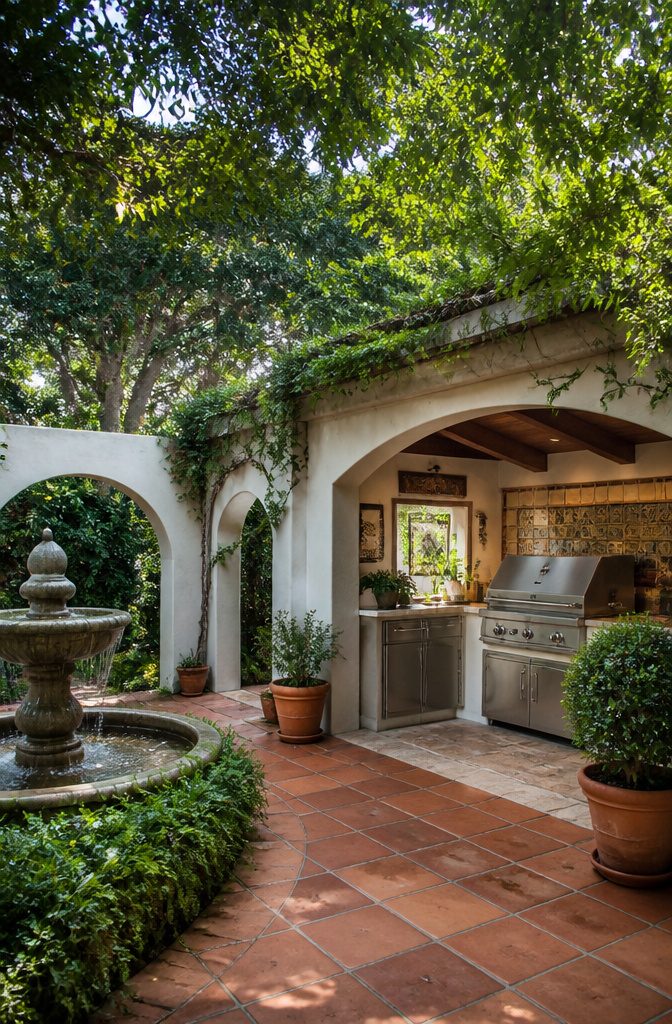
Walls on three or four sides change how an outdoor kitchen functions more than most people expect. I learned this by watching how sound behaves in confined versus open plans.
A courtyard setup traps the clatter of pans and the low roar of a grill burner, bouncing it back at half the volume that would drift across an open lawn.
That acoustic containment matters if neighbors sit close or if you cook after 8 PM, when noise carries further than light.
Air movement suffers. Heat from a grill or fryer lingers without a cross breeze, so a full enclosure needs either a high ceiling or a deliberate gap above the walls, what some plans call a light well.
The source passages point to Mediterranean and California versions that solve this with tall openings or partial roofs, letting hot air rise out while keeping the intimate scale that makes courtyards feel right for conversation.
Privacy arrives automatically with this layout, though you still choose what faces inward.
I would put the cooking wall opposite the entry, so guests see greenery first and the host’s back last. The garden framing matters more here than in open plans because the walls force your eye toward whatever lives inside them.
Small trees pruned to clear sightlines at shoulder height give dappled shade without blocking the sky; wrong placement turns the space into a box.
Semi-enclosure hits a middle note that full walls sometimes miss. Two parallel walls block prevailing wind and define the kitchen zone, while open ends let you walk through with trays and let smoke find its way out.
That is the version I would build in Fort Wayne, where the season runs May through September and a fully pocketed room would sit empty half the year.
17. Bar Seating Outdoor Kitchen
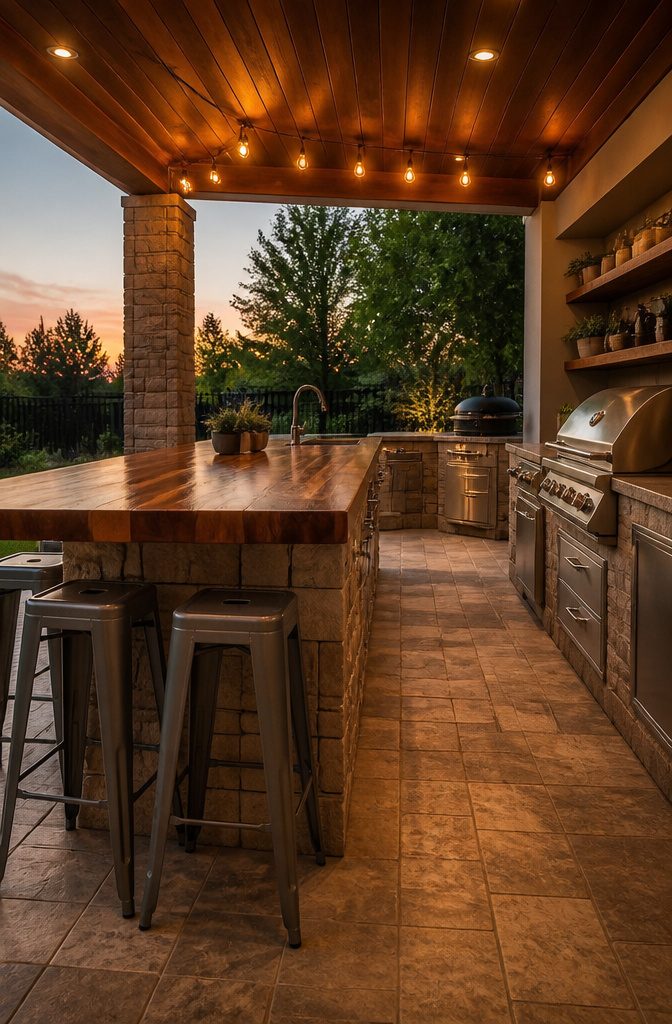
Counter-height seating changes how people use an outdoor patio with kitchen more than most owners expect.
The height puts guests at eye level with the cook, which matters because a dropped counter + stools on the outside leaves someone facing a wall; the cook, meanwhile, works with their back to everyone.
Flipping the arrangement, stools on the cook side, turns the counter into a stage where prep and conversation happen in the same direction, though you sacrifice the hiding spot for dirty pans.
The overhang needs at least 12 inches of knee clearance or guests eat in their laps.
Fifteen is safer for anyone taller than average. Each stool wants 24 inches of width at the rail, measured center to center; anything tighter and shoulders bump on the squeeze-in.
Depth behind the seat matters too, about 18 inches so someone can push back without stepping into the grill’s heat zone.
I put the bar on the cook side whenever the layout allows it. Every spill lands on the work surface, and guest traffic cuts through the prep triangle.
But the social return is immediate, the cook stays in the room instead of performing for a row of backs. For narrow yards where depth is scarce, cook-side seating is usually the sacrifice worth making.
18. Covered Patio Kitchen
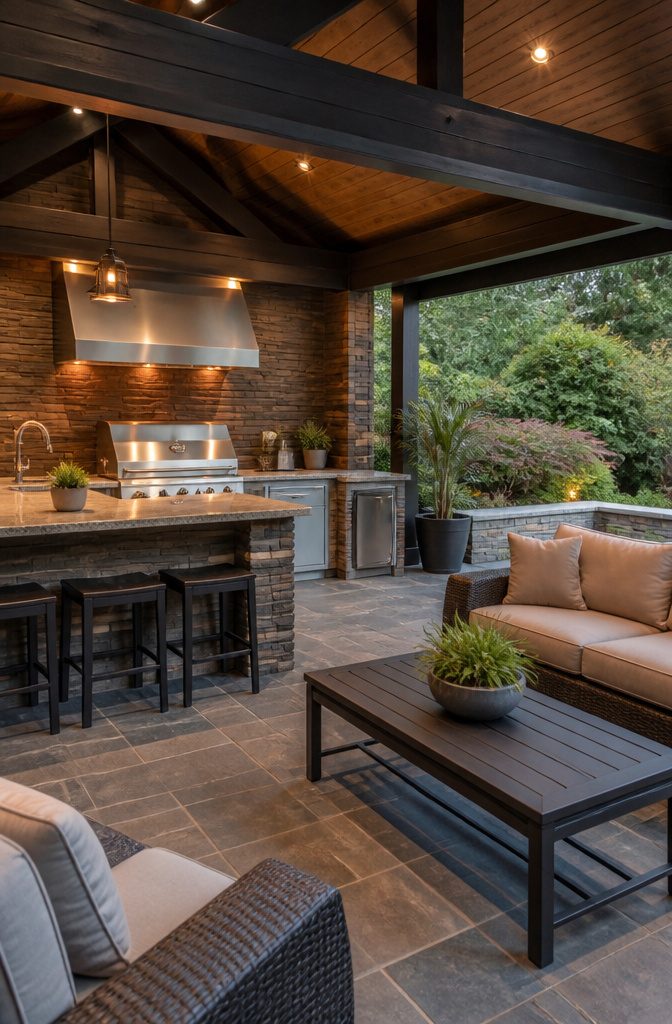
An attached roof extending from your house wall turns a patio into a real outdoor room, and the structural connection to the wall is what carries the load so the posts in front can stay light.
I would run a beam straight into the house framing or a ledger rather than let the roof float on its own columns; any movement between two independent structures cracks finishes and lets water in.
Ceiling height under that solid cover matters more than most people figure. Leave at least 8 to 10 feet of clearance above the cooking surface, whether you are running gas or charcoal, so smoke and heat have somewhere to go.
Lower than that and you are staining the ceiling, trapping grease, and making the space unusable for anyone standing at the grill.
Solid overhead cover also means no sky light, so you are designing in artificial light from the start.
Task light directly over prep and cooking surfaces is non-negotiable; ambient light from string fixtures or lanterns fills in the rest, but it does not replace it.
I would put the task fixtures on their own switch so the cooking zone reads bright and the dining pool stays softer when you leave the station.
19. Tropical Outdoor Cooking Zone
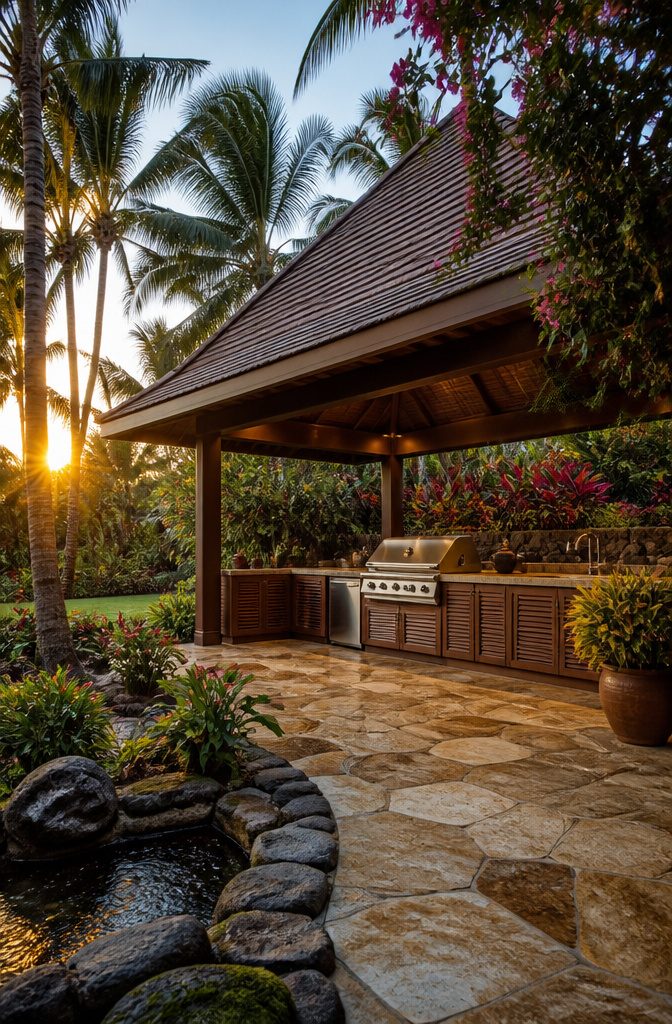
A tropical outdoor patio with kitchen lives or dies by how it breathes.
Open ventilation matters more here than in any other style because shutting humidity inside with a grill and a gas burner turns the space into a steam cabinet within half an hour.
I would never build one without a roof pitched steep enough to shed heavy rain fast — a shallow slope lets water pool and carries it back under the eaves onto the counters.
Organic roofing materials shade the kitchen and keep the air underneath cooler, but they need clearance from open flames. That distance is non-negotiable; a thatch edge curling too close to a searing grate is a season-ender.
The plant palette is where most tropical kitchens stumble. Palms and broad-leafed screening plants look right, yet tuck them too tight against the structure and you trap transpired moisture against the cabinets.
I leave a three-foot buffer of low ground cover between any screen planting and the kitchen floor, letting air move through while the taller canopy still blocks the sightline.
Give the planting a year to settle; the palms gain height, the understory fills in, and the kitchen starts to look like it grew there instead of being dropped onto the lawn.
20. Japandi Kitchen Arrangement
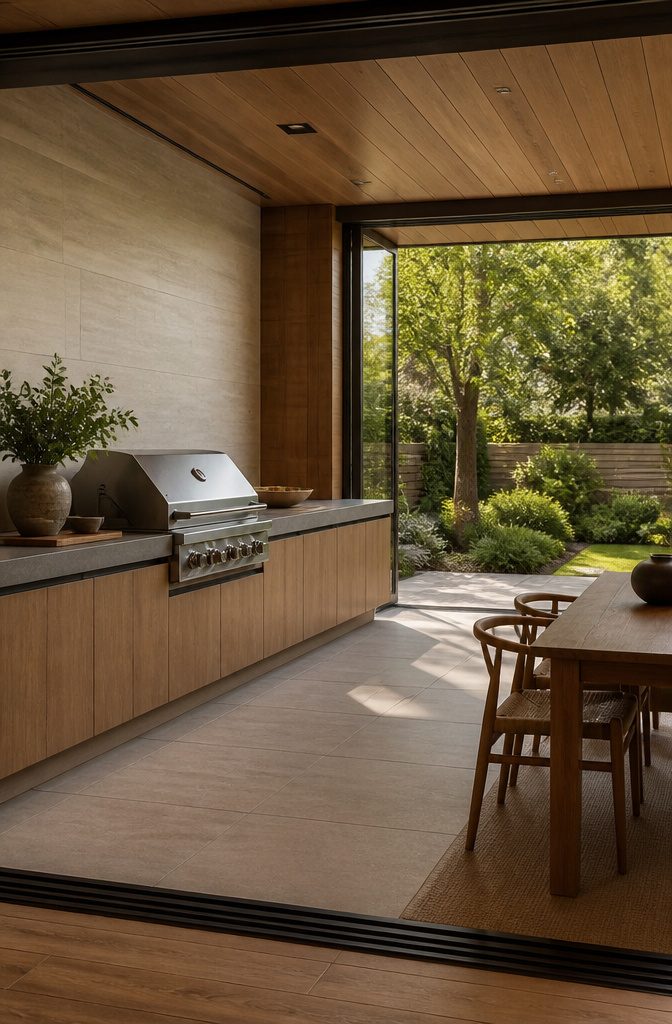
Natural wood, stone, and soft colors stay calm in the open air. Leave the doors open and let the garden become part of the room; that is the move that makes Japandi work outdoors.
In a backyard cooking space, resist the temptation to add "just one more thing." Space itself is part of the design.
Asymmetrical balance means the grill might sit left of center with a single stone ledge running right, no matching cabinet to mirror it.
The grain in the wood you choose should read across the surface, not fight for attention. Hardware goes quiet: recessed pulls, touch-latch drawers, nothing that catches light or glints in photographs.
Glass walls slide almost completely aside for the indoor-outdoor connection, letting you move from kitchen island to grilling station without fumbling with doors.
Coordinating materials from ceiling to floor, or using ceramic porcelain outdoor tiles and pavers that mimic the mixed flooring inside, keeps the transition flat and uninterrupted.
Weather is the weakness: this arrangement asks for a covered run or at minimum a scalloped awning you can adjust as the sun moves. Without that shade, the pale tones wash out and the calm turns to glare.
Frequently Asked Questions
Should an outdoor kitchen be covered?
Yes, covering your outdoor patio with kitchen is advisable for protection from the elements, though it ultimately depends on budget and personal preference.
A pavilion or extended roof keeps surfaces dry and usable into cooler months, while a pergola only provides shade. Full coverage also protects finishes from rain and holds heat from fireplaces so the space stays comfortable longer.
What can I use to cover my outdoor kitchen?
Pergolas, gazebos, and pavilions are the most common structures for covering an outdoor kitchen.
A pergola buys shade on sunny afternoons; a pavilion with a solid roof blocks rain and holds warmth into October. Match the cover to how often you cook outside and whether you need weather protection or just shade.
Can you enclose an outdoor kitchen?
Yes, you can enclose an outdoor kitchen, but proper ventilation is required for safety. That means extra ventilation on the island itself plus overhead ventilation for each cooking appliance.
Without adequate airflow, heat and smoke linger; a full enclosure needs either a high ceiling or a deliberate gap above the walls to let hot air rise out.