A home bar can run from free pallet wood and a Saturday afternoon to a curved plywood slat build with LED channels and a bar-top epoxy pour that takes a week to cure.
What decides it is whether you need the bar to stay put or roll away, fold flat against a wall, or survive the weather on a patio.
I would not pour a 1/4-inch resin layer without a respirator rated for organic vapors and a warm enough workshop, and that single requirement alone pushes some builders toward a butcher block top that only asks for mineral oil once a month.
1. Pallet Bar
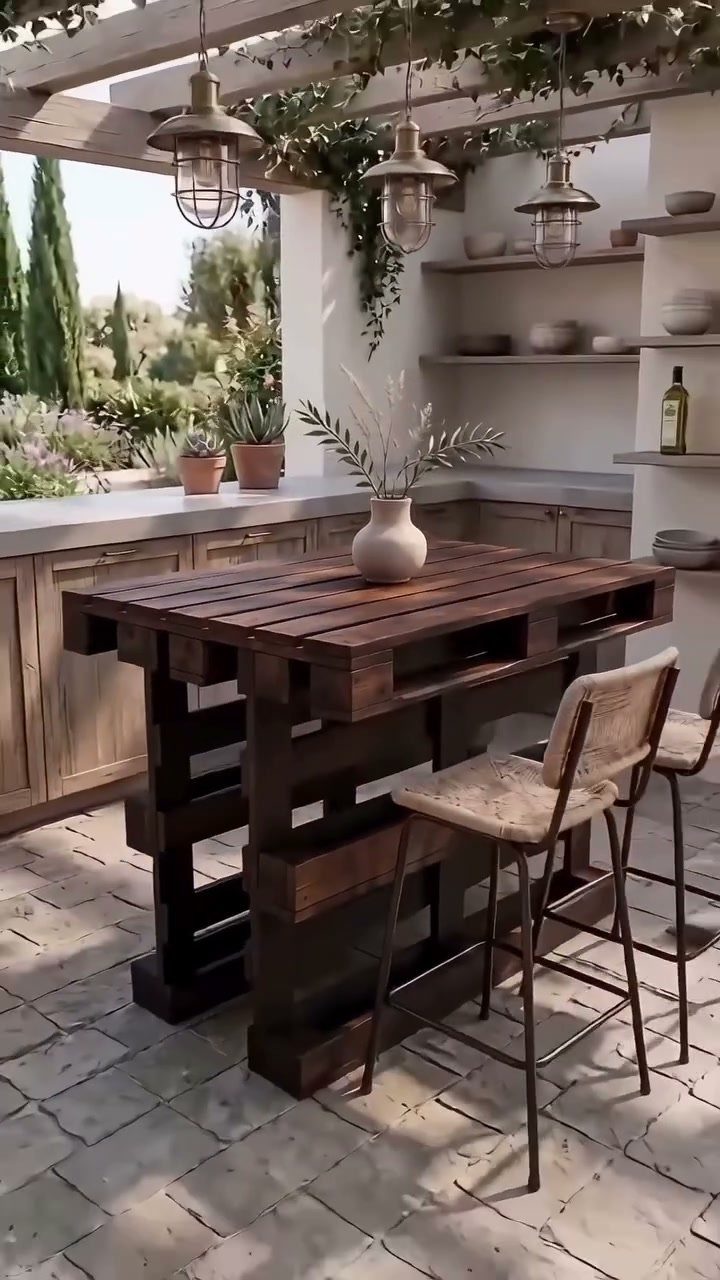
Pallet wood runs cheap or free, and the gaps between slats drain rainwater on a patio build.
I would stack 2 pallets for height, screw them together, and sand the top until splinters are gone. A coat of exterior polyurethane keeps the grain visible and slows rot.
The look is rough and that is exactly why you choose it. If you want level, buy lumber.
2. Bar with Wine Cooler Cabinet
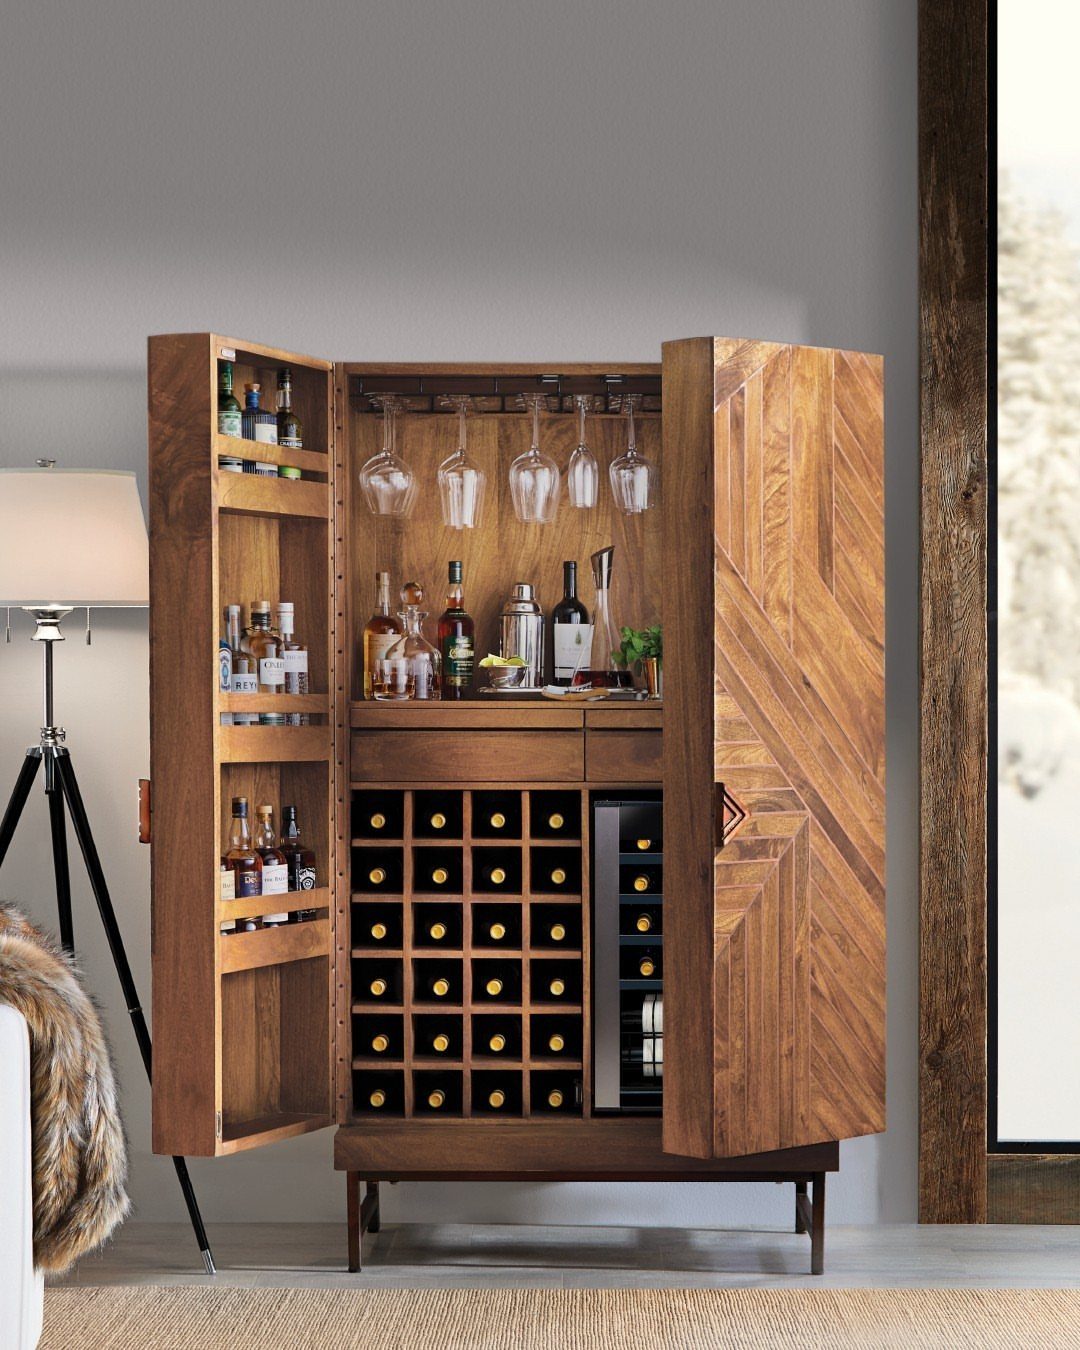
A wine cooler cabinet tucks into the same footprint as open shelving but keeps bottles at a steady cellar temperature, which matters if you store more than you pour.
I would build the cabinet frame from 3/4-inch plywood, leave a 15-inch wide bay for a thermoelectric or compressor unit, and vent the back into the wall cavity or through the toe kick.
Herringbone doors need patience; a simple shaker panel reads just as well from across the room.
3. Sophisticated Bar with Mirror
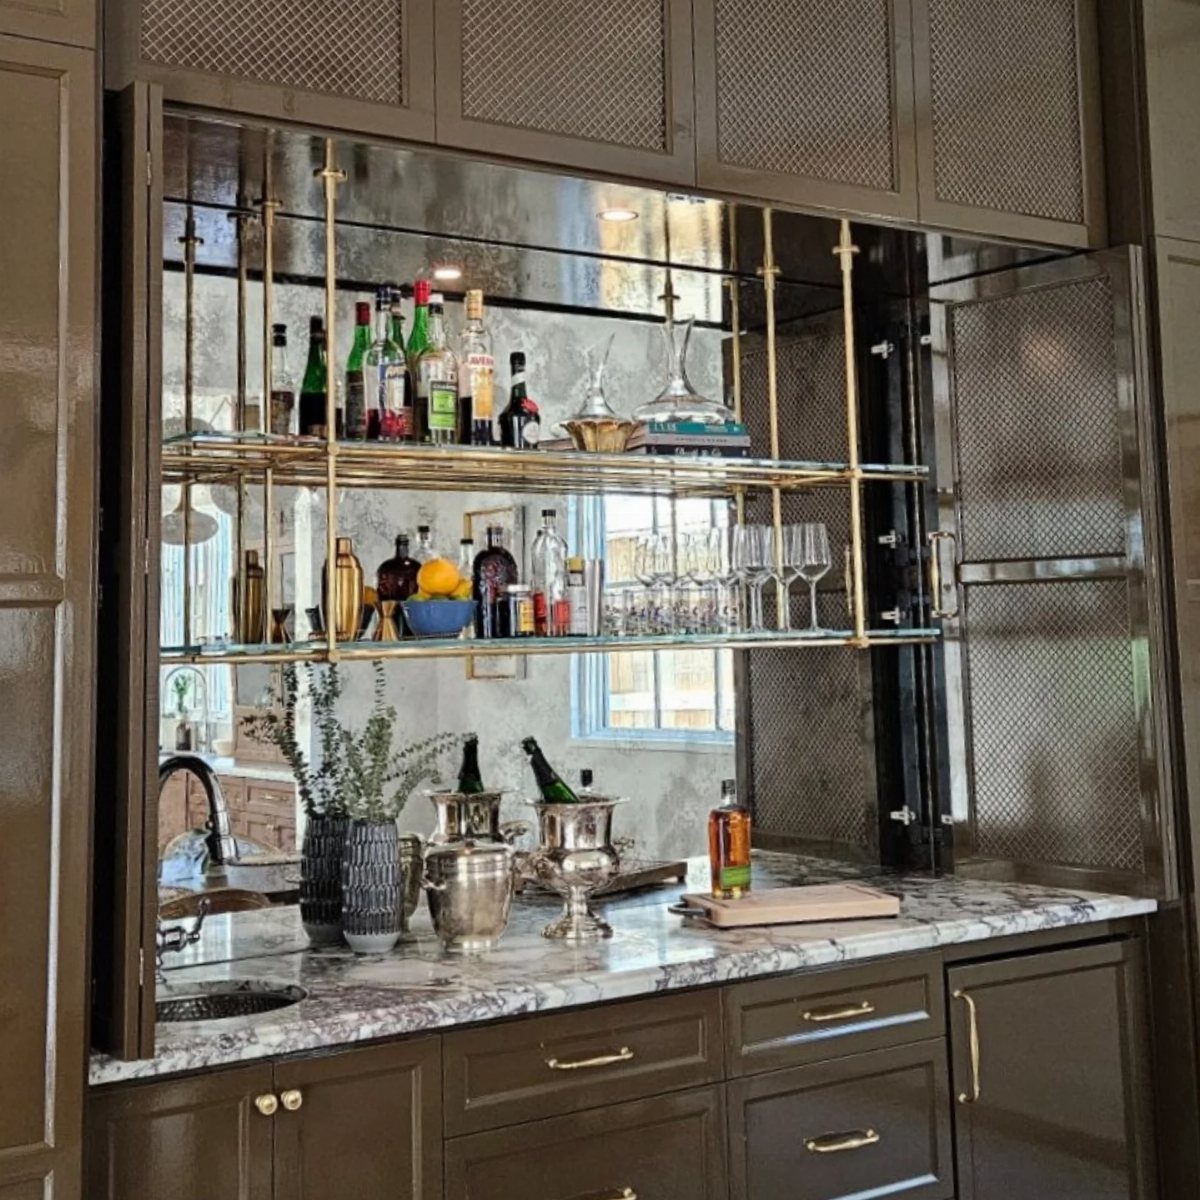
Mirrored backs multiply what light you have and make a shallow bar feel deep.
I would use antiqued mirror, not plain; the mottling hides smudges and reads warmer. Brass and glass shelves need wall blocking behind the drywall, since full liquor bottles are heavy and you do not want a sag.
Marble tops stain with citrus and red wine. I would seal twice yearly or choose a honed dark stone and call the etching character.
4. Coffee Bar
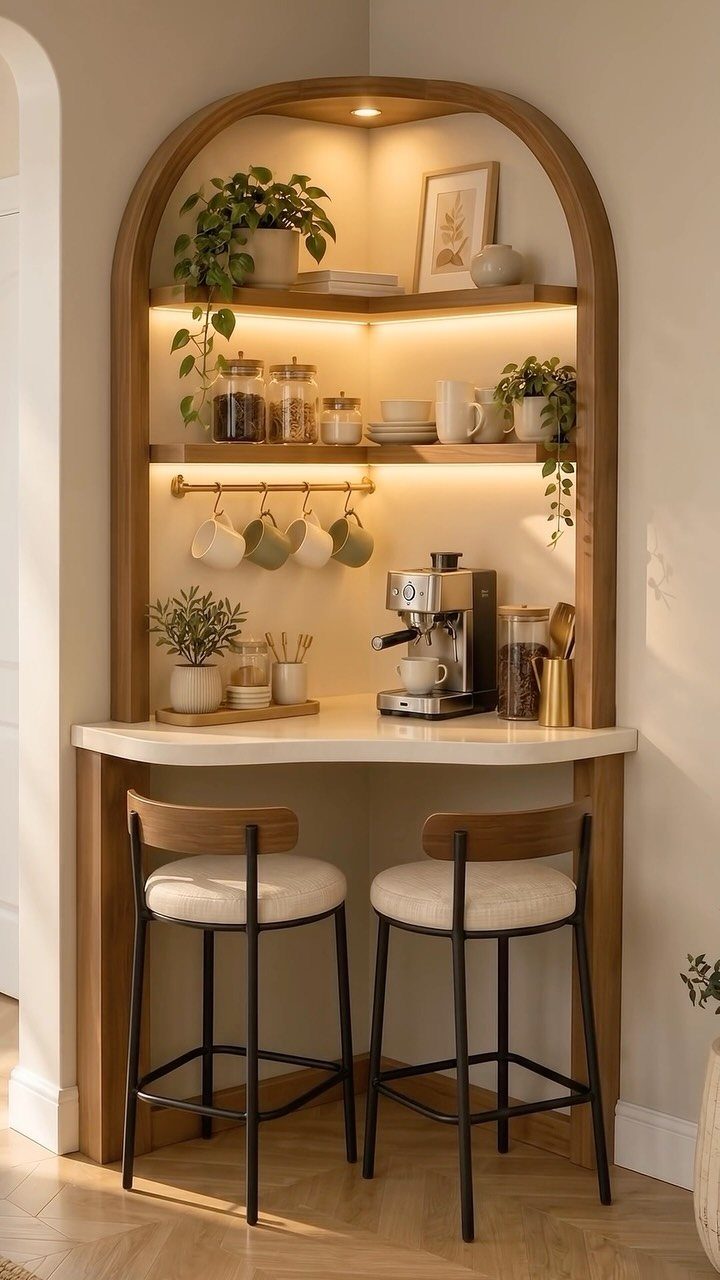
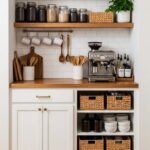
A coffee bar needs a water source or a lot of hauling from the kitchen sink.
You can get most of the way to a coffee bar with a freestanding hutch, a power strip, and a small under-counter fridge for milk if you have the floor space.
I would budget for a burr grinder before the built-in look. Good espresso depends far more on the grind than on the machine.
5. Butcher Block Bar Top
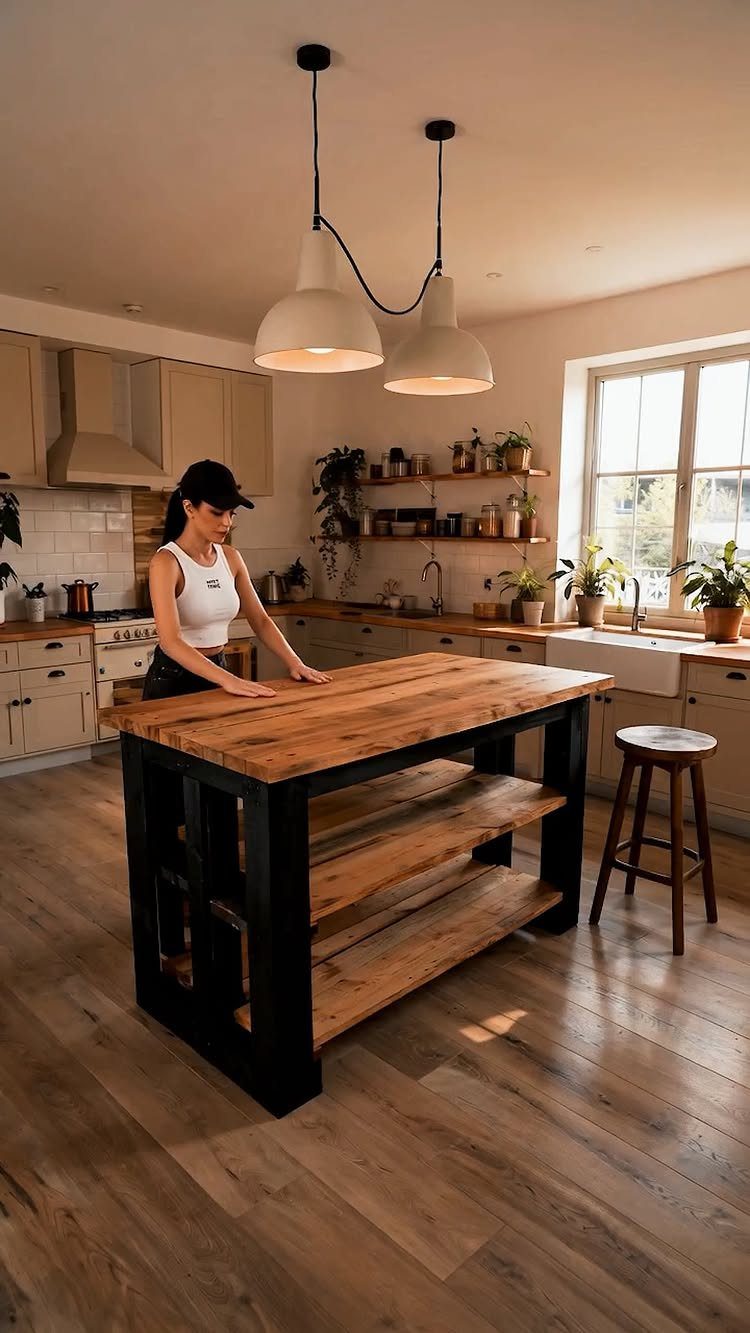
Butcher block asks for mineral oil monthly and stands up to knives better than varnish, which flakes. A black steel frame, bolted together, carries the weight without the carpentry of a cabinet base.
Oil the underside too, or it cups with humidity changes.
6. Epoxy Resin River Bar Top
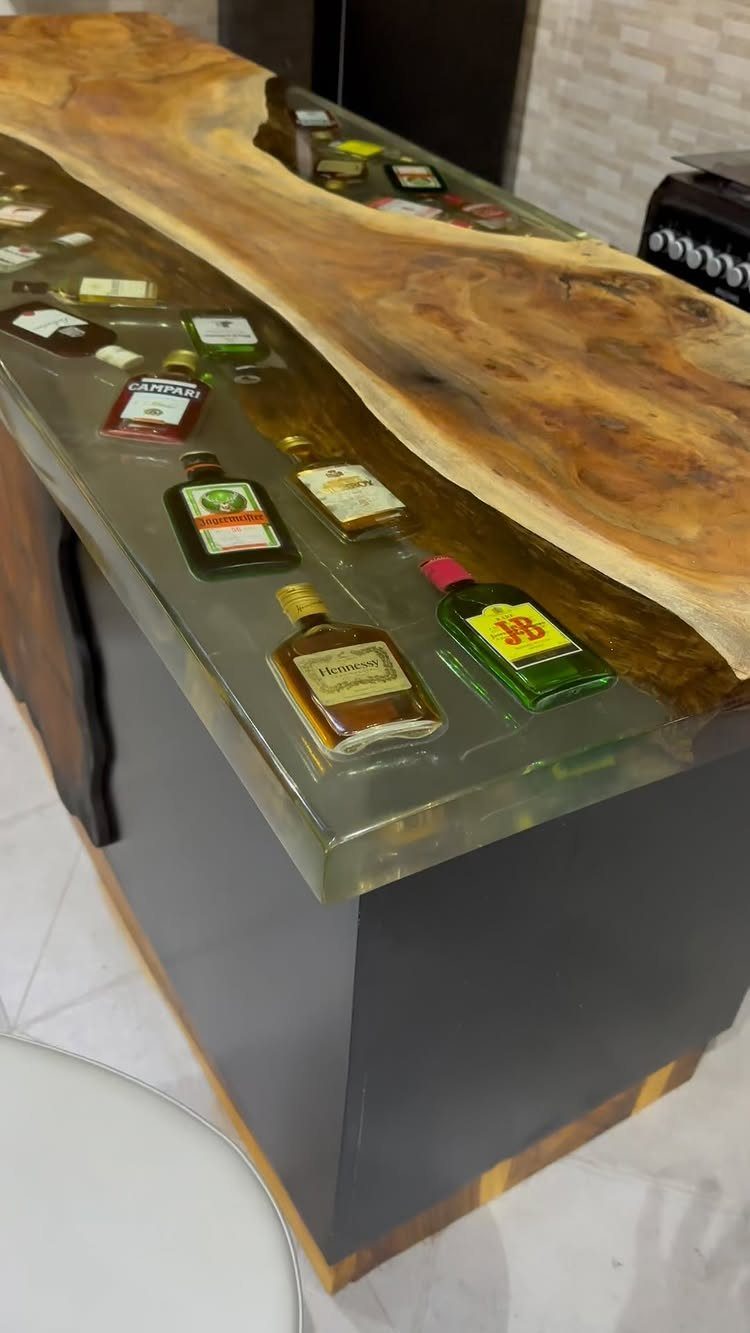
An epoxy river bar top pours in layers, 1/4 to 1/2 inch at a time, to keep bubbles from clouding the resin.
The miniature bottles in this one are sealed in place; I would plan their layout on paper first, since repositioning mid-pour is not an option. Gray pigment mixed into the epoxy reads like slate water against live-edge wood.
The maker notes care and love; I would add a respirator rated for organic vapors and a warm enough workshop, or the cure goes wrong.
7. Live Edge Wood Slab
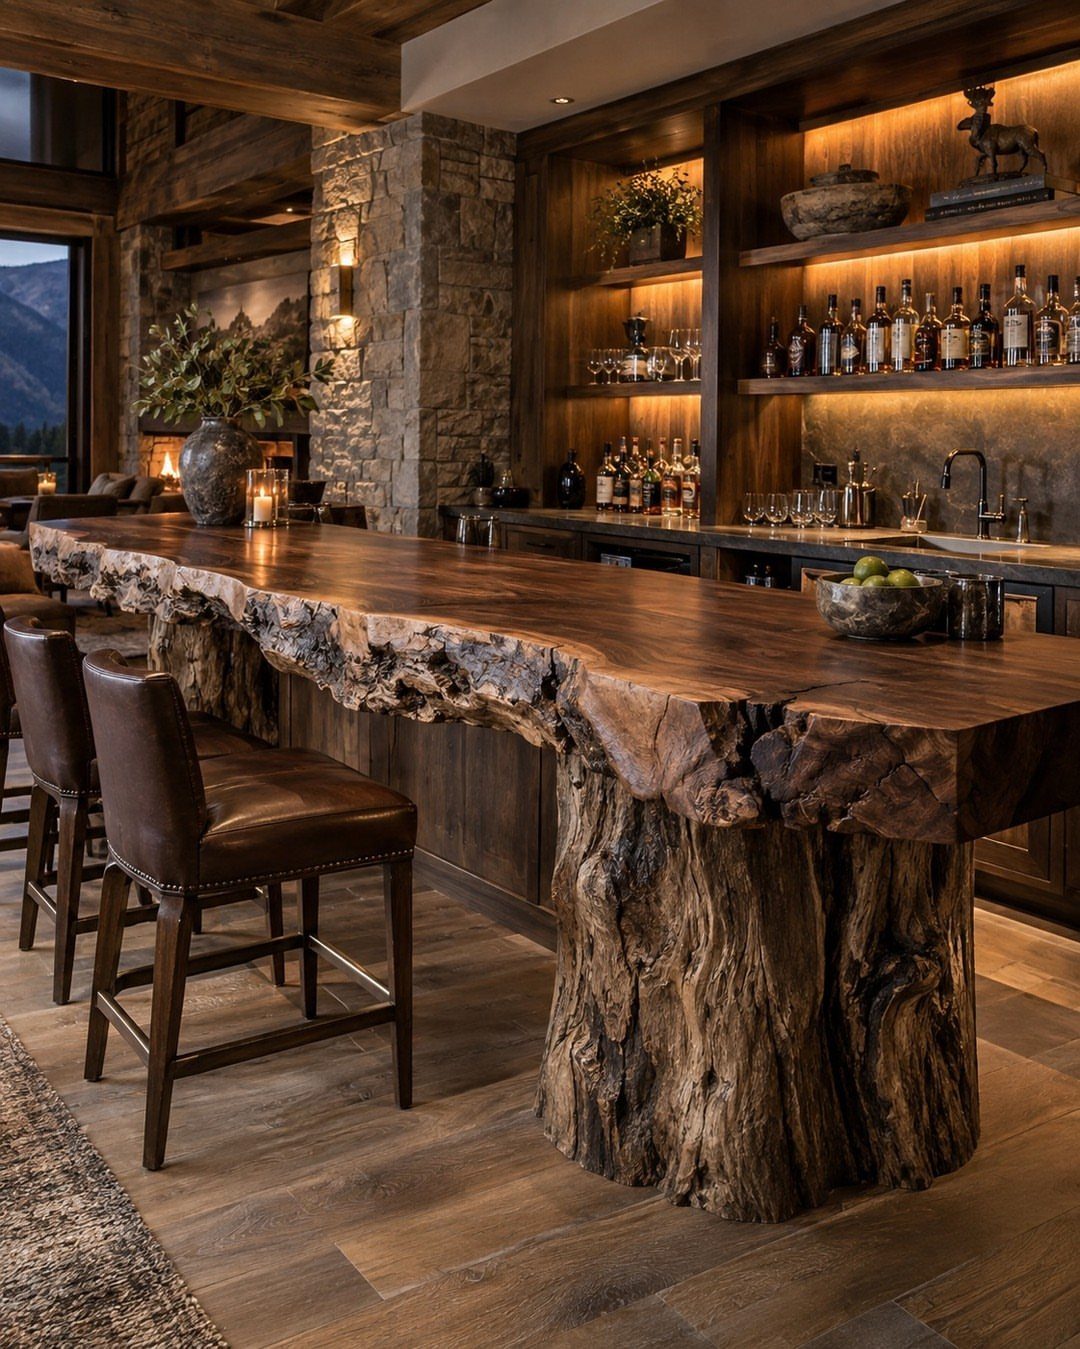
A single slab with the bark line left intact gives a bar top no factory can replicate.
I would choose black walnut or maple, air-dried for a year per inch of thickness to stop later cracking, and pair it with a steel hairpin or flat-bar base to keep the visual weight on the wood.
A fully dried trunk treated for insects carries the slab without splitting or inviting powderpost beetles; skip either step and you are rebuilding in a year.
Finish with hardwax oil, not film varnish, so a ring from a wet glass sands out in minutes.
8. Portable Bar
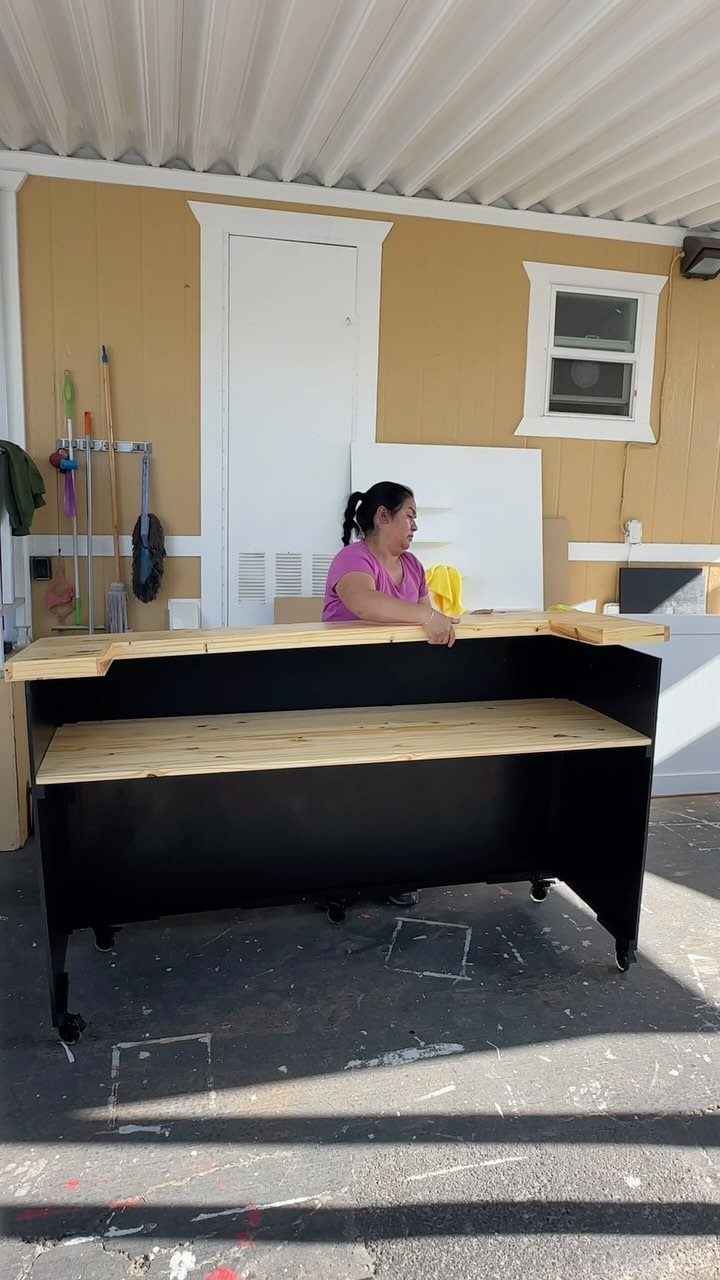
Casters turn any solid frame into a bar that rolls out for parties and back against the garage wall after.
I would use locking casters rated for 300 lb total, four-inch diameter minimum, or the thing wobbles once the ice bucket is full.
Paint-grade poplar for the carcass saves money over oak if you are covering it anyway, and the light top against black frame reads modern without the hardwood price.
A foot rail, even a simple black pipe, keeps guests from kicking the legs.
9. Foldable Bar
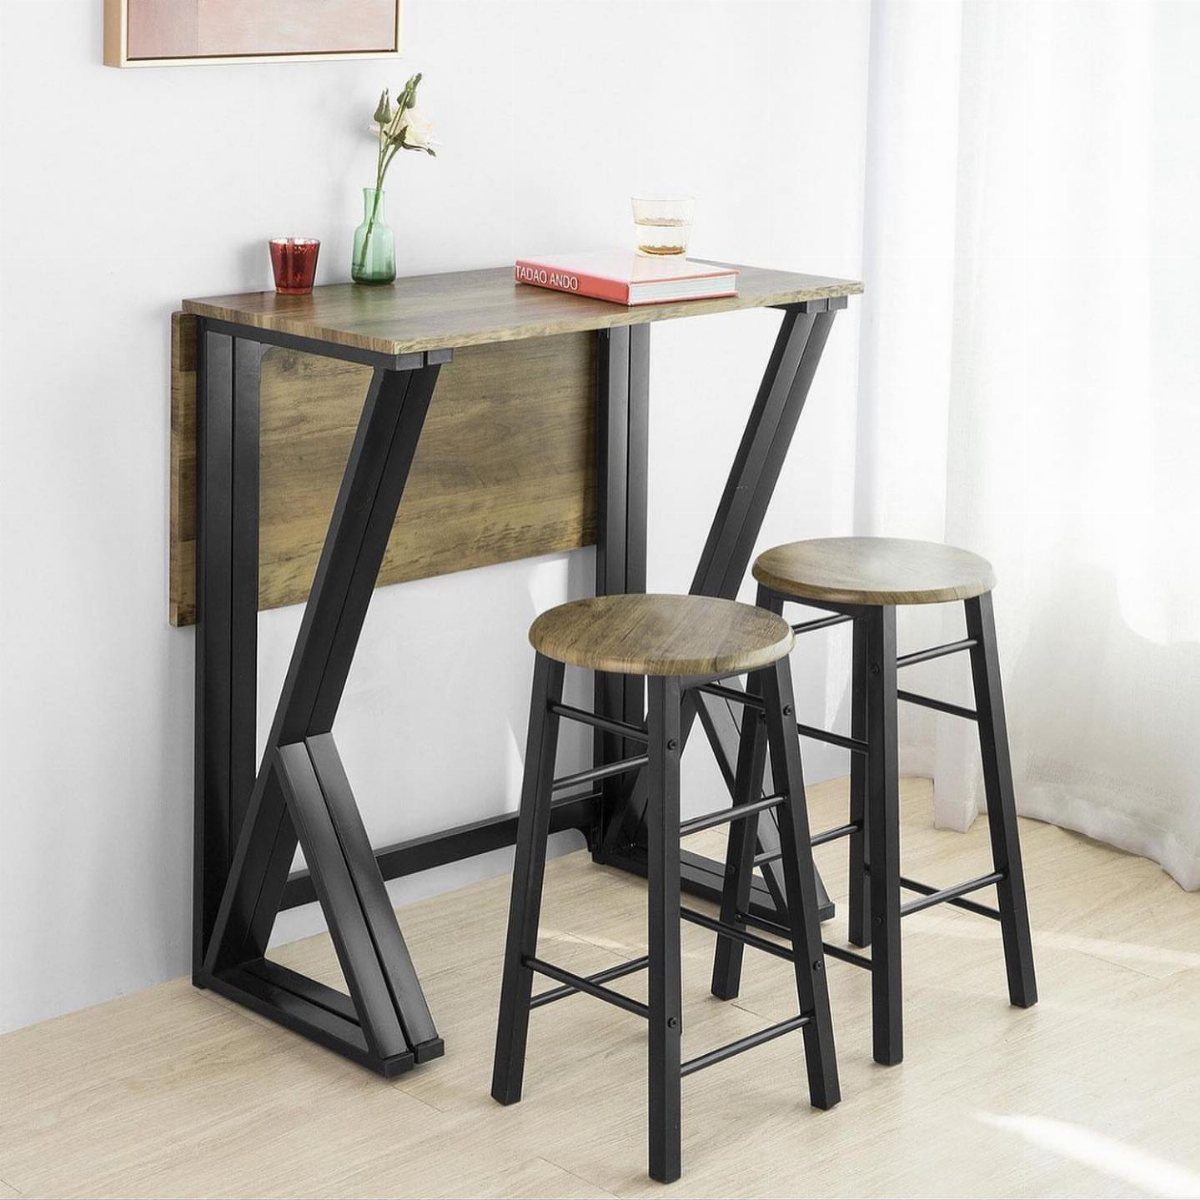
Drop-leaf hinges let a bar shrink to console-table depth against a wall and expand when guests arrive. I would mount the leaves on rule-joint hinges, not standard butt hinges, so the seam sits flat under a glass.
Hairpin pairs or a simple welded square-tube leg in black steel fold flat and keep the profile slim.
A narrow top needs no overhang beyond the hinge pin or the leaf tips catch when raised. Store stools underneath when folded.
10. Tiki Bar Hut
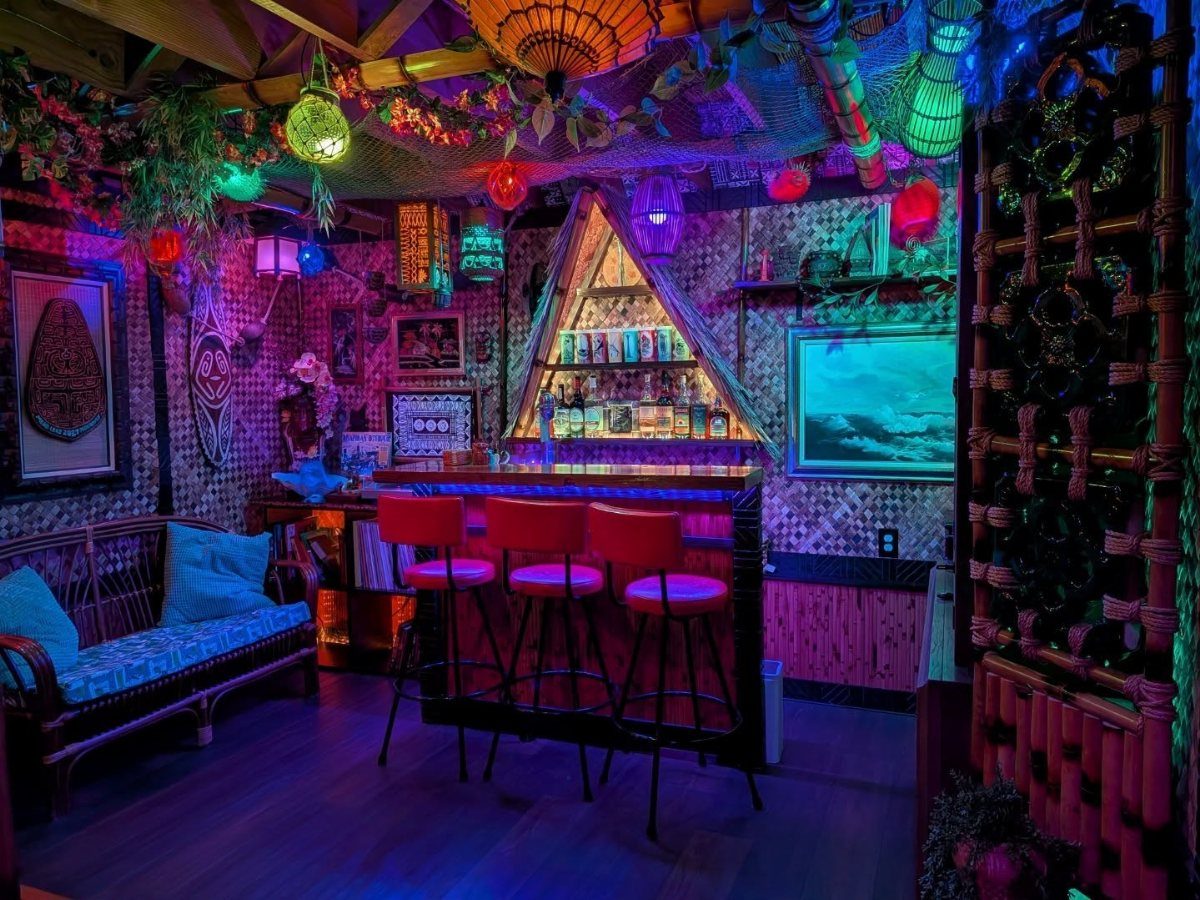
Thatch and bamboo set a mood that painted drywall cannot touch, but the materials need fire treatment if used indoors; I would buy Class A-rated synthetic thatch rather than risk a code violation or a spark from a neon transformer.
Glass tube neon hums, flickers, and needs a transformer per color; LED flex is quieter and simpler but the glow is different.
For a home build, LED neon strip tapes into the same channel and runs on 12V. Woven mat wall covering hides uneven studs and cable runs.
11. Curved Wooden Bar Counter
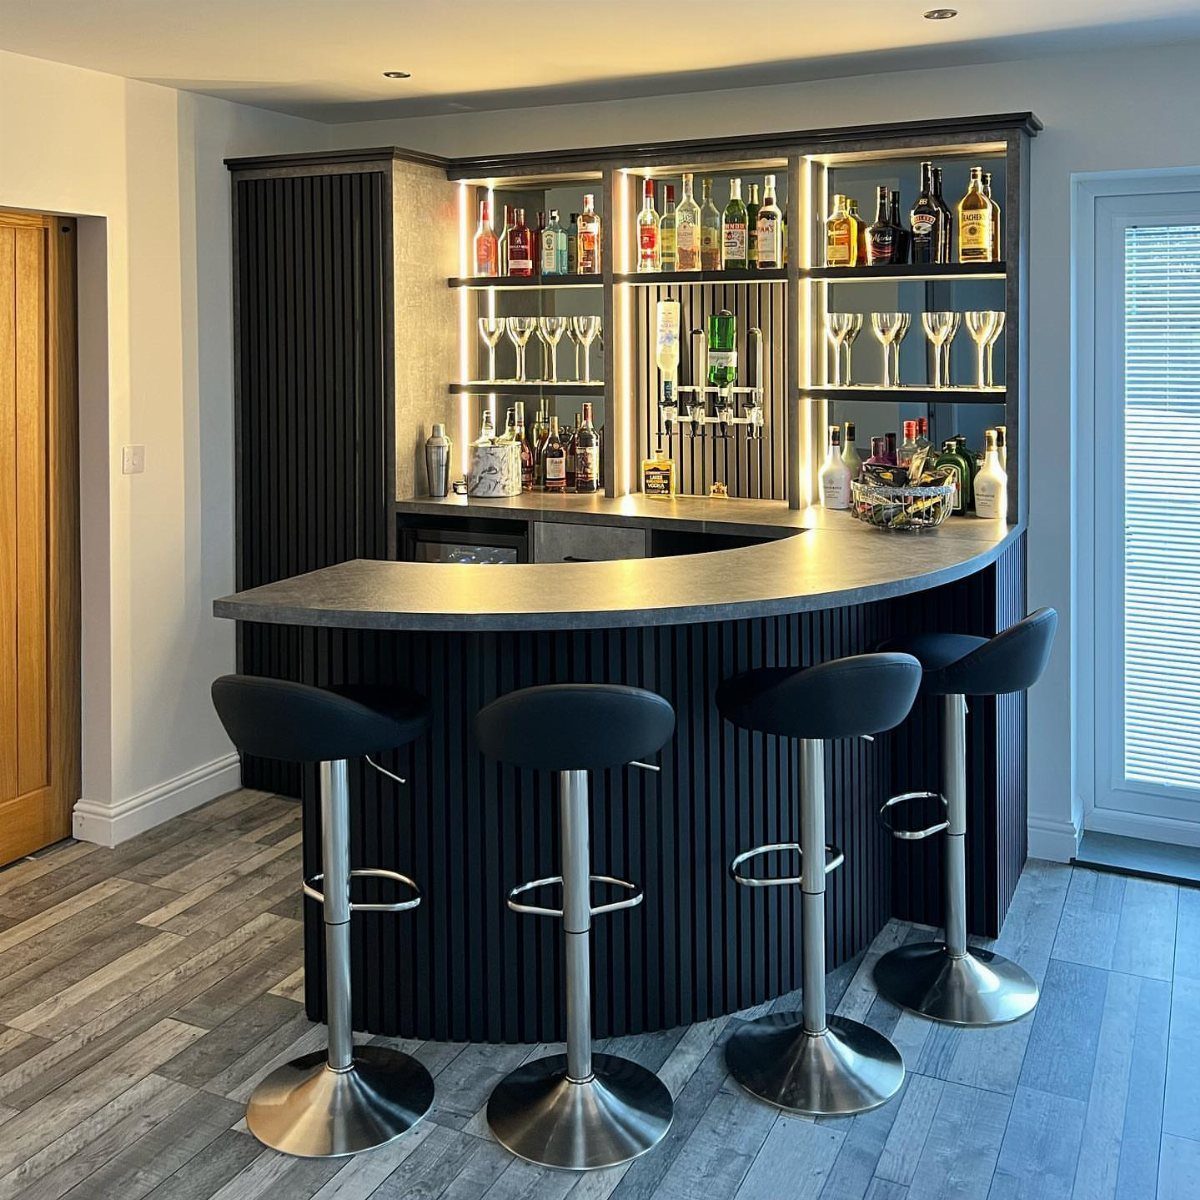
Vertical slats on a radius soften the bar face and let you build the curve from straight boards instead of steam-bending solid stock.
I would rip 1x3s from 3/4-inch birch plywood, space them 1/4 inch apart on a curved plywood backer, and black-stain before install so the gaps stay clean.
LED strip behind the bottles needs a channel with a diffuser, not bare tape, or the dots show through the glass.
The gray top reads like quartz or honed granite; laminate in a dark pattern costs a fraction and wears fine for home use.
12. Corner Bar Unit
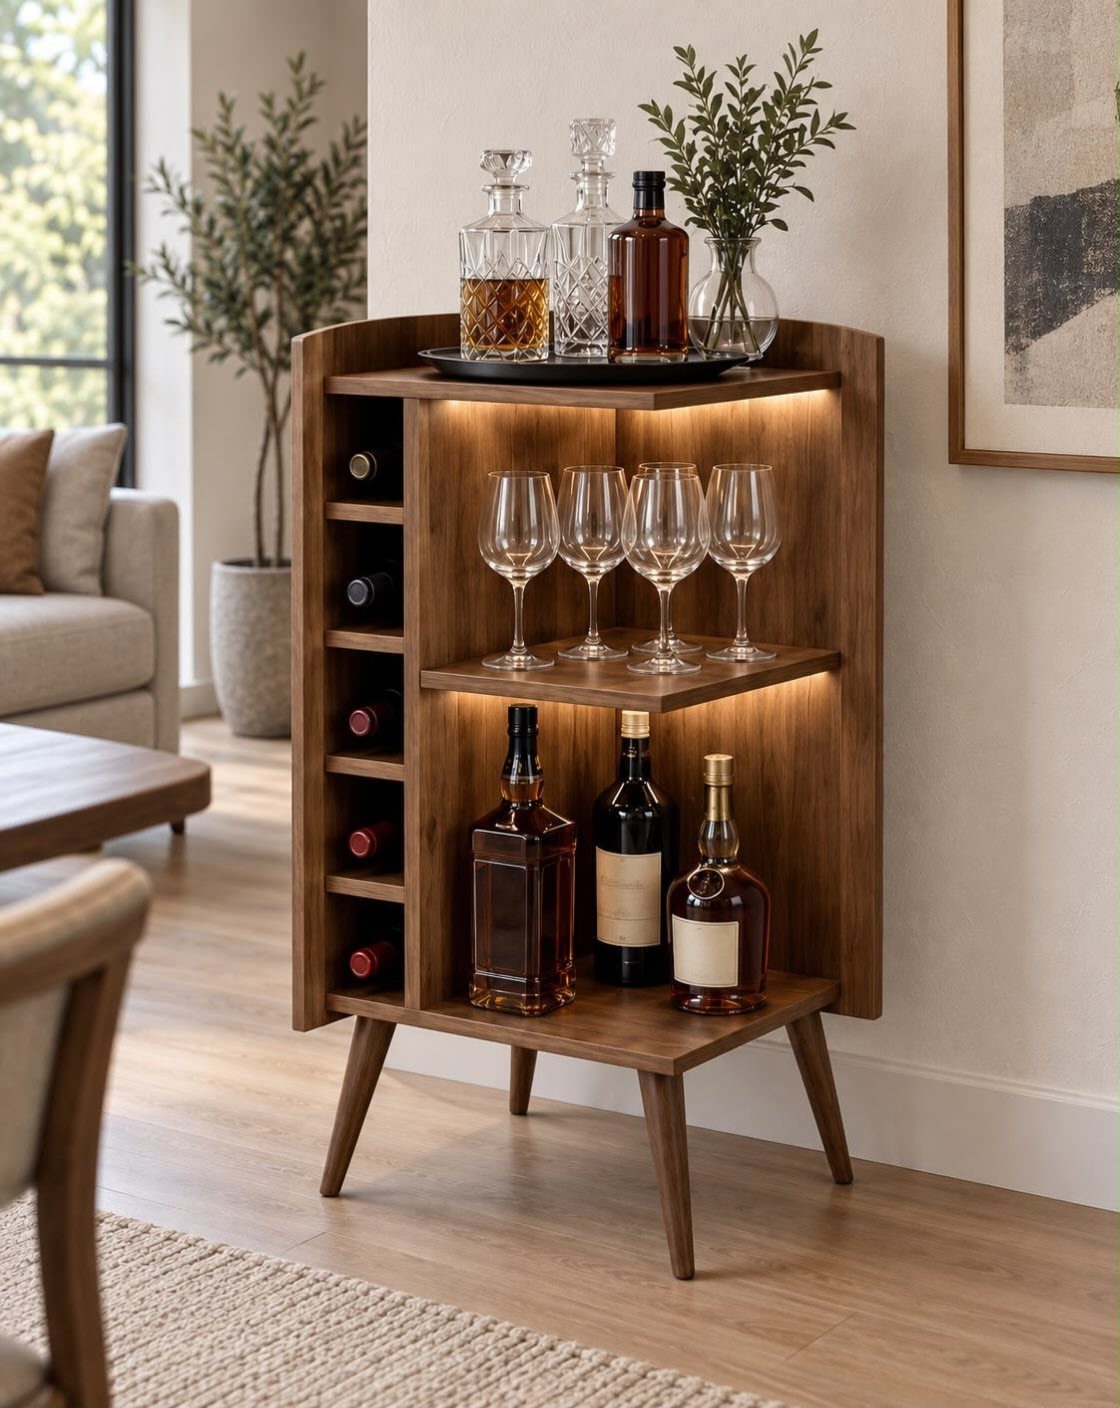
A corner unit turns dead space into storage that reads as furniture, not an afterthought.
I would build the carcass from 1/2-inch plywood with hardwood edge banding, since the face frames hide the plies anyway, and size the cubbies to 3-3/4-inch square for standard wine bottles.
Warm strip lighting at 2700K or 3000K wired to a door switch turns on when the fold-down or cabinet door opens, so you are not fumbling for a switch with a glass in hand.
The mid-century legs, likely tapered 8-inch walnut, lift the unit so it does not squat in the corner.
13. Wall-Mounted Metal Bottle Rack
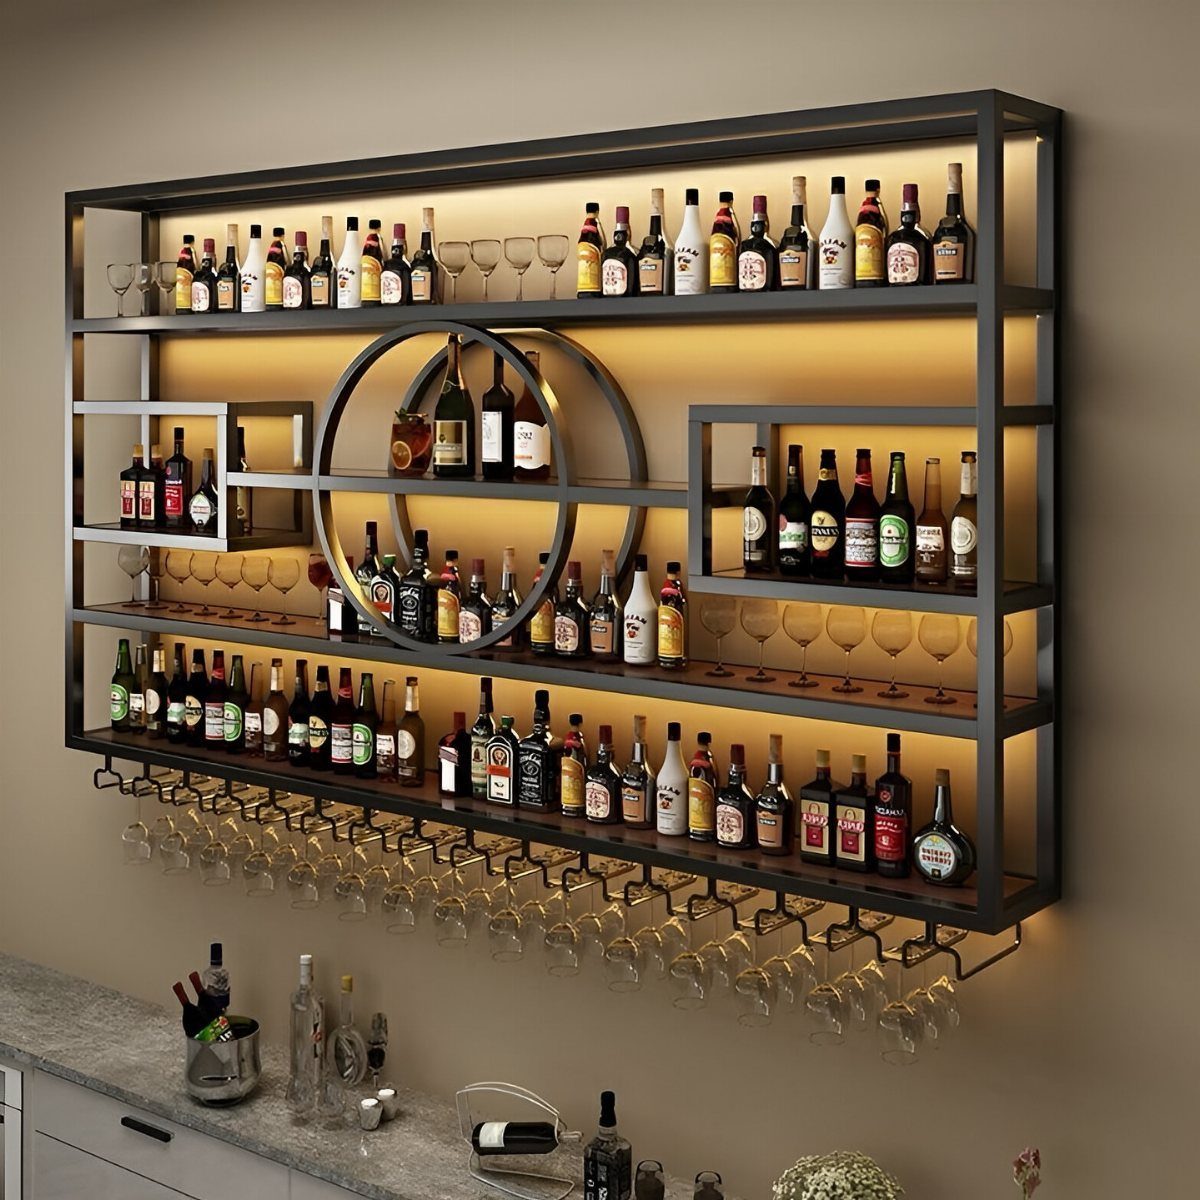
A wall-mounted rack keeps bottles off the counter and turns the wall itself into storage.
Black steel square tube, the common hardware-store sizes, welds into a grid strong enough for full bottles; glass hangers slot into the lower rail, stems down, so they dry ready.
I would run LED strip in an aluminum channel behind the rack, not across the front, so the light grazes the bottles without glare in your eyes.
I would find the studs and sink lag bolts deep, because a rack full of glass bottles carries serious weight and drywall alone will not hold it.
14. Repurposed Cabinet Bar
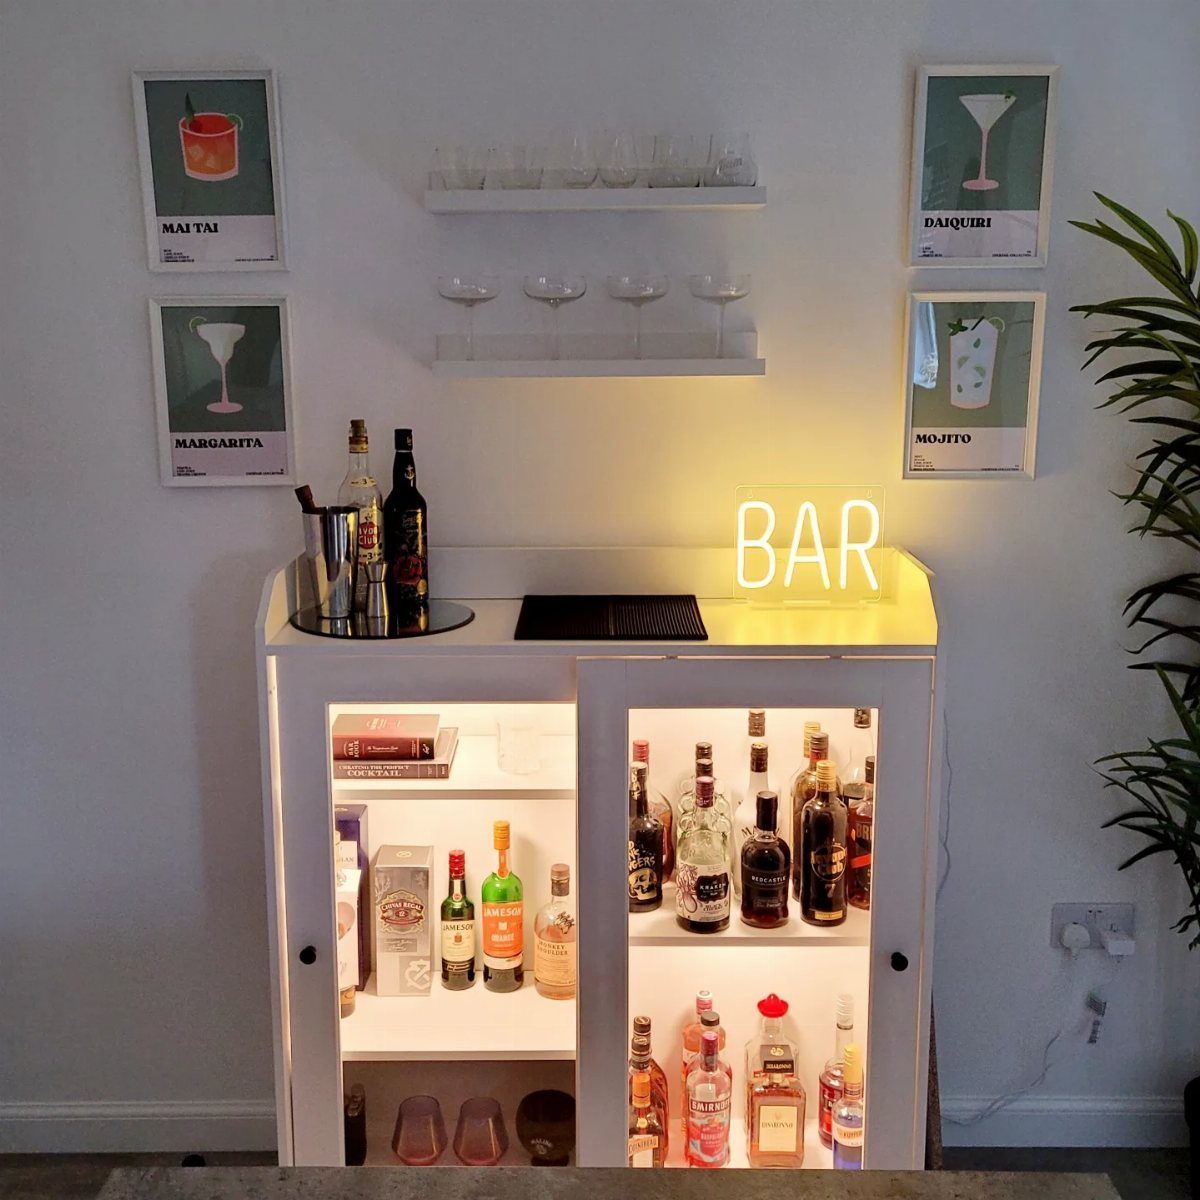
A cabinet with doors already built beats starting from raw lumber if your tools stop at a drill.
I would pull the shelves, add a power port for the light kit, and switch the glass to seeded or reeded if the original is too bare; the texture hides clutter.
The neon BAR sign plugs in where the cabinet light does, so one outlet feeds both. Floating shelves beside it hold mixers and glassware the cabinet depth cannot, and keep the wall from reading too white-on-white.
While you can purchase a prefab bar or even hire someone else to build one, a more affordable and rewarding option can be to build your own bar.
— Bob Vila
15. Paneled Bar Counter
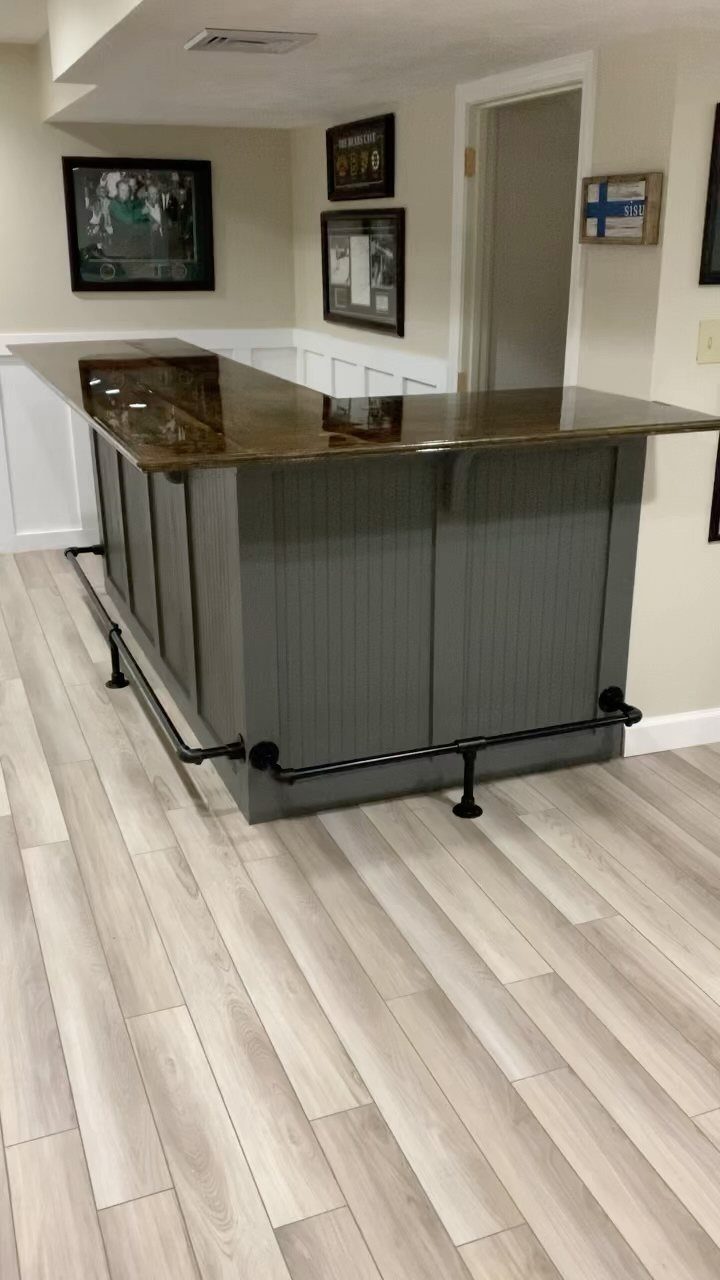
Recessed panels dress up plywood without the cost of solid raised doors; thin MDF set into standard poplar frames, painted gray, reads finished from across the room.
A glossy dark top, likely walnut or stained oak with a bar-top epoxy pour, reflects the backbar bottles and wipes clean.
Black pipe for the footrail, the common diameter with threaded floor flanges, needs no welding and threads together with a pipe wrench.
I would set it at standard bar height off the floor, same as a commercial bar, so the stool footrest lands right.
Bar Essentials and Tools
A full bar set runs past the bottles.
I would start with a jigger, corkscrew, paring knife, cocktail shaker, muddler, bar spoon, strainer, and ice bucket. Those eight cover most drinks without cluttering the counter.
Glassware shapes matter more than count.
Low-ball and highball glasses handle spirits, pint glasses and steins take beer, shot glasses for shooters. Stemmed wine and champagne glasses hang upside down if you trust the crowd; otherwise keep them upright and out of reach.
Padded bar stools with backs beat backless for anything longer than a round.
A footrest helps, swivel helps more. If the budget stretches, add a separate bar cabinet for overflow storage.
Lighting sets the mood better than any bottle display. Skip overhead fluorescents; lamps, pendant lights, or color-changing LED string lights give the dim glow that makes a bar feel like a bar.
Music before the first guest arrives, whether that is a record player or a phone paired to a speaker.
Planning and Layout Tips
Placement decides how often the bar gets used.
I would put it where guests naturally gather, with a path to dispose of leftovers and rinse glassware if there is no sink. A dry bar means hauling, so count the steps.
Storage protects what you bought. Spirits live cool and dark, out of direct sunlight; too much light flattens flavor.
Glassware on shelves behind or underneath. Napkins, stirrers, straws in a caddy at hand level.
Under-bar additions change the workflow. A fridge, ice maker, wine cooler, sink, or beer tap each cuts trips to the kitchen but needs power, water, or ventilation planned in advance.
For entertainment, classic games keep hands busy without competing with conversation. Dominoes, chess, checkers, cards; nothing that demands a screen or shouts over the room.
Lighting and Ambiance
Pendant lights over the bar look right in a small cluster, hung at a height where taller guests walk under without thinking about it. Lower wattage bulbs and softer light give the bar a pub feel rather than something harsher.
The mixing zone needs task light same as a kitchen prep zone.
Under-cabinet strips or recessed cans aimed at the counter let you measure and pour without shadow. LED strips now run anywhere and switch color, so the same fixtures shift from warm pour to cooler mood without a bulb change.
Light belongs behind the bottles, not in front of them.
Recessed cans fill in where pendants leave dark pockets. The combination, pendants for atmosphere plus recessed for work, covers most home bars without a single overhead fixture burning down on the room.
Frequently Asked Questions
How do I make my own bar at home?
Start by choosing where guests naturally gather, then build from materials that match your skill level and budget.
Pallet wood runs free or close to it if you want that beat-up outdoor look, and a secondhand cabinet with a fresh top on it will get you pouring sooner, especially when your tool collection ends at a drill.
I would plan power, water, or ventilation before cutting any wood if you want a fridge, ice maker, sink, or tap; adding those later means tearing things apart.
Is it cheaper to build a bar or buy one?
Building your own usually costs less and lets you size every shelf and shelf height to your bottles and space. A pre-built cabinet skips the cutting and clamping but rarely fits a corner or an odd wall length without gaps.
I would spend the savings on a good top or better lighting; those are what you touch and see every time you pour.
What are some good bar items for a home bar?
Start with 8 tools: a jigger, corkscrew, paring knife, cocktail shaker, muddler, bar spoon, strainer, and ice bucket.
Low-ball and highball glasses carry spirits, pint glasses and steins handle beer, and I hang stemmed wine glasses overhead only when I know the company; otherwise they stay upright and back from the edge.
How to make a bar more fun?
Classic games that occupy the hands without forcing anyone to shout, dominoes or chess or checkers or a deck of cards, do more for the room than another neon sign.
I would skip anything with a screen; it competes with the reason people came over.