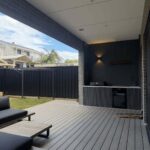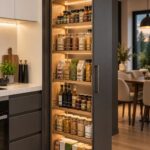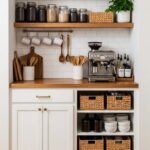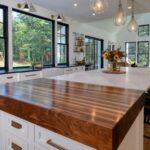
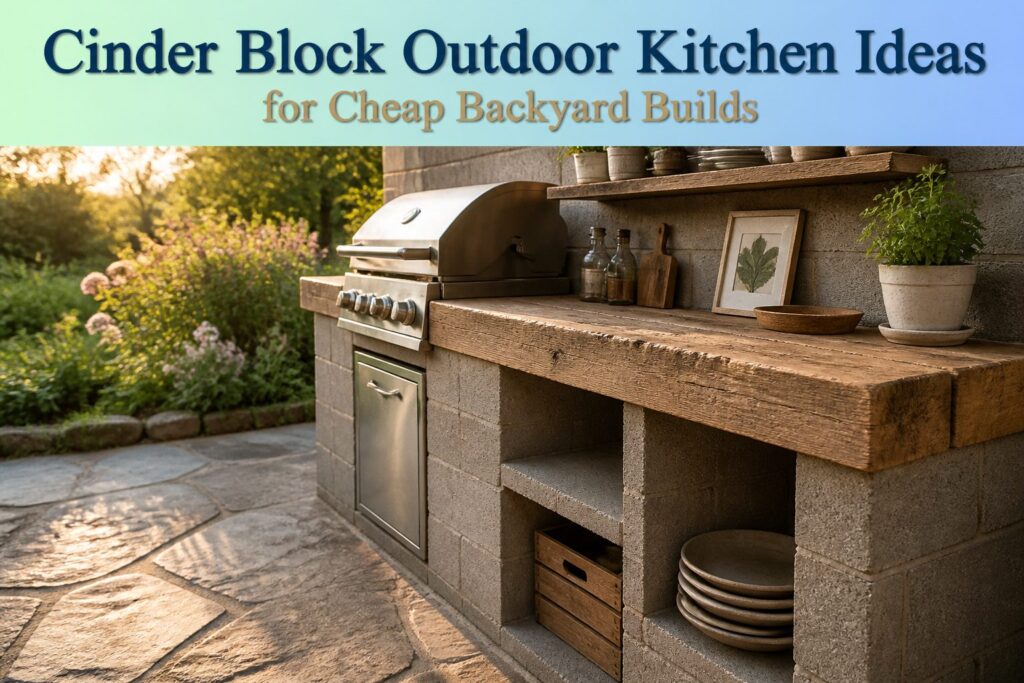
A finished outdoor kitchen with cinder blocks runs anywhere from $200 to $800, and the single factor that pushes you toward either end is what you choose for the countertop.
The blocks themselves are cheap, heavy, and fireproof, but they will crack a stone slab in a single season if the top course is not leveled with obsessive care.
Solid blocks laid flat across that final row, not hollow ones standing vertical, are the detail that separates a station that lasts from one that splits at the first freeze.
1. Simple Cinder Block Grill Station
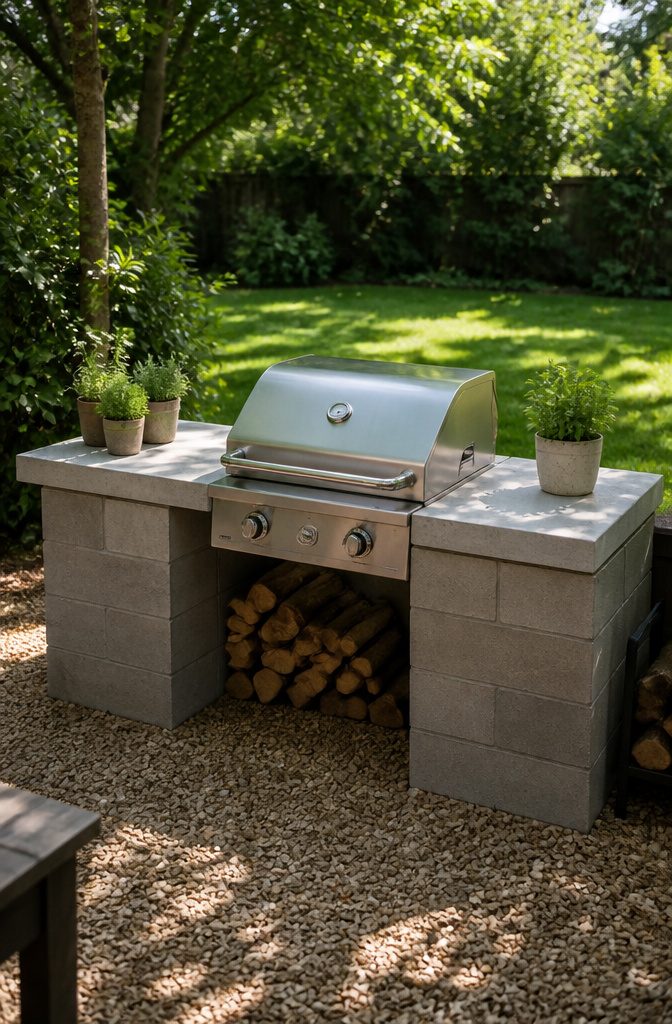
The cheapest way to start an outdoor kitchen with cinder blocks is a simple grill station: two columns of stacked block with a concrete slab across the top.
Blocks run $1.50–$3 each at any home improvement store, masonry supplier, or landscape yard, so the shell of this thing costs less than a bag of decent charcoal.
Cinder block earns its keep here because it will not catch fire or freeze and crack through Fort Wayne winters.
That stability comes with weight, though, and a heavy countertop like stone or poured concrete needs proper support or it will crack.
Solid blocks, not hollow ones, laid flat across the top row give a continuous bearing surface; check every course with a level as you build, because gaps or tilt in that top row transfer straight into the slab above.
I would skip the marble or granite entirely for a first build and pour a 2-inch concrete countertop instead.
It sits happily on that solid block bed, and if it does crack, you are out an afternoon and thirty pounds of mix, not a slab you paid to have templated.
2. L-Shaped Outdoor Kitchen Bar
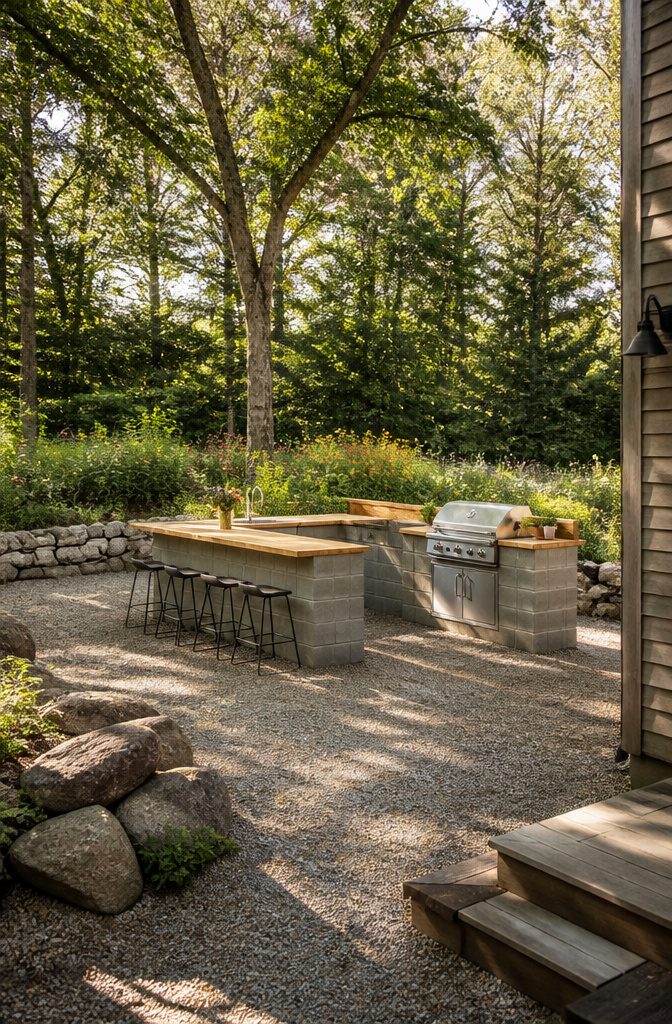
An L-shaped outdoor kitchen with cinder blocks gives you two defined work zones without the cost of cabinets.
I stack blocks in an L formation, leaving the front open for bar stools and the back wall solid for the grill. One leg handles cooking, the other becomes a serving counter where guests gather.
Novice builders win here because the corner does most of the structural work. You can build one leg at a time, check it with a level, and adjust before the next course goes up.
A concrete layer spread first over uneven ground lets you true up as you go, and you can decide the height, length, and exact shape as you stack rather than following a fixed plan.
The customization matters most at the corner itself. I leave one block cavity open for a mini-fridge or cooler recess, or mortar in a narrow planter box if I want herbs within reach of the cook surface.
The counter material decides finish and durability; granite or a polished concrete slab laid across the block tops lasts longer than wood in weather, though it costs more up front.
The open side needs bar stool clearance: 24 inches knee space minimum, and I prefer 27 if I can spare the patio depth. Without that, the bar becomes a ledge nobody uses.
3. Multi-Level Cinder Block Kitchen
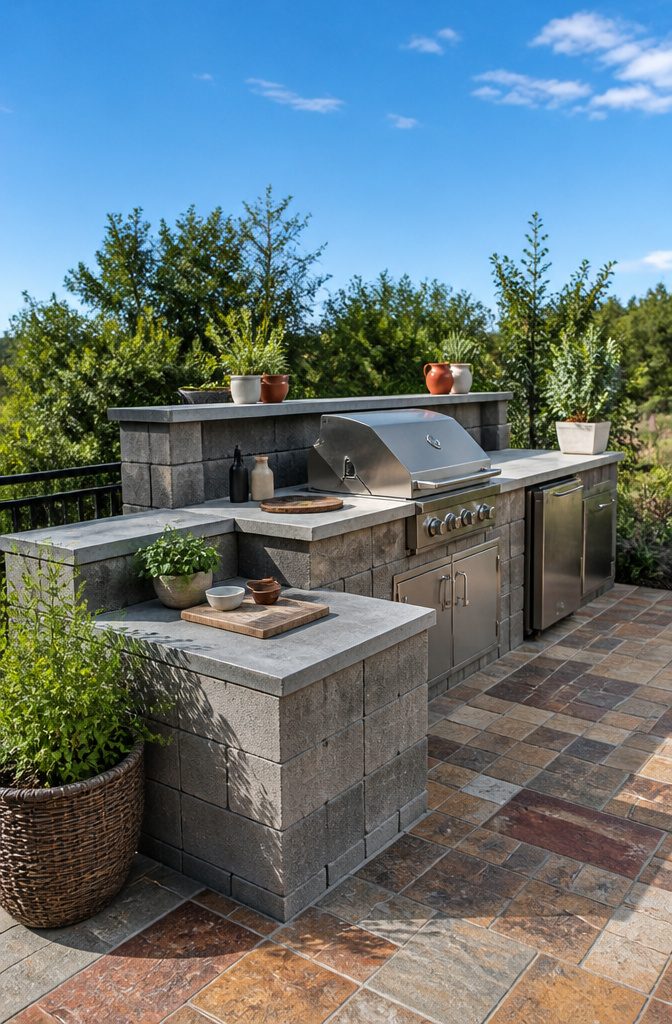
Varied counter heights in a cinder block build cost nothing extra in material, but the labor jumps significantly from a single-level design.
Each change in height means a separate foundation row, checked level before the next course goes up, and solid cap blocks laid horizontally to create stable landing points for countertops.
Skip this step and a slab of stone or granite will crack.
A lower surface at 30 inches for prep, a standard 36-inch counter for cooking, and a 42-inch bar level for serving keeps three people from competing for the same square footage.
I think the effort pays off only if you actually cook with someone else regularly; for solo weeknight grilling, one flat plane gets you outside faster and with fewer aching evenings spent hunched over blocks in the 80-degree heat that seems to define every project weekend I’ve scheduled.
4. Rustic Farmhouse Style
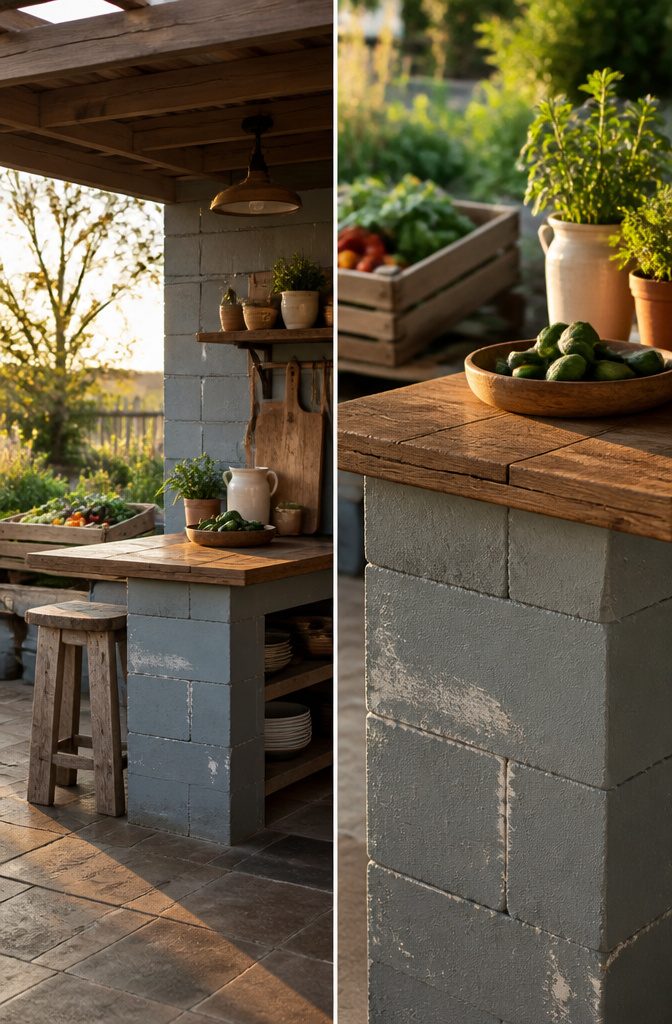
Reclaimed wood laid over a cinder block base gives you the farmhouse kitchen look without the farmhouse mortgage.
The block itself reads industrial, but one coat of exterior latex paint and a quick sand-through at the edges lets you push it toward weathered barn siding or leave it bare for contrast.
I like corrugated metal for the back panel or cabinet fronts. It catches late-day light, rusts to a working patina if you skip the sealant, and costs less than cedar shingles.
Distressed finishes on the blocks, vinegar and steel wool, or a simple dry-brush of off-white over gray, keep the whole structure from reading too finished.
Level your base with a layer of concrete first, then stack with cement between courses. For the countertop, a thick reclaimed plank sealed with marine-grade polyurethane holds up to summer humidity better than raw wood.
Add vintage-style lighting overhead if you want the glow after dark, though I would spend that budget on the wood surface first and hang pendants later.
5. Compact Cinder Block Kitchen
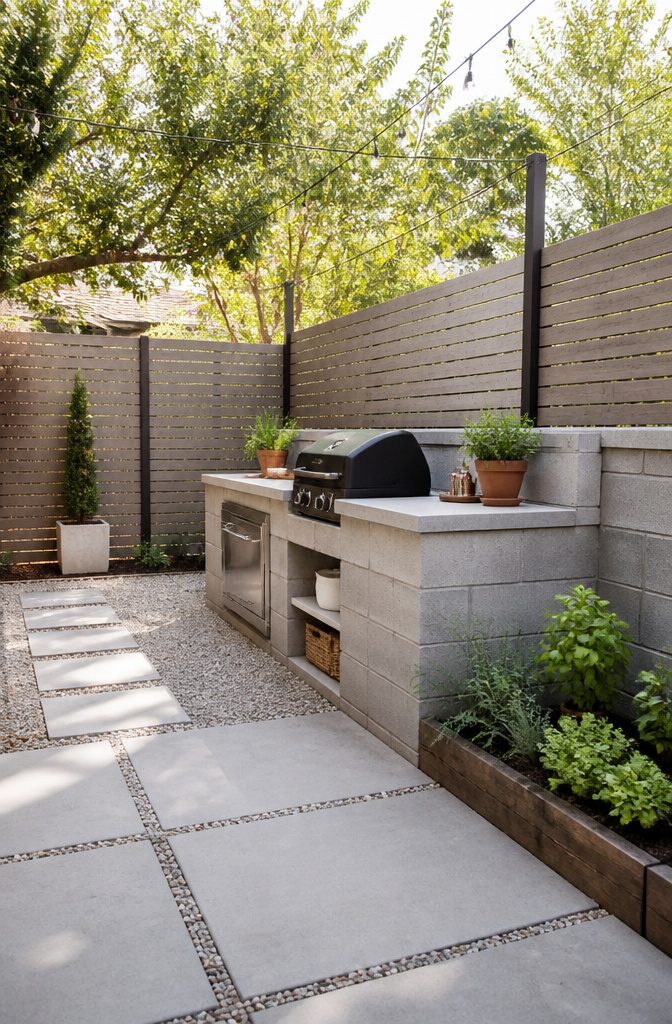
A compact outdoor kitchen with cinder blocks fits on a 6-foot patio strip or balcony corner and still handles the full cooking loop: heat, prep, and a landing spot for the finished plate.
The whole build stays toward the $200 end of the $200–$800 range because you are buying maybe a dozen blocks and a single countertop board, not a wall of them.
I stack two columns of three blocks apiece, open ends facing front and back, which gives you four cubbies for tools, fuel, or a dry-goods bin. A 2-inch cap block across the top flattens the surface for your board.
The countertop itself is the place to spend or save: a cedar 1×12 left raw, a remnant of stone if you find one, or even a laminate off-cut from a kitchen remodel. The blocks do not care.
The foldable table mentioned in many balcony builds is a false economy here. Dragging it out and wrestling it level defeats the point of a fixed station.
Instead, hinge a small side shelf on the right block column if you are right-handed, left if not; 18 inches is enough room for a bowl and a cutting board.
A portable grill drops onto the surface, but so will a single-burner propane camp stove or a half-size kamado. The weight sits directly on the blocks, not on your shelf, which is the detail that keeps this from tipping.
One limit: store nothing flammable in the block void directly beneath the heat source. The other seven cubbies still hold plenty.
6. Outdoor Kitchen with Planters
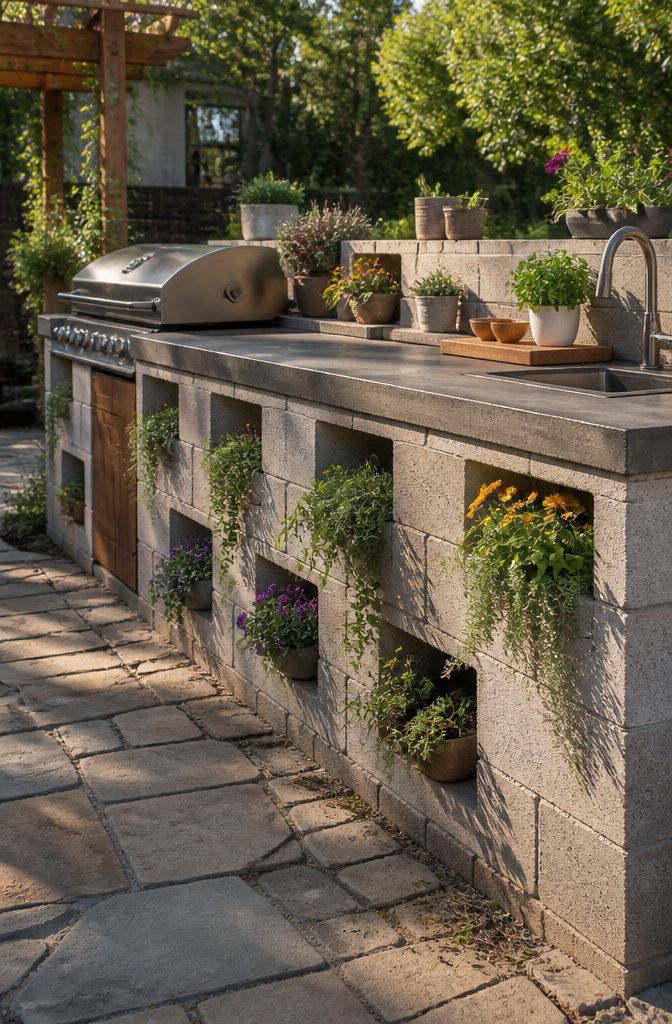
Cinder block cavities make the best planter pockets you do not have to build separately.
The same holes that lighten each block become built-in containers once the wall goes up: fill four or five along a counter edge with potting mix, and you have a kitchen herb row within arm’s reach of the cutting board.
A 16-inch block cavity holds enough soil for a mature basil or thyme plant, which means the integration costs nothing extra in materials or footprint.
For gardeners working a patio or balcony measured in feet, not acres, this dual function matters.
The kitchen wall eats no additional square footage the way a freestanding raised bed would, and the blocks themselves stay the cheapest structural option for an outdoor kitchen with cinder blocks.
I would leave every other cavity open rather than fill them all. Unplanted holes work as tool slots or dry storage, and the rhythm of green blocks against empty ones keeps the wall from looking like a solid mass.
Mix a few boards into the top course for a warmer surface where elbows rest, but keep the block faces exposed below: the concrete draws heat through the day and holds it into the evening, which extends the season for parsley and chives by a couple of weeks in fall.
Water sits in concrete and can rot wood in contact with it, so any wooden cap should sit on a spacer or a strip of composite decking rather than directly on the block.
Trellises belong on the back side of the kitchen wall, not the front, unless you want vines trailing across the prep space.
A simple wire mesh screwed into the top block course handles peas or compact cucumbers without the bulk of a framed trellis.
A full trellis throws afternoon shadow that cools the concrete and delays morning warm-up, so orient it to the north face if possible.
Leave at least one cavity in every run as a drainage channel.
A short length of perforated pipe through the bottom block face, sloped slightly away from the wall, keeps soil from waterlogging during a hard rain. Without it, the concrete wicks moisture into the roots and into your counter storage below.
7. Fire Pit and Cooking Combo
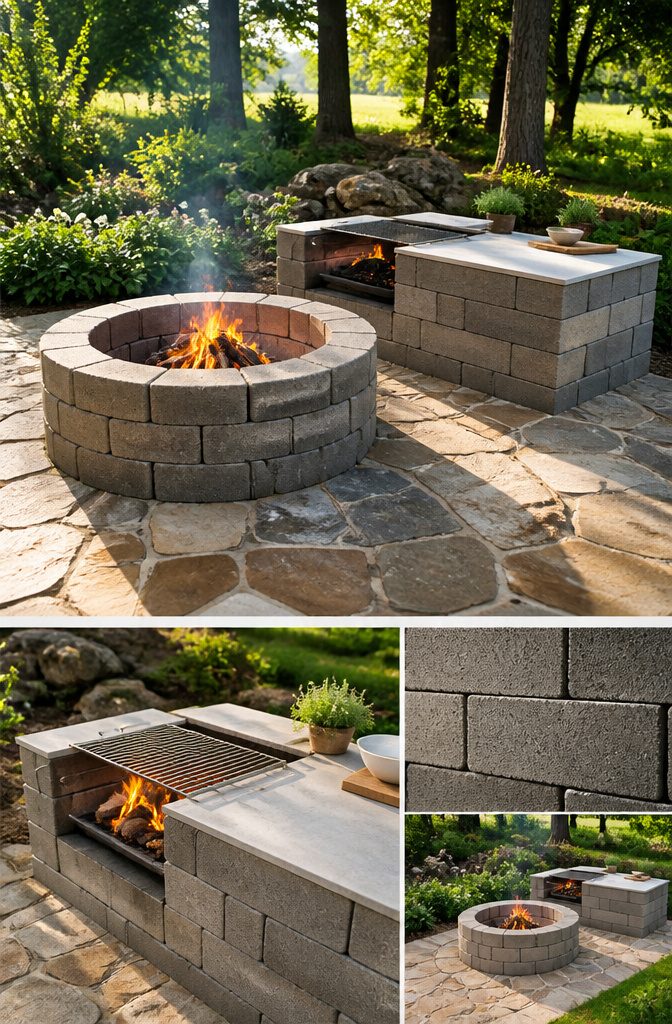
The blocks will not need firebrick if you keep the fire in a metal ring or bowl placed on top, not inside the stack itself.
Cinder blocks are concrete masonry units rated around 1,900 psi; the concrete degrades past 570°F or so, but a raised fire pit with a steel liner never transfers that heat directly to the block walls.
I would still gap the back row from the cooking surface by at least 18 inches.
That distance lets you work a Dutch oven or a grill grate over coals without scorching the adjacent block structure, and it gives you room to rake ash.
A circular fire pit built four to five blocks across, roughly 32 to 40 inches inside diameter, pairs naturally with a straight cinder block counter alongside it.
The counter height should land at 36 inches, standard kitchen counter height, so you are not bending between the fire and the prep surface.
Leave the block cores open on the cooking side and drop in a steel grate or a pair of rebar rungs; that is your adjustable-height grill.
For Dutch oven work, a flat paver or slab on top of the fire ring itself works better than balancing on legs over loose coals.
Wind is the problem here. An open fire pit in a compact yard throws sparks and shifts with every gust.
A cover or spark screen is practical if your local code requires one, and it should be factored into the 18-inch gap so the lid can hinge or lift without hitting the counter edge.
The blocks need no sealant, but the horizontal joints will collect grease. Scrape them seasonally, or the buildup turns rancid by spring.
8. Modern Minimalist Cinder Block Kitchen
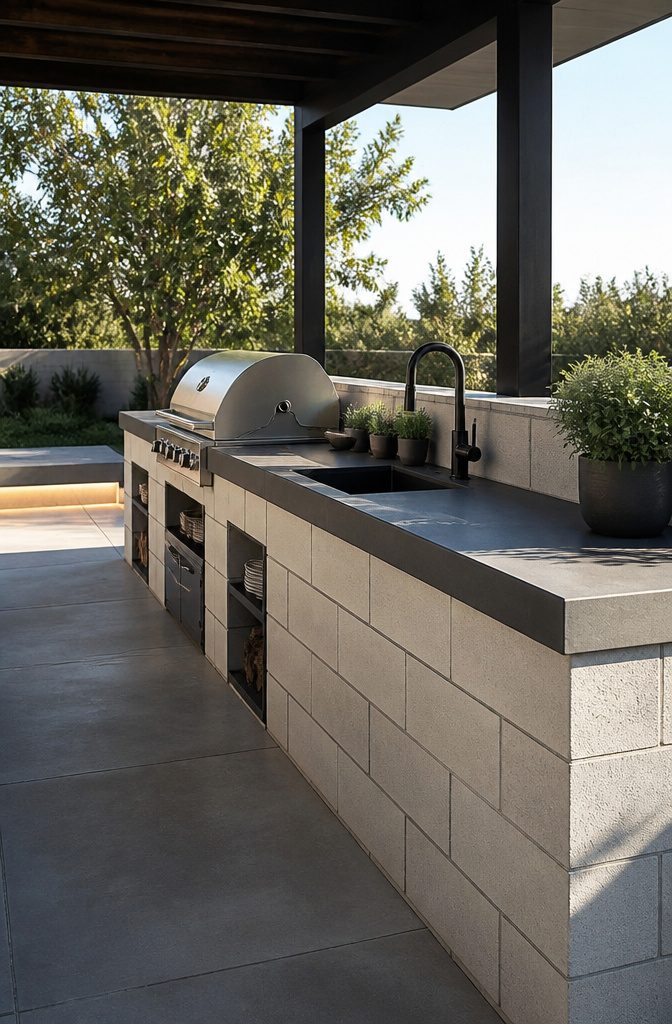
Smooth-faced cinder blocks, the ones with flat planes and sharp edges rather than the rough, porous standard variety, give a clean look without extra work.
You will pay more per unit; around here they run $2–$3 each versus $1.50 for standard rough blocks, and not every lumberyard stocks them.
The easier path, and the one most people actually take, is to buy standard blocks and surface them with paint or stucco.
A coat of exterior-grade masonry paint in matte charcoal or warm white hides the aggregate texture completely. Stucco costs more in labor but adds a tactile, hand-finished warmth that paint cannot match.
The hardware-free part matters more than it sounds. Cabinet pulls and drawer fronts collect grime from grease and pollen; plain ledges and drop-in surfaces wipe clean in minutes.
I would skip any attempt at built-in cabinetry below counter height and instead use open shelving made from trex or marine plywood sealed with spar varnish.
The rustic farmhouse builds, all reclaimed barn wood and visible mortar drips, ask for a different mind-set entirely.
Those builds celebrate the handmade; this one insists on restraint. Keep the color palette to two tones, three at most, or the eye starts reading the structure as busy rather than intentional.
Concrete countertops poured in place continue the material logic, though I have seen finished builds where a single large-format porcelain slab laid across the block wall reads cleaner and lighter.
That is the trade: weight and permanence versus the ability to adjust or replace later.
9. Cinder Block Pizza Oven
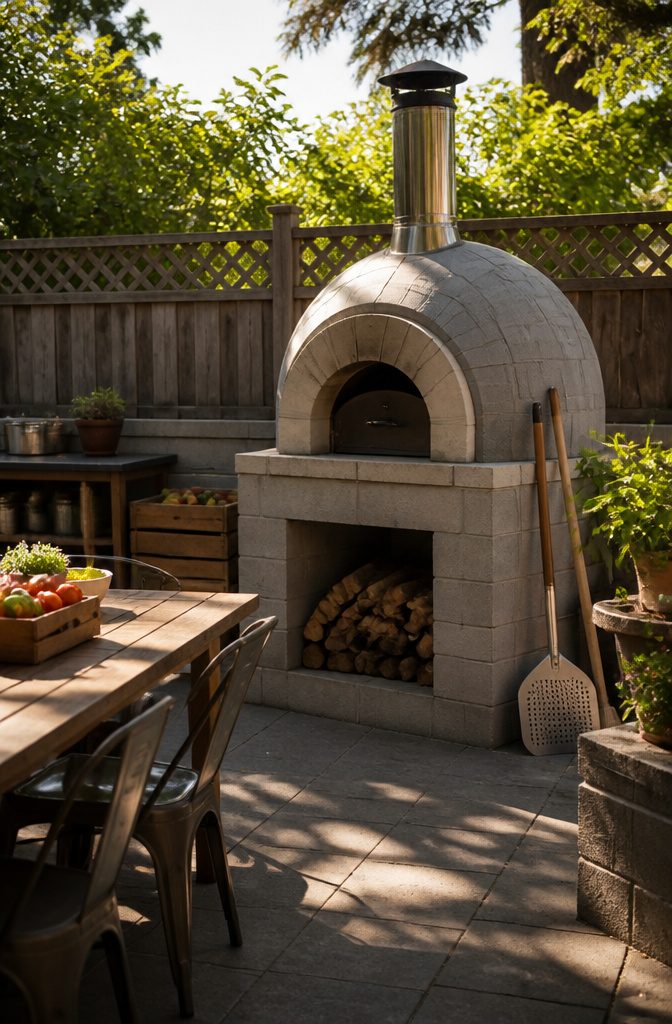
A cinder block pizza oven starts with the same rectangular base every other outdoor kitchen build uses, but the real work is the dome.
Stack blocks for the walls, then lay a solid slab across the top and build up an insulated dome, not just more blocks in a pyramid.
The insulation is what lets the firebox hit 700°F, hot enough for a ninety-second Neapolitan crust with actual leopard spotting. Add a chimney through the dome for draft, or smoke backs into your face every time you turn a pizza.
This project sits at the higher end of the $200–$800 range.
Cinder blocks run $1.50–$3 each, and the firebrick floor, insulation layer, and chimney pipe add up fast. You get a real wood-fired oven, not a metal box that tops out at 450°F and turns crust into cracker.
Two ways to play the budget: build a full dome with clay or castable refractory, which eats most of your $800, or go with a smaller barrel vault and spend closer to $400–$500.
The barrel vault is easier to build and still hits temperature, though the heat is less even across the floor.
Dome wins if you bake bread too; barrel vault wins if pizza is the only job and you would rather finish this weekend than next month.
10. Budget-Friendly Cinder Block Kitchen
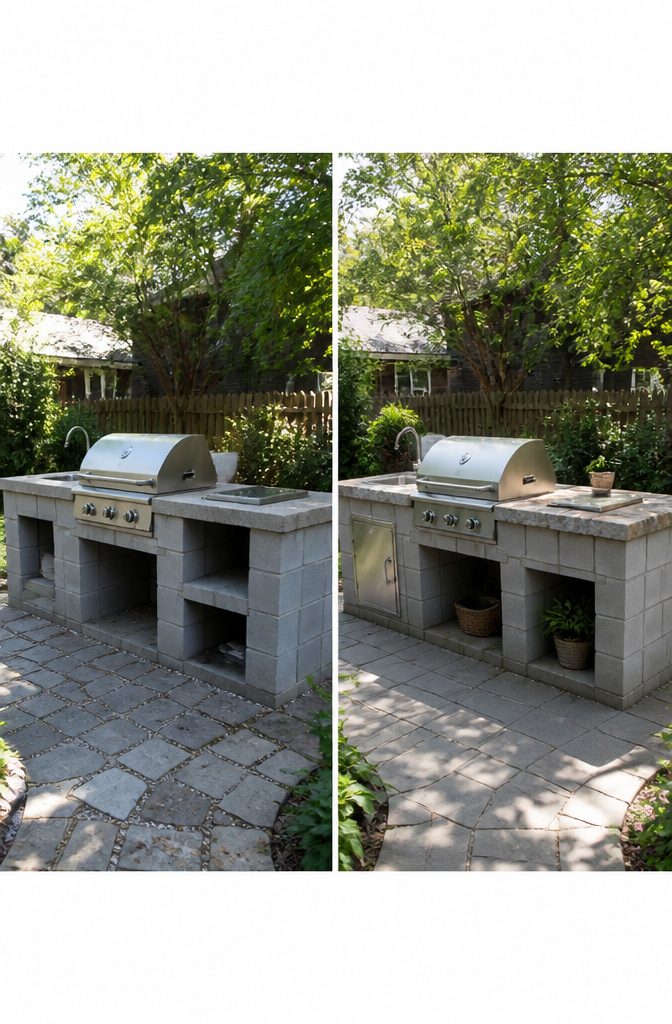
A simple rectangular layout keeps the block count low and the math honest. Used or surplus cinder blocks run around $1.50 to $3 each, and for a compact two-course wall forming a U or straight run, that puts the masonry near $75 to $120.
Add a slab of salvaged stone or tile for the counter, scrounged from demolition sales or leftover kitchen jobs, and the total material package lands close to $200.
The savings come from refusing extras. No built-in storage bays, no planter integrations, no second paint color for contrast.
Solid blocks, not hollow ones, belong on the top course laid horizontally, since they carry the counter weight evenly and prevent cracking from an unlevel surface. That detail costs nothing extra but decides whether the surface lasts.
Compared to traditional paved kits or framed masonry with new materials, this route cuts roughly half the cost. Labor and weight are the real costs: each block runs heavy, and every row needs checking with a level.
But the material itself resists fire and frost once set, so the investment holds where cheaper wood builds rot or warp within a few seasons.
11. Cinder Block Outdoor Kitchen with Storage
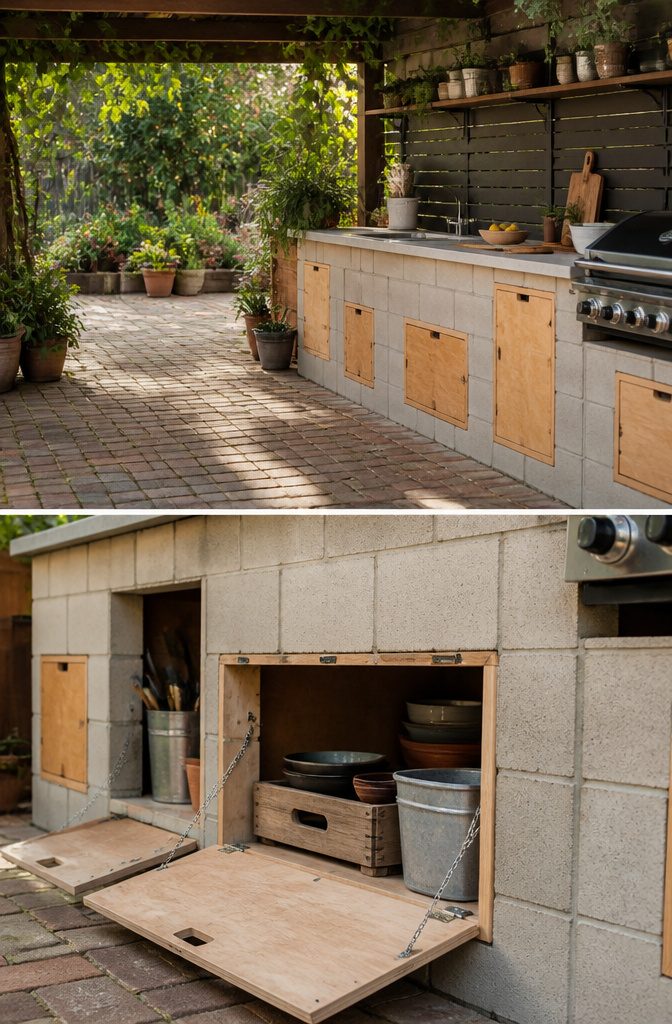
The real advantage of a cinder block build is that the hollow cores are already there, waiting to be used.
A standard 8-by-8-by-16 block leaves you with two rectangular cavities roughly 5 inches across, running the full height or depth of your kitchen wall.
Slap a piece of exterior plywood across the front, hinge it at the top, and you have a drop-down door that costs maybe $15 in scrap and hardware.
Paint the ply with deck sealer on all sides, especially the end grain, or it will swell and jam shut after the first decent rain.
For charcoal or propane storage, the cavity works better turned horizontal.
Lay blocks on their sides so the holes face front, slide in a plastic storage bin that fits snugly, and the block becomes the frame while the bin handles the weather seal.
The bin lifts out when you need to haul ash or swap a tank, and you are not trusting raw cinder block to keep moisture off paper bag charcoal.
The one trade-off is drainage. A solid concrete cap on your block row traps water in the cavity every time.
I leave the bottom course open, run a slight slope, or drillweeps through the mortar bed. Stored utensils stay dry enough with a bin; stored fuel stays dry enough with a bin on a pallet or a few shims.
Nothing here needs a roofline or caulk gun, just the decision to let gravity do the work instead of fighting it.
12. Cinder Block Kitchen with Built-In Seating
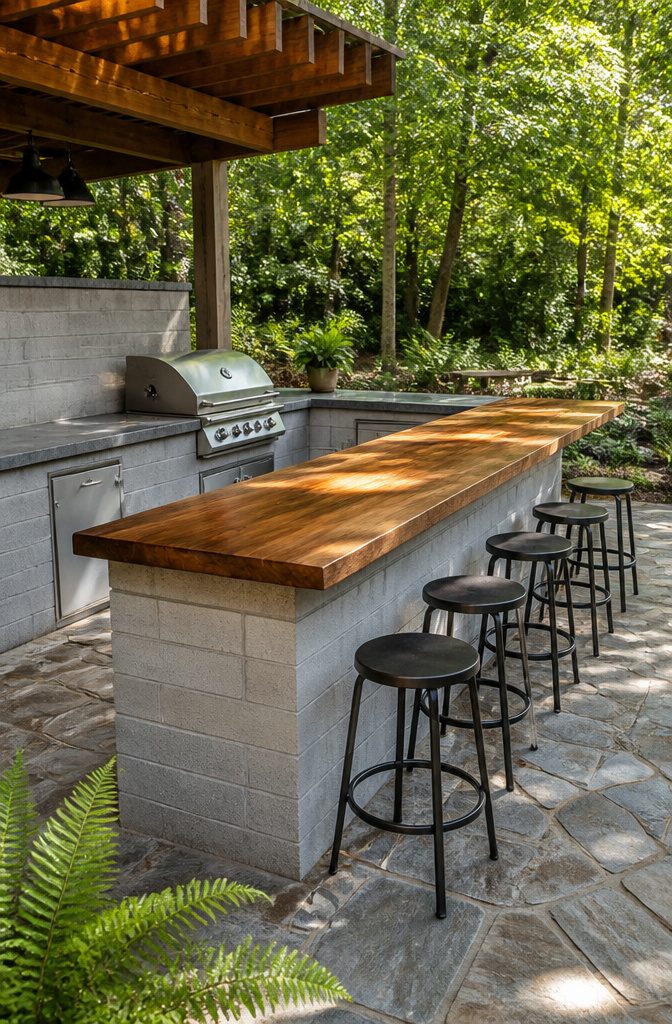
A bench or stool run built into the same cinder block footing as the cooking surface keeps people at counter height, which matters more than most backyard hosts realize.
Guests hovering at standing height while someone works the grill is a traffic jam; counter-height seating lets the cook face the party without turning their back.
The block count rises fast. Every linear foot of bench needs roughly the same number of blocks as the wall behind it, sometimes more if you want storage cavities beneath the seat.
For a six-foot bench on each side of a standard grill bay, expect to double your material order and add a full day of laying and leveling.
The cap layer also runs longer, so budget another $40–60 in concrete board or stone just for the seating surface.
I would stack the bench bases hollow and fill the top course with rebar and concrete for rigidity; an empty block bench flexes and eventually cracks under shifting yard soil.
Weight is the main concern. A solid-core bench section eight feet long takes two people to nudge, so build it where you want it the first time.
What Cinder Block Kitchens Cost
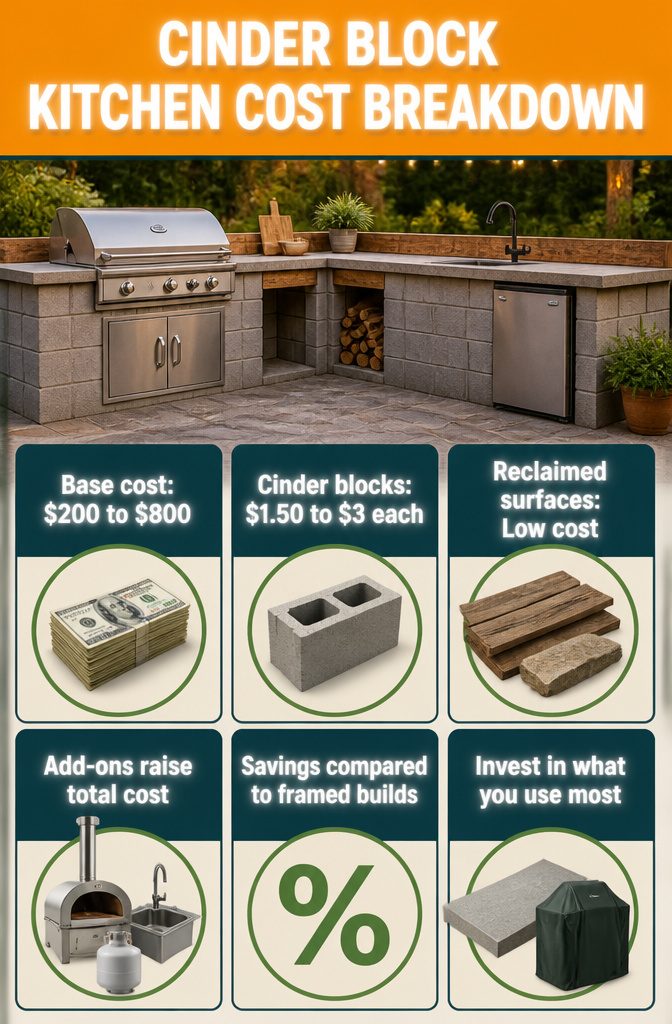
A barebones outdoor kitchen with cinder blocks starts around $200 and tops out near $800, with most of the swing coming from how you handle the countertop and whether you add appliances.
Cinder blocks themselves run $1.50 to $3 apiece. For a compact grill station with maybe thirty blocks and a basic surface, that keeps you in the lower half of the range.
Salvaged wood or reclaimed stone on top costs almost nothing except time. New concrete tops bought ready or poured yourself sit at the other end, and anything that needs mortar between courses adds labor hours but not always much cash.
The real jumps come from built-ins: a purchased outdoor oven, a small sink, a propane run. Each pushes the total toward that $800 mark or past it.
Still, stacking block against traditional framed construction with finished veneer typically lands you at about half the price. I would put the savings into a better countertop or a proper cover, since the block base itself is rarely what fails.
The block outlasts the budget; the surface and the hardware are what you will touch every time you cook out.
Why Cinder Blocks Hold Up Outside
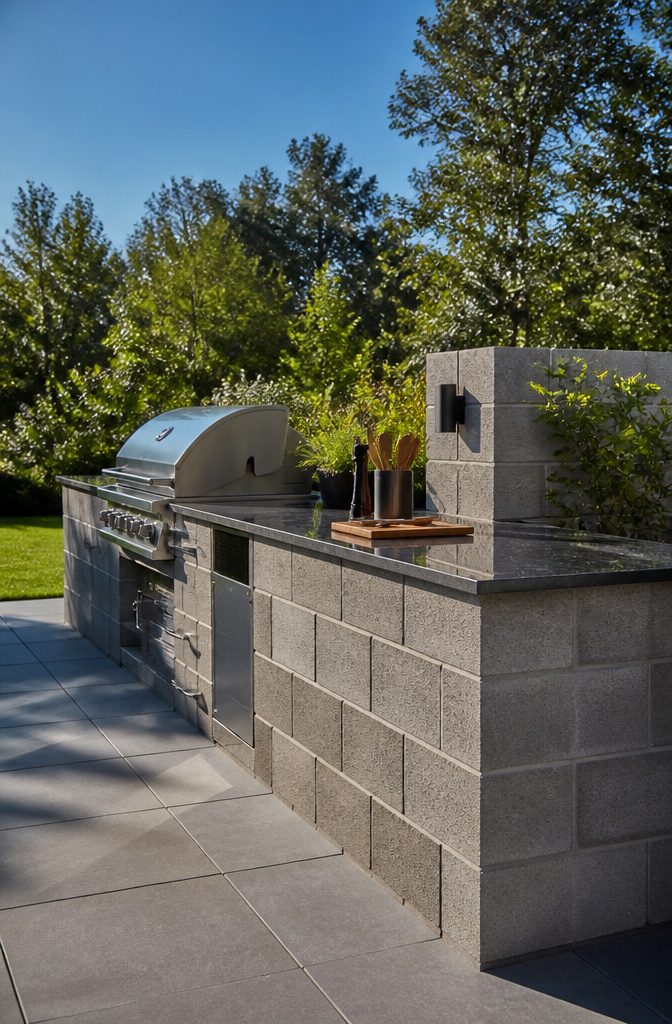
Cinder block won’t catch fire or freeze solid, which makes it one of the few materials I trust for an outdoor kitchen that sees real weather year-round.
The blocks that support your countertop need to be solid, not hollow, and laid horizontally across the very top row.
Every course below that needs checking with a level, because a slab of stone with even slight uneven pressure underneath will eventually crack.
Heavy countertops need even support across the full surface; gaps or tilted blocks transfer weight to points instead of planes, and stone or concrete tops pay for that mistake within a season or two.
The labor is significant, blocks are heavy, and cutting corners on foundation work turns a durable material into a liability.
Proper installation means treating the cinder block base as structural masonry, not a quick stack: level each row, use solid top blocks, and give the countertop nothing to flex against.
How Much DIY Skill You Actually Need
Most cinder block outdoor kitchens stay within reach of a first-time builder.
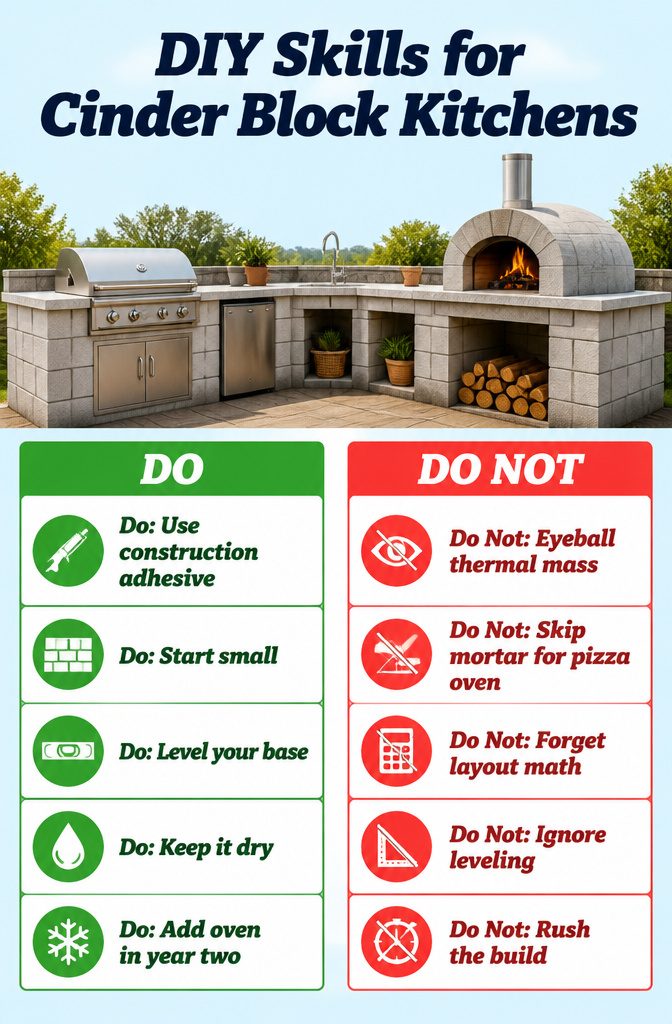
The blocks themselves stack and bond like heavy LEGOs: a level base and running bond pattern will carry you through a straight grill station or a simple L-shaped bar without mixing mortar if you use construction adhesive between courses.
That changes once you add a pizza oven. A cinder block pizza oven needs a rectangular base, then a dome top for heat retention, plus a chimney for smoke ventilation.
The firebox has to reach and hold roughly 700°F, which means gap-free joints and thermal mass you cannot eyeball.
I would put that build at a clear season above the rest. Size matters too.
A six-foot counter is one Saturday. Twelve feet with corners, a sink stub, and built-in seating drifts fast into layout math and leveling puzzles that punish small errors.
My read: start with the smallest footprint that feeds your crowd, stay dry-stacked or glued for the frame, and treat the pizza oven as a year-two add-on once you have learned how the blocks settle through a frost cycle.
Outdoor Products That Fit These Builds
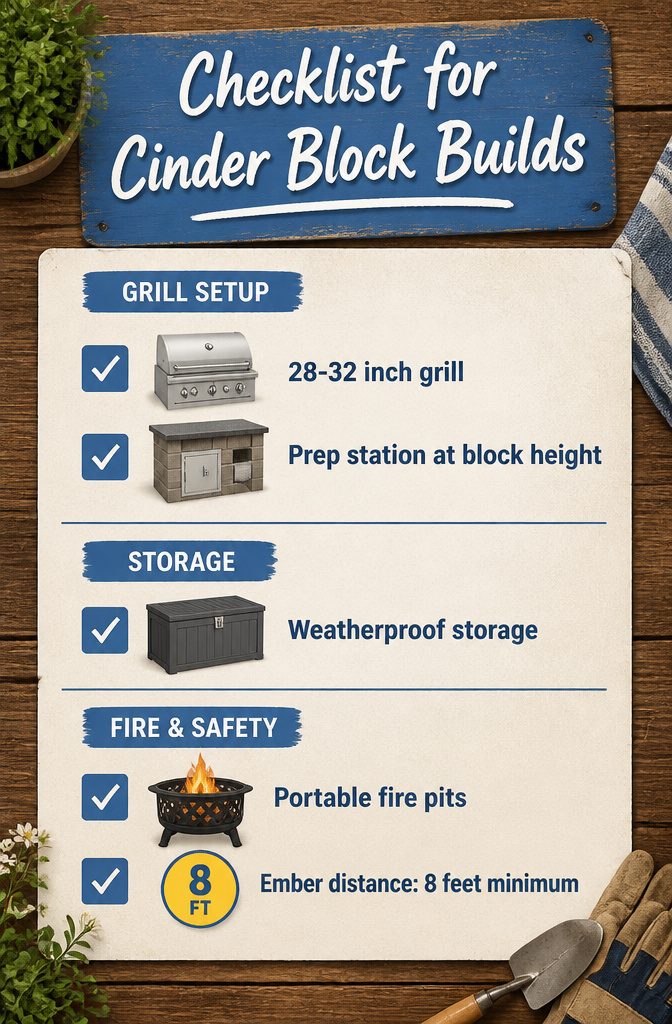
A drop-in grill gives the cinder block frame its purpose, but the grate size and burner layout matter more than nameplate BTU numbers.
I look for units with a 28–32 inch cook surface first; anything smaller fights for space once you are working two zones at once.
Stainless runs roughly double the price of coated steel, and in Fort Wayne humidity, that gap pays for itself inside three seasons.
- The prep station you add should match your cinder block counter height exactly. A surface 36 inches high with the block and capstone looks inviting; drop to 32 and you are bending, raise to 38 and you are fighting your own shoulders. Portable stainless tables with locking wheels work well here, because you can roll them aside when the build needs repointing or winter cover.
- Portable fire pits pair cleanly with block kitchens only when you set a hard rule: no ember source within eight feet of the wood storage or the grill propane line. I keep a 10-foot minimum myself, and I stopped using the mesh-screen models after one sent a spark cluster into a bag of lump charcoal.
- Weatherproof storage units are the piece most people underbuy. A deck box rated for 150 pounds fits two standard propane tanks and the grill cover; the cheaper 80-pound boxes flex and leak at the seams by August. Check the hinge hardware first, since that is what fails when the lid slams in a wind gust.
Frequently Asked Questions
What are some cinder block outdoor kitchen ideas?
You can build a simple grill station, an L-shaped bar, a multi-level kitchen, a rustic farmhouse style setup, a compact balcony station, a kitchen with built-in planters, a fire pit and cooking combo, a modern minimalist design, a pizza oven, a budget-friendly straight run, a storage-heavy build with drop-down doors, or a kitchen with built-in seating.
Each idea uses the same cheap block base but changes the layout, finish, or added features to match your space and cooking style.
How much does it cost to build a cinder block outdoor kitchen?
Materials run from $200 to $800 for most builds.
Cinder blocks cost $1.50 to $3 each, so the masonry shell stays cheap; the swing comes from whether you pour concrete, lay stone, or scrounge salvaged countertops, and whether you add appliances like a drop-in grill or sink.
Can I build a pizza oven with cinder blocks?
Yes. Stack blocks for a rectangular base, then build an insulated dome on top with firebrick and a chimney for draft.
The oven hits 700°F, hot enough for ninety-second Neapolitan pizza. A full dome runs near the top of the $200–$800 range; a simpler barrel vault costs less but gives less even heat.
How long do cinder blocks last outside?
Cinder blocks last indefinitely outside because concrete does not catch fire or freeze and crack through winter.
The weak points are the countertop above and any wood trim, not the block itself. Solid cap blocks on the top row and level courses keep the structure sound for years.
What are the disadvantages of concrete blocks?
The weight is the main drawback: each block is heavy, and a solid-core bench section eight feet long takes two people to move.
Blocks also need precise leveling, and hollow cores trap water unless you add weep holes or drainage. Cutting corners on the base leads to cracked countertops, since stone or concrete tops need even support across the full surface.
How to build an outdoor fireplace with cinder blocks?
For that build, keep the fire in a raised metal ring or bowl on top of the blocks, not inside the stack, since concrete degrades past roughly 570°F. Gap the back row from the cooking surface by at least 18 inches for working room and spark clearance.