
Outdoor pavilions range from $7,500 vinyl kits to custom timber frames that cost multiples more, and the deciding factor is not the upfront price but how much maintenance you will actually perform. Wood demands staining every couple of seasons; skip it and UV cracks open joints you cannot close. A 10-by-10 footprint seats four in lounge chairs, but the same space with perimeter benches handles eight, which is the detail that separates a pavilion you use from one that sits empty.
1. Outdoor Kitchen Pavilion

Built-in grills under a pavilion roof change how often you actually cook outside. I have watched neighbors abandon standalone grills after one rainy Memorial Day; a roof overhead keeps the schedule you planned instead of the one the weather hands you. The setup that works pairs the grill with prep counters on both sides, not one, because raw and finished platters need separate landing zones and no one wants to cross the hot zone mid-service.
Counter depth matters more than counter length. Twenty-four inches front to back is the minimum that keeps a cutting board stable and a propane line tucked; anything shallower and the edge becomes a traffic hazard when three people crowd around. Bar seating along the outer counter lets guests gather without blocking the cook’s triangle to the grill, fridge, and sink.
Traffic flow separates the kitchen pavilion from a covered grill. Two paths minimum: one for the cook between house and cooking zone, another for guests circulating between dining area and the rest of the yard. A 10-by-12-foot footprint handles the appliances and one six-person table; smaller than that, and someone is always backing into someone else with a hot tray.
The mistake I see most is sizing for the biggest weekend of the year instead of the typical Tuesday. The smallest pavilion that covers your actual cooking habit beats the largest that swallows your lawn.
2. Pool Pavilion
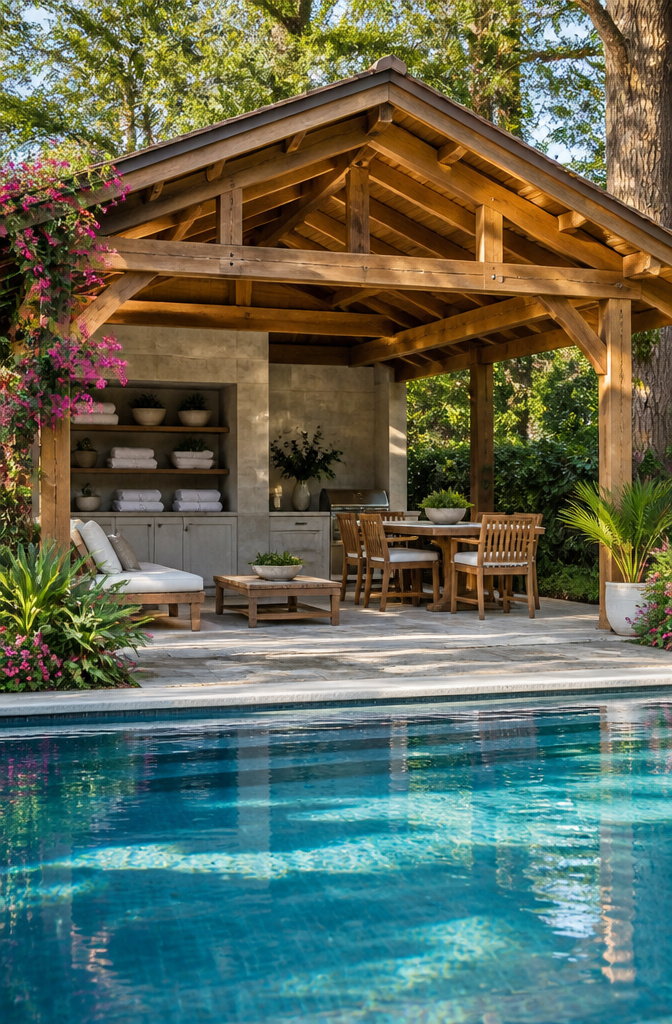
A pool pavilion only earns its keep if people actually sit in it, and that means placing shade close enough to matter. I like the rule of thumb that keeps swimmers, sunbathers, and anyone supervising kids within easy sightlines and flow, so the structure reads as part of the pool zone rather than an afterthought stuck at the property line.
For seating, casual lounge chairs alongside a dining setup handle both drying off and actual meals. Built-in shelves or a cabinet for towels keeps the wet-outside, dry-inside boundary intact so you are not hauling damp loads through the house every afternoon.
Material choice shifts here because water is not just nearby, it is airborne. Chlorinated mist and splashes punish standard finishes. Treated wood, aluminum, vinyl, and timber frames all come up as common options, but near the pool the priority flips to moisture resistance over raw aesthetics. Fans and a layout that accepts misting lines help, though I would skip the misting if the pavilion roof is not pitched to shed the extra humidity.
3. Hot Tub Pavilion
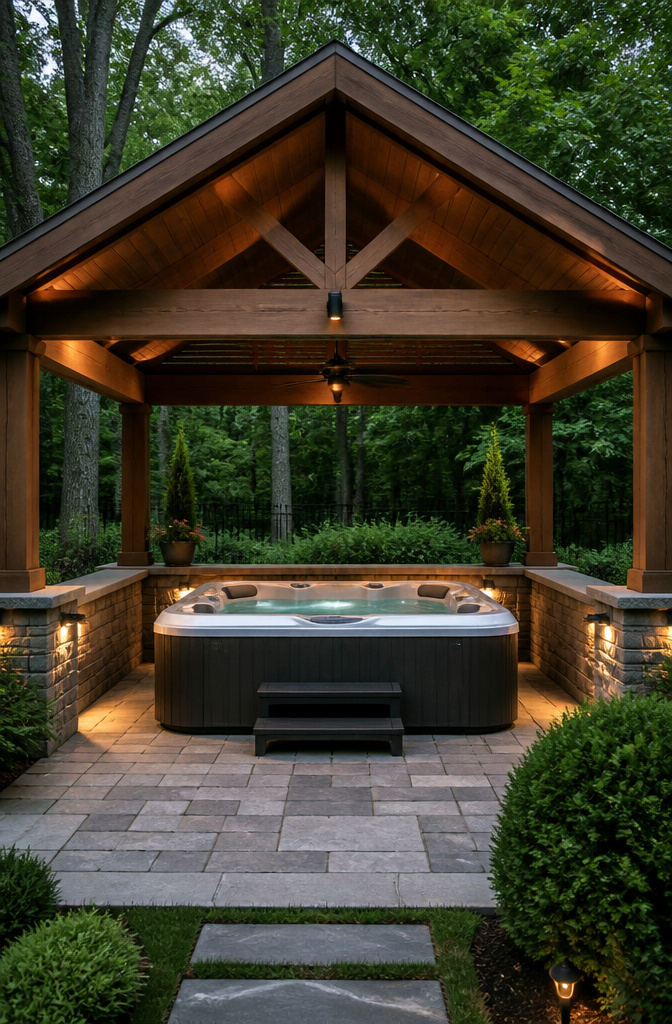
A solid roof over a hot tub turns the thing from a fair-weather luxury into something usable in light rain and afternoon sun without a single moving part to maintain later. Ventilation is the detail that makes or breaks it. Moisture trapped overhead will rot timber and turn the spa into a mildew chamber, so a vaulted wood ceiling with gaps or a vented peak matters more than the shade itself. Built-in fans help in summer; in winter, that same height lets steam rise and disperse instead of condensing on the beams. Stone bases around the tub keep the area from turning into a slick deck, and if you are running power anyway, low-voltage lighting extends soak time past sunset without glare. The pavilion does not need walls, but it does need breath.
4. Outdoor Dining Pavilion

A 14-by-16-foot footprint is where dining outdoors starts to feel intentional rather than cramped. That size shelters a standard six- to eight-seat table with enough clearance that guests are not brushing the posts on their way to refill a plate. Go smaller, to a 10-by-10, and you have a seating area for four, maybe cocktails and appetizers, but a full place setting gets tight once the chairs pull out.
Roof design matters more here than in lounge spaces because the table sits fixed in place. A gable roof, the classic A-frame, sheds rain fast and gives you headroom for a pendant light or a hanging planter above the center of the table. A hip roof, all four sides sloping down, handles wind better if your yard sits open to the weather, though the interior volume feels lower. Flat roofs read modern, but the slight pitch built into them is non-negotiable; water that pools above a dinner party ruins the mood fast.
Built-in bench seating around the perimeter can push an eight-seat count into a 10-by-12 frame, which sounds efficient. The trade-off is layout commitment. Freestanding chairs let you reconfigure for a buffet or squeeze in a high chair; benches bolted to the frame lock you into one arrangement. For a family that hosts monthly, that rigidity costs more than it saves.
5. Cozy Lounge Pavilion

A lounge pavilion built around a stone fireplace gives you a retreat that works past the first frost. The fire becomes the anchor, with seating arranged to face it the way a living room circles a hearth rather than pushing conversation toward a distant grill. Some layouts add a TV wall for watching games or movies outside, though in my reading this split the room: the screen competes with the fire for attention, and most homeowners ended up choosing one as the clear center.
Enclosure and heating are what stretch the season. Fixed walls or heavy curtains on the open sides block wind enough that patio heaters can keep the space comfortable into cooler months. Without that step, the fire warms only whoever sits closest and the rest of the pavilion empties by mid-October. Flowering vines or shrubbery planted along the edges add privacy and soften the structure, though they do take a season or two to fill in.
6. Event Pavilion
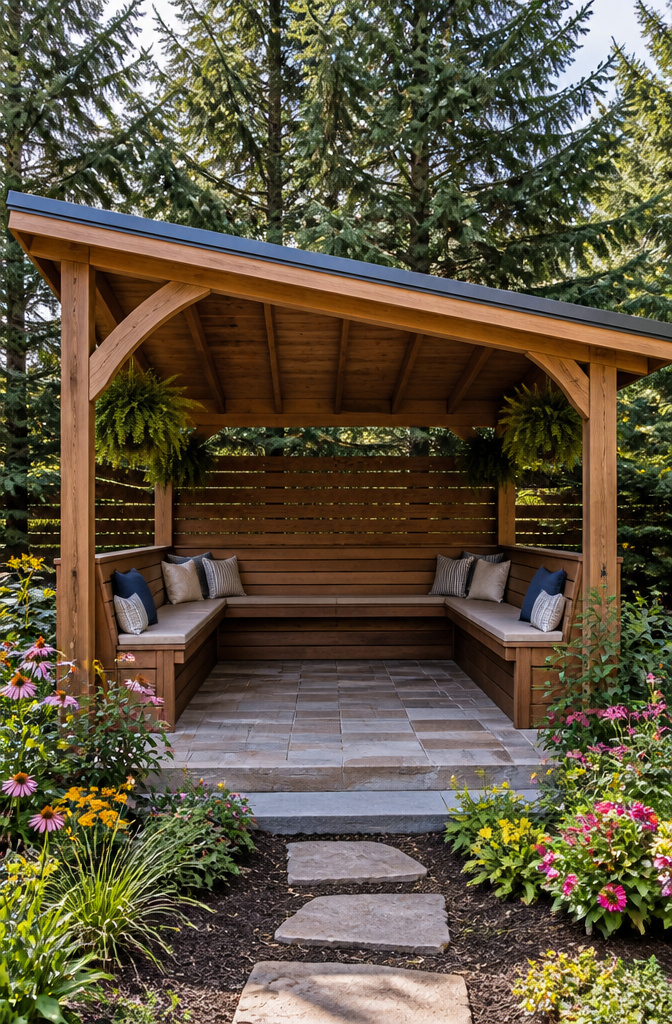
Built-in bench seating around the perimeter is the design move that turns a 10×12 pavilion into a space that seats eight. Perimeter benches free the floor area for a single small dining table or coffee table instead of a chair circle, and the seat box stores cushions, extra throws, or fire-pit accessories. In a small space, the floor square footage saved by switching from chairs to benches is the difference between tight and comfortable.
Where this fits best: pavilions used primarily for gathering rather than dining, families that host more than they sit alone, and yards where every square foot needs to do double duty. The trade-off is that built-in benches commit you to a layout. If the pavilion’s primary use changes, say from family gathering to outdoor dining, the benches are harder to remove than freestanding seating.
For flooring, concrete, pavers, wood decking, or gravel each create a stable surface for activities. Flooring adds practicality and elevates the overall look of the pavilion. A 10×12 footprint with perimeter seating handles eight people comfortably, while freestanding chairs in the same space would leave everyone elbow to elbow.
7. Garden Pavilion

A garden pavilion works best when the structure and the planting plan are designed together, not as afterthoughts. Placement determines everything: set it where you will look out through the pillars onto a garden bed or a winding path rather than facing a fence or the house wall. The open sides frame the view, so the sightline matters as much as the footprint.
I would soften the edges with climbing vines or lush plantings right up against the posts. This blurs the line between built and grown, which is the whole point of a garden pavilion. Taller shrubs or small trees placed behind the structure can also screen whatever view you do not want and deepen the sense of a green room.
Leave enough space around the base for maintenance access, about two to three feet, or you will be crawling through hostas to stain the posts in year three. Wind direction matters too; a pavilion tucked into a corner with plantings on two sides cuts breeze enough to read comfortably without blocking the garden view entirely.
8. Multi-Use Pavilion
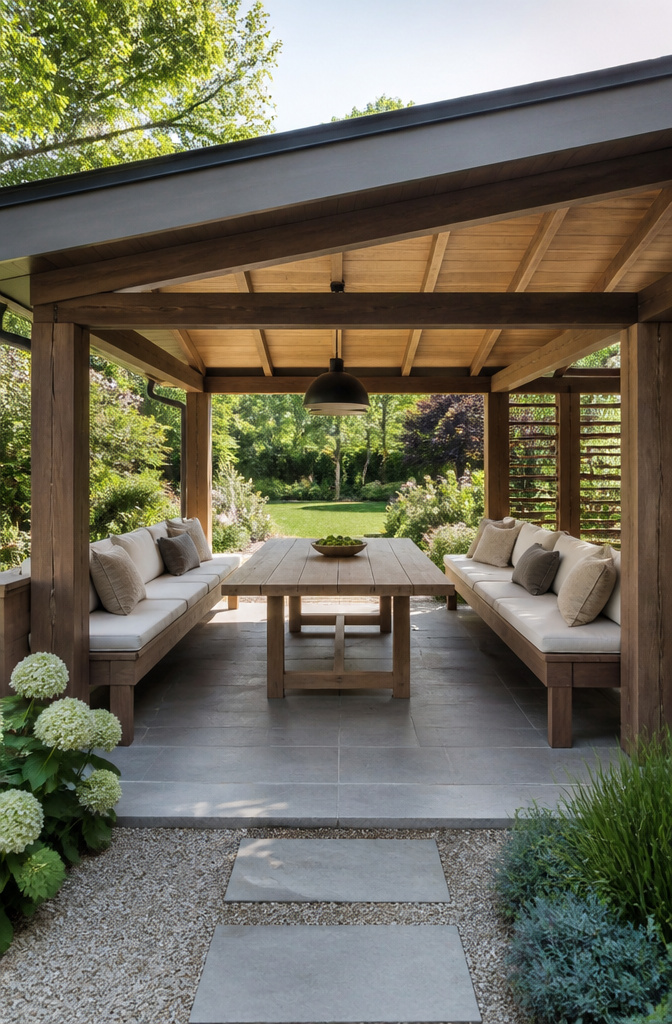
The pavilion that earns its keep is the one that refuses to pick a single job. A two-zone layout, one end for dining and the other for lounging, lets the space shift from summer cookouts to football-season gatherings without anyone shoving furniture around in the rain. Built-in bench seating around the perimeter turns a 10×12 footprint into seating for eight, with the seat box storing cushions and fire-pit gear where chairs would waste the floor. The trade-off is commitment: benches nail down the layout, and a later switch to formal outdoor dining leaves you rebuilding rather than rearranging. Open sightlines and movable furniture keep the space adaptable year to year, while electricity for lighting or a mounted screen extends the usable hours. Perimeter benches save the square footage that makes a small pavilion feel comfortable instead of tight, though freestanding pieces win if your needs still change with the seasons.
9. Rustic Wooden Pavilion

A timber frame built from Douglas Fir or Western Red Cedar carries the weight of a traditional pavilion without trying to look like anything else. Douglas Fir handles the structural load and keeps a warm, workable tone that shows off the joinery; Western Red Cedar costs more but buys you natural rot resistance and that rich reddish-brown color that silvers down gracefully if you let it weather. I have read enough timber frame specs to know the split: Douglas Fir needs moderate upkeep, an occasional sealing or staining to keep it right, while Cedar asks even less, mostly color maintenance if you want to hold that original tone against the sun. Either way, you are looking at mid-to-high range material cost, and both woods reward the choice with joinery that can outlast the decade, not just the season. Pressure-treated lumber belongs below the floor, hidden, where no guest sees it and no beam relies on it for looks.
10. Modern Pavilion
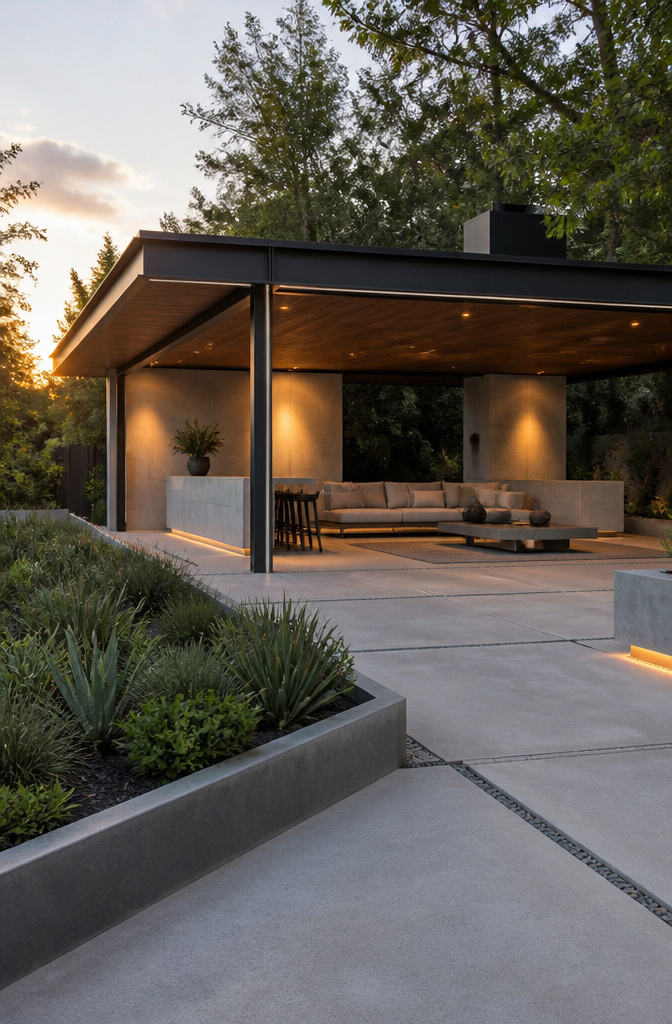
A modern pavilion reads as architecture rather than a backyard add-on because of what it leaves out. Clean lines replace ornamental brackets; steel, glass, and polished concrete take over from timber and shingles. Where a traditional build might announce itself with a peaked roof and decorative post caps, this style keeps the silhouette low and horizontal, often with a flat or very low-slope roof that sits two to three feet shorter at peak than a comparable gable frame.
That lower profile matters in tight sites. A flat roof stays below fence sight lines, preserves second-story window views, and demands less vertical space on urban patios or side yards. The trade-off is drainage: the roof only looks flat, carrying a slight pitch plus a routed downspout to prevent pooling. In heavy-snow regions, specifying the roof load rating becomes necessary rather than optional, since flat planes shed weight differently than pitched ones.
Minimal detailing extends inside the frame. Recessed lighting, retractable shade panels, and monochrome or light wood finishes keep the visual noise down. Modular furniture and built-in LEDs continue the same logic. What reads as restraint up close feels deliberate at a distance, and that distinction is exactly what separates contemporary construction from simply leaving things off.
Pavilion Materials Compared
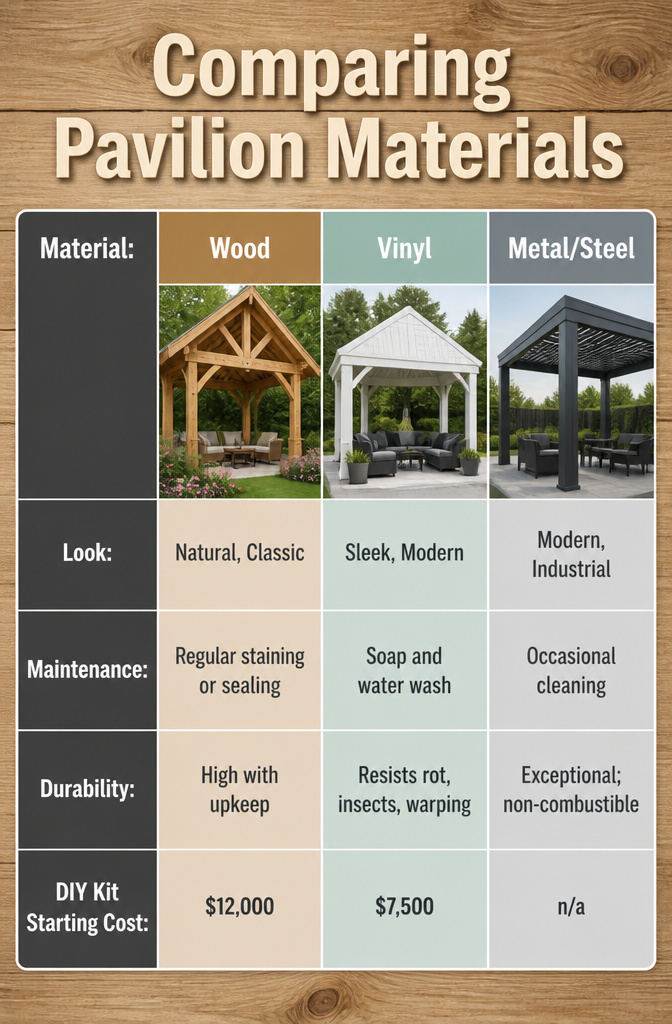
Wood, vinyl, and metal each carry a different cost in upkeep, and that cost matters more than the sticker price over ten or fifteen years of Midwestern summers and freeze-thaw winters.
| Material | Look | Maintenance | Durability | DIY Kit Starting Cost |
|---|---|---|---|---|
| Wood | Natural, classic | Regular staining or sealing | High with upkeep | $12,000 |
| Vinyl | Sleek, modern | Soap and water wash | Resists rot, insects, warping | $7,500 |
| Metal/Steel | Modern, industrial | Occasional cleaning | Exceptional; non-combustible, holds heavy snow loads | n/a |
Wood asks the most of you. Douglas fir takes stain beautifully but demands that attention every couple of seasons; skip it and UV rays and moisture open cracks you cannot close. Vinyl skips that cycle entirely, which is why the $7,500 vinyl kit saves money long before you have paid off a wood frame’s higher purchase price. Metal sits at the far end of durability, shrugging off rot, insects, and warping altogether, though the passages did not price out those kits. For a gardener who would rather tend beds than scaffolding, vinyl removes the chore entirely.
Roof Styles for Pavilions
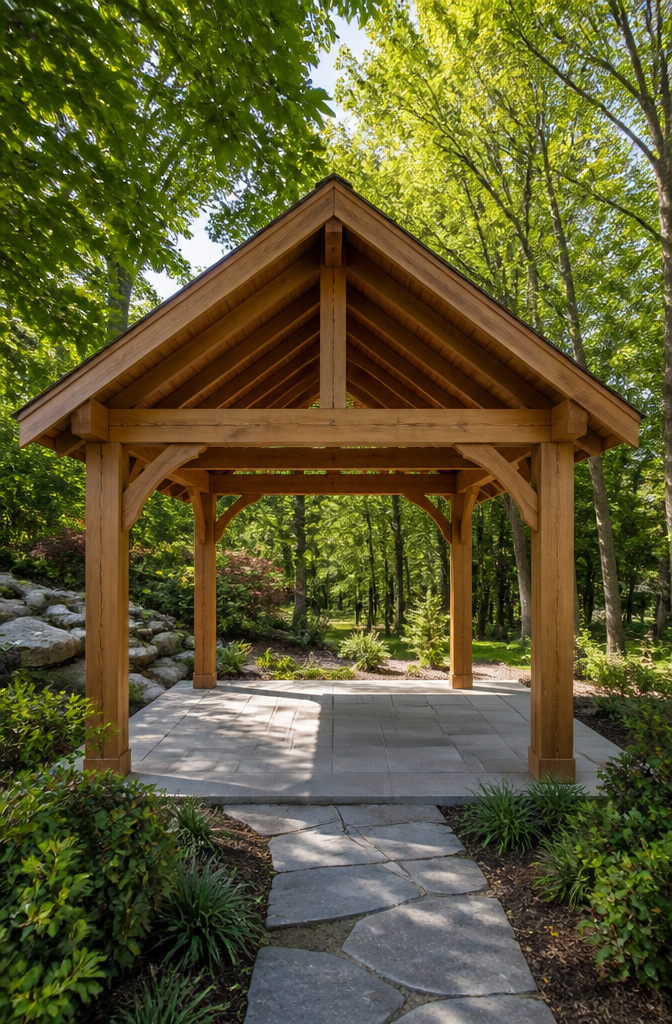
The roof style you settle on shapes how the pavilion feels from the inside out. Gable roofs remain the most popular choice, and for practical reasons: that classic triangular form sheds rain and snow efficiently and keeps headroom generous straight through the center of the structure. A 10’x10′ pavilion gains usable height it would not have under a flatter profile.
Hip roofs slope on all four sides rather than two. The look reads more refined, and the geometry handles wind better, though the inward slope does pull the ceiling down a little and makes the space underneath feel tighter.
Flat roofs carry a cleaner, more modern line, but they need that slight pitch the sources mention because water has nowhere else to go. Without it, you are asking for trouble.
Pergola-style roofs sit at the opposite end of the shelter spectrum. The open slats filter light rather than blocking it, which is the point: you get dappled shade and no illusion of being indoors. Sources draw a hard line here. Pavilions and gazebos give full cover; pergolas do not. If your goal is keeping a grill session dry through an unexpected shower, a pergola roof leaves you exposed.
What convinced me, reading through the comparisons, is that the choice is less about looks than about what you are actually doing under the thing. Cooking and dining want the gable or hip. Lounging with a book on a mild afternoon, the pergola makes more sense than the sources sometimes admit.
Sizing Your Pavilion
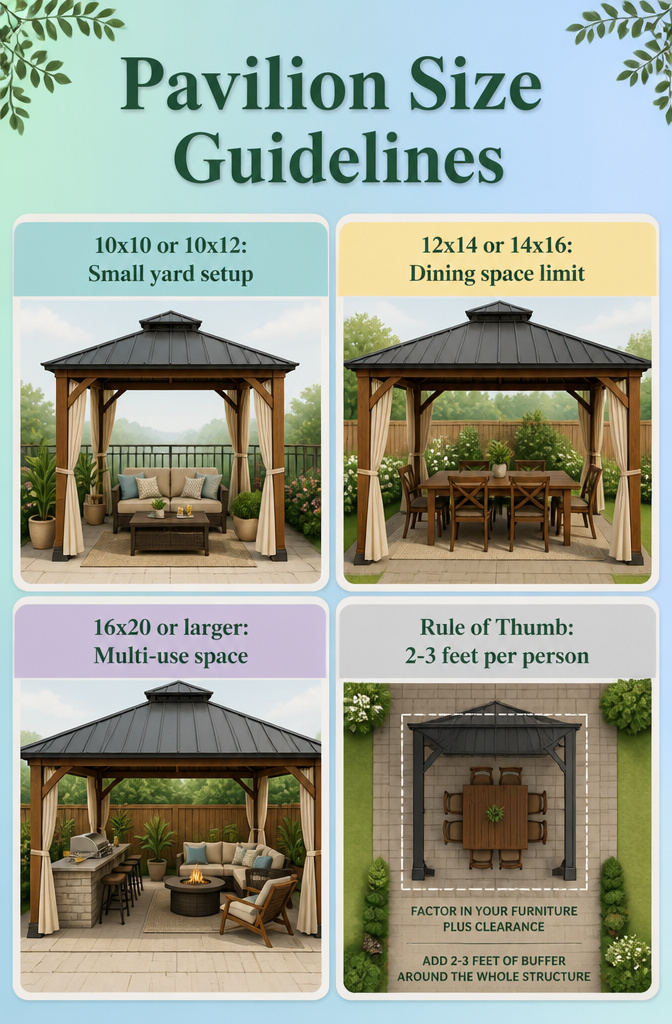
A 10-by-10 or 10-by-12 pavilion fits a small yard or balcony garden setup where two to four people might sit with drinks. That footprint leaves room for a loveseat and a small table without swallowing the whole outdoor area.
Move up to 12-by-14 or 14-by-16 if you want a real dining table under cover. I have seen this size crammed with a twelve-person farmhouse table and it turns into a shoulder-bumping disaster; six to eight chairs with walking space around them is the honest limit.
For anything beyond eating and sitting, 16-by-20 or larger is where a pavilion starts earning its keep as multi-use space. Outdoor kitchen, lounge chairs, maybe a small bar setup all at once. The catch is that this size needs a corresponding yard; park it on a standard suburban lot and the lawn becomes a narrow path around the edges.
The rule of thumb I keep seeing is two to three feet of space per person for comfort. Factor in your furniture plus clearance, not just the furniture itself. A table that measures four by six feet needs more than four by six feet of pavilion; pull the chairs out and people need to move behind them. Add two to three feet of buffer around the whole structure for property lines, trees, or your house wall. A pavilion that dominates the yard stops being a feature and starts being a problem.
Design and Maintenance Basics
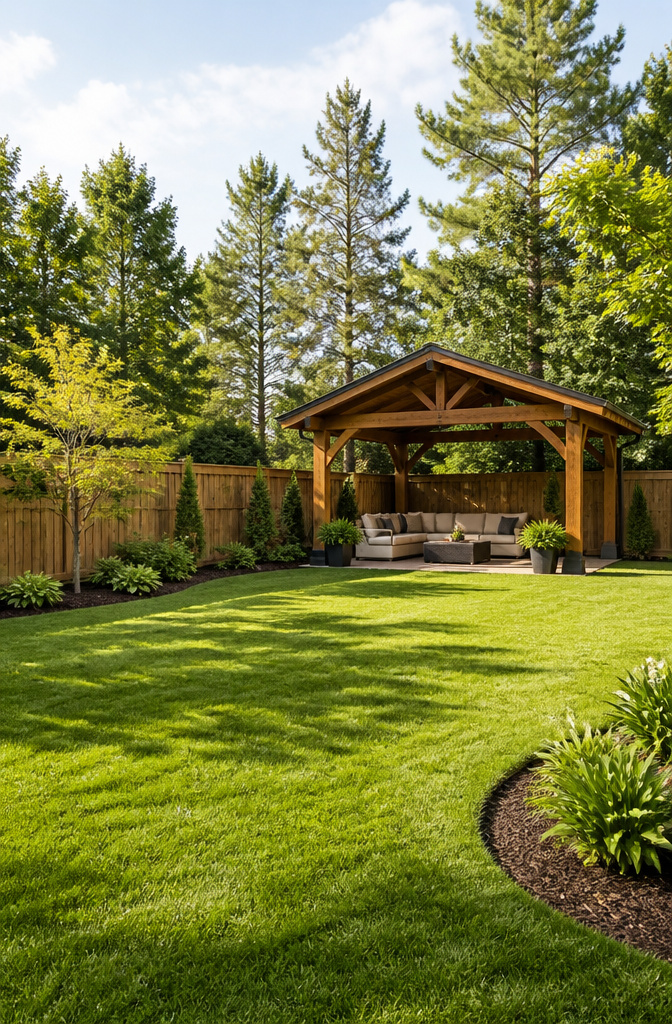
Where a pavilion lands in the yard shapes everything that follows. Tucking it into a back corner preserves open lawn for kids or pets and uses two fence lines as visual anchors, so the structure reads as settled rather than floating. That placement keeps sightlines clean from the house; you see across the grass to the pavilion, not into it. The tradeoff is less natural shade, which makes the roof’s actual coverage matter more than it would dead-center.
Material choice sets the maintenance load for years. Wood, whether Douglas fir or treated lumber, offers natural warmth but requires staining or sealing against UV and moisture to stay sound. Vinyl skips that cycle entirely; it resists rot, insects, and warping without the annual upkeep, though the look is more modern and less forgiving of a rustic scheme.
Plan the interior before the frame goes up. Lighting, fans, and furniture placement all need rough-in points: electrical for fixtures overhead, spacing for airflow, and clear paths between seating zones. A dining setup wants different proportions than a lounge, and changing your mind after the roof is on means extension cords and compromise.
Customization Options
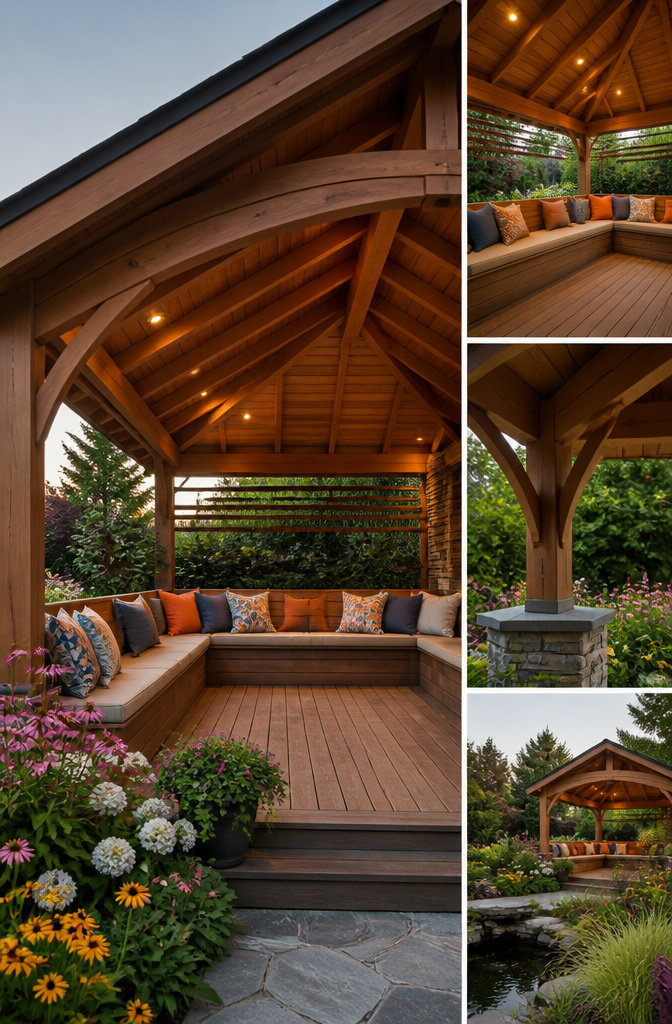
Built-in seating, specialized lighting, and a few deliberate add-ons are what turn a standard pavilion kit into something that functions the way your household actually lives.
- Built-in bench seating around the perimeter frees the floor area for a table or leaves room to move. In a 10×12 pavilion, perimeter benches seat eight where chairs might crowd four. The seat box stores cushions, throws, or fire-pit accessories. The trade-off is layout commitment; freestanding furniture moves when your needs change, benches do not.
- Recessed downlights in the rafters, post-mounted sconces washing the columns, and a single overhead pendant or fan light layer light onto structure rather than empty air. String lights across the open span read temporary and add visual clutter. A pre-wired post system with internal electrical pathways, such as TimberVolt®, keeps conduit off the visible post faces. On a small structure, that difference shows.
- Shade curtains or screens add privacy and block sun or insects without altering the frame. Fireplaces or fire pits create a focal point for cool evenings. An electrical package runs fans and entertainment systems without extension cords snaking across the floor.
Frequently Asked Questions
What is an outdoor pavilion used for?
An outdoor pavilion works for dining, entertaining, or relaxing, depending on how you set it up. A kitchen pavilion keeps the grill running through rain, a lounge pavilion with a fireplace stretches into fall, and a pool pavilion gives swimmers a place to dry off without tracking water through the house. The structure earns its keep when you match the layout to the activity you actually do most often, not the one you imagine for a single big weekend.
What materials are best for outdoor pavilions?
Wood, vinyl, and metal each suit different priorities. Douglas fir or Western Red cedar give natural warmth and strong joinery but need staining or sealing every couple of seasons. Vinyl skips that upkeep entirely; a quick wash with soap and water handles maintenance, and a kit starts around $7,500. Metal or steel shrugs off rot, insects, and heavy snow loads with little more than occasional cleaning. Near pools or hot tubs, moisture resistance should drive the choice more than raw looks.
How much does a pavilion cost?
DIY kits start around $7,500 for vinyl and $12,000 for wood, while custom builds typically run $10,000 to $30,000 depending on size and features. Premium timber frame packages begin near $13,800. The long-term cost flips the comparison: wood demands regular sealing or staining, vinyl needs almost nothing, and metal sits at the far end of durability with minimal upkeep. A gardener who would rather tend beds than scaffolding often finds vinyl pays back its lower purchase price quickly.
What size pavilion should I choose?
A 10-by-10 or 10-by-12 fits two to four people with drinks or a loveseat and small table. Move to 12-by-14 or 14-by-16 for a six- to eight-seat dining table with clearance for pulled-out chairs and walking space behind them. A 16-by-20 or larger handles multi-use layouts, outdoor kitchens, or combined lounge and dining zones. The rule that keeps sizing honest is two to three feet of space per person, plus buffer around the structure so it does not swallow your yard.